
In the Add Whitelist section, you need to add the desired walled garden. In the IP Address /Domain Name field, click Add to insert the walled garden. Make sure that you also add the IP Address used to reach HSNM platform.
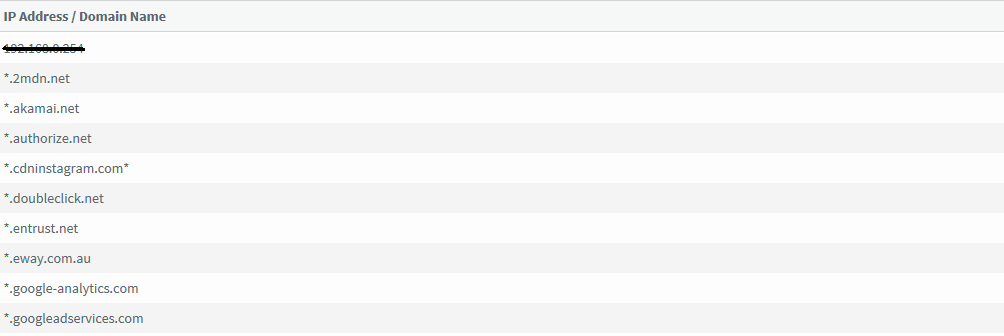
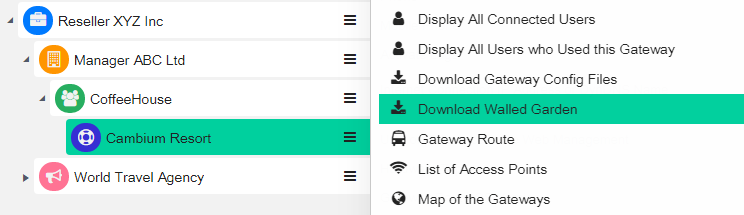
Note To know the accurate and required Walled Garden you need to add one by one, access your HSNM platform and click the contextual dropdown menu of your gateway. Select Download Walled Garden to get a .txt file with your accurate walled garden list as shown Figure Download Walled Garden.
Once you have saved the configuration, you need to syncronise it with the cnPilot Access Point. In this way, your cnPilot will set up the entire necessary configuration.
From the category bar, select Configure, then click Configure Devices > Sync Configuration and click the button on the top right of the page.

Now check the box related to your device and then click the Sync Now button on the bottom left.
In a few moments, you will get your cnPilot configured and ready to work with HSNM.
Important: If you have few cnPilot to configure, or you just don’t want to register a cnMaestro account, you can manually configure every cnPilot just by connecting them to a computer configured with an IP address of the same network of the cnPilot. By default, cnPilot has 192.168.0.1 as IP address. Therefore, you can open your browser to that IP and access it by using admin for both username and password fields. At the end, you just need to configure the parameters as explained above (field names are the same of the cnMaestro configuration but their visualization is slightly different).