
Gateway & AP – Set-Up Guide
TP-Link Omada Software Controller has a walled garden entries limitation. So, you may face some problems getting more than one social login or payment system running.
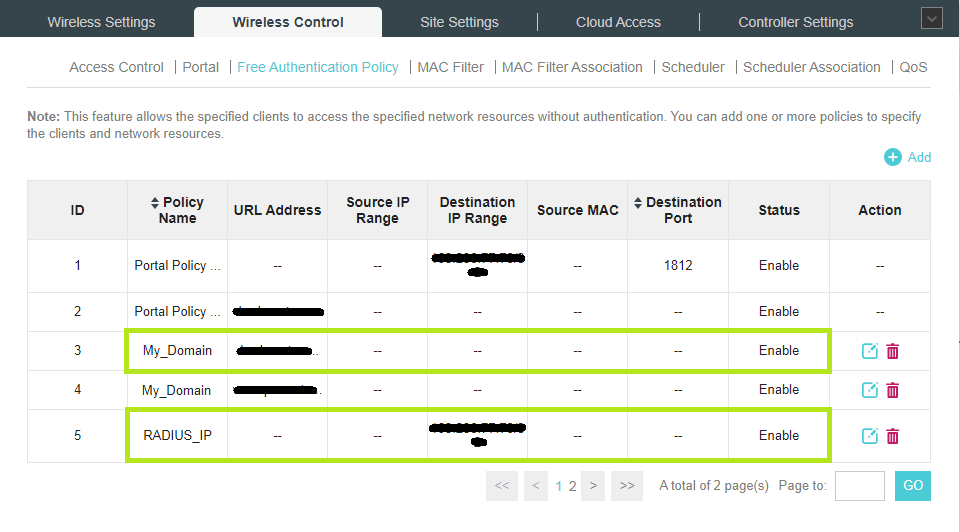
Click the Wireless Control tab and then select Free Authentication Policy.
You will notice that two Policies have been automatically created and they will appear. One is for the RADIUS Authentication IP and the other one is for the URL set for the “External Web Portal URL”. Both policies are not enough because one declares the entire URL to reach the Welcome Portal and it doesn’t work and the other one has the specified RADIUS port.
So, you need to add two new Policies.
Click Add on the upper corner of the page and configure the policy where you set only the IP or the domain name of your HSNM (for example http://YourHSNMDomain.com). Once configured, click Apply to save.
Click Add on the upper corner of the page and configure the policy where you edit the RADIUS IP without specifying any port. Once configured, click Apply to save.
From the same menu, you can add all the relevant and needed Policies (walled gardens) to get social login work.
Once saved, the configuration is now complete. Now, you can connect a device to the WiFi network of the EAP Access Point and you will be redirected to the HSNM Welcom Portal.