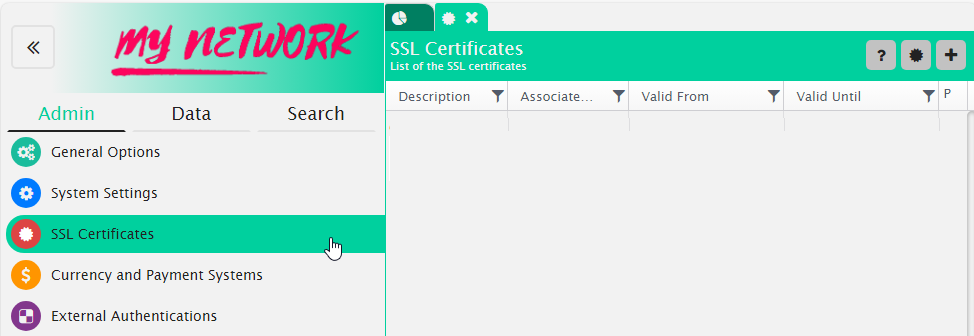

a) To add your certificate to use for your HSNM or your gateway, click the + button on the top-right corner.
b) In the General Data session, enter the description. From the Issued by list box, select Certification Authority, and enter the Associated Domain.
c) Go to Certificates and load the CRT, the KEY and the Intermediate certificate files.
d) Click Save in the top-right corner of the page. Your selected entries are saved.
a) To generate a CSR file to use for requesting a certificate to a CA, click the button on the top-right corner.
b) On the newly opened tab, check the General Data auto compiled by HSNM.
c) Expand the Generate the CSR session. Choose whether your certificate is Standard or Wildcard from the Domain Type list box. Verify the correctness of the Domain Name (the FQDN for which request the certificate, i.e. the FQDN used to reach HSNM or the FQDN used to reach the gateway/controller).
d) Click the Generate the CSR File button to get the file to provide to the CA.
e) When you get the CRT file and the Intermediate file from the CA, upload them into your HSNM as described in the previous section.
a) To add your certificate to use for your HSNM or your gateway, click the + button on the top-right corner.
b) In the General Data session, enter the description. From the Issued by list box, select System (Let’s Encrypt) and enter the Associated Domain (the FQDN for which request the certificate, i.e. the FQDN used to reach HSNM or the FQDN used to reach the gateway/controller).
c) Click Save in the top-right corner of the page to generate the Let’s Encrypt certificate.
Now you can decide if you want to use the certificate for your HSNM or if you want to use it in the MikroTik gateway in order to enable the HTTPS on the Welcome Portal.
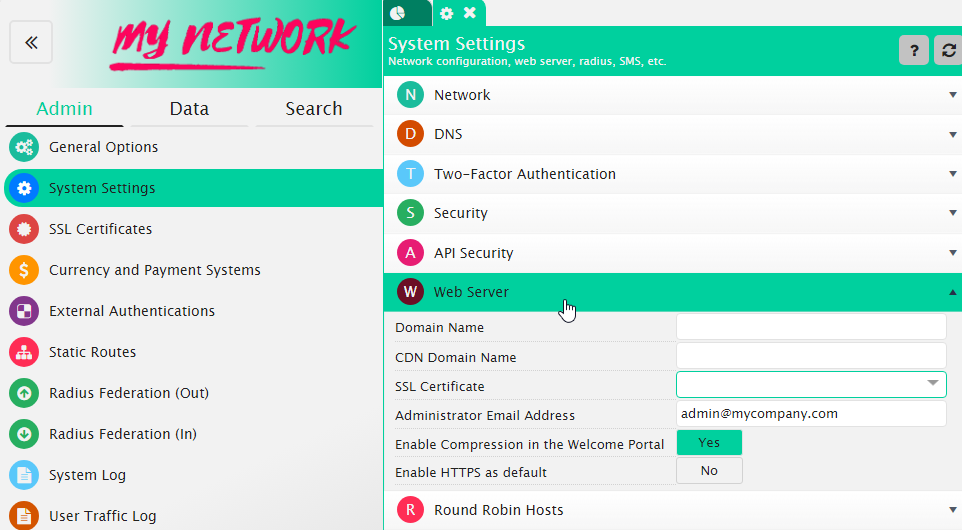
4. From the Admin tab, click System Settings.
5. Expand Web Server.
6. From the SSL Certificate dropdown, select the certificate you want to use.
Important warning!!! The certificate must be valid for the domain name declared in the Domain Name field.
7. Click Save in the top-right corner of the page.

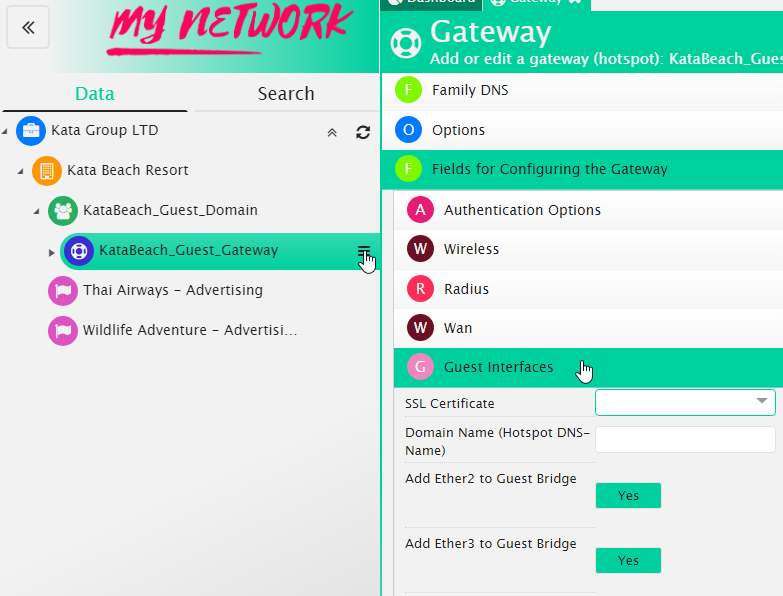
4. Click the Data tab and expand the tree until the gateway you want to enable the SSL certificate.
5. Click on the contextual menu and then on Edit.
6. Scroll down till Fields for configuring the Gateway and click it
7. Expand Guest Interfaces and from the SLL Certificate dropdown select the certificate you want to use for the gateway.
Important warning! The certificate must be valid for the domain name set in the Domain Name field as per point 8.
8. On the Domain Name field, enter the domain name that will be used by the MikroTik Hotspot Service to load the Welcome Portal login page (We suggest to use for example hotspot.fqdn_set_on_systemsettings_domainname)
If you choose to use a Let’s Encrypt certificate for your MikroTik Gateway, the certificate will be self-renewed every three months on HSNM and then automatically downloaded from the MikroTik gateway.
