
This chapter describes how to configure Cambium cnMaestro on Premise HTTP.
Before proceeding further with the configuration, you need to configure HSNM with a domain and a gateway as described in Adding a New Gateway.
The prerequisites required for configuration are:
Once logged in to your cnMaestro, you have to add your AP in order to update and manage it. Click on the gear icon on the left, go to Shared Setting Menu > WLANS and AP GROUP.
Click New WLAN on the top right

Create your WLAN by entering the SSID and select Open in the Security dropdown menu
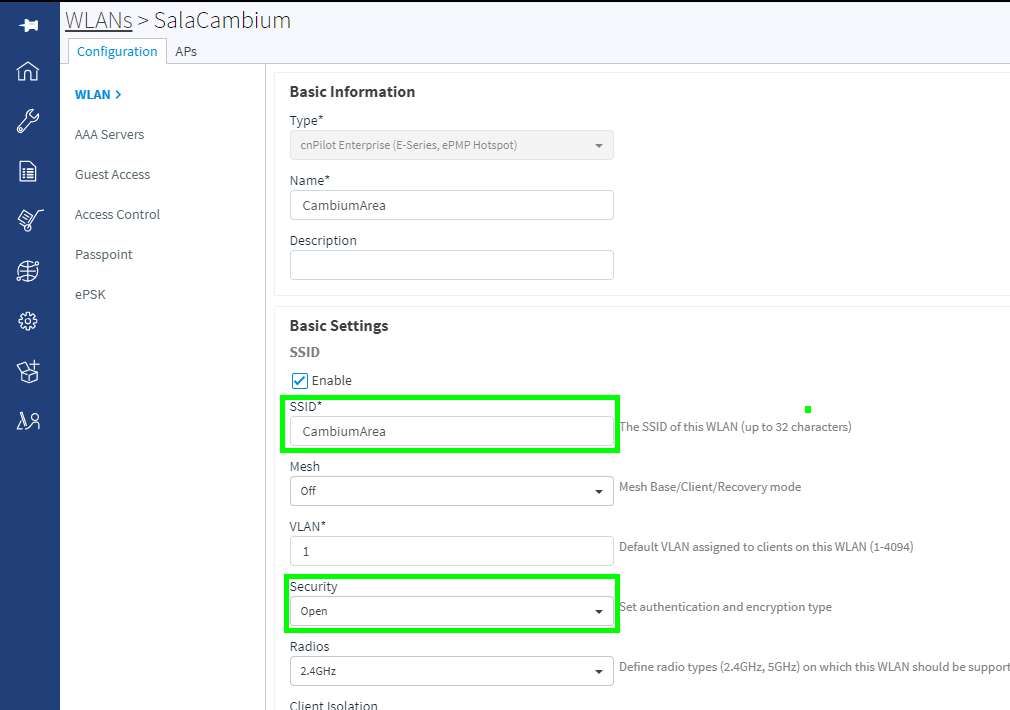
Click the Save button that displays at the bottom of the window
From the Configuration tab on the left, select AAA Servers
In the Authentication Server section, enter the details as follows:
Scroll down to Accounting Server
Enter the details as follows:
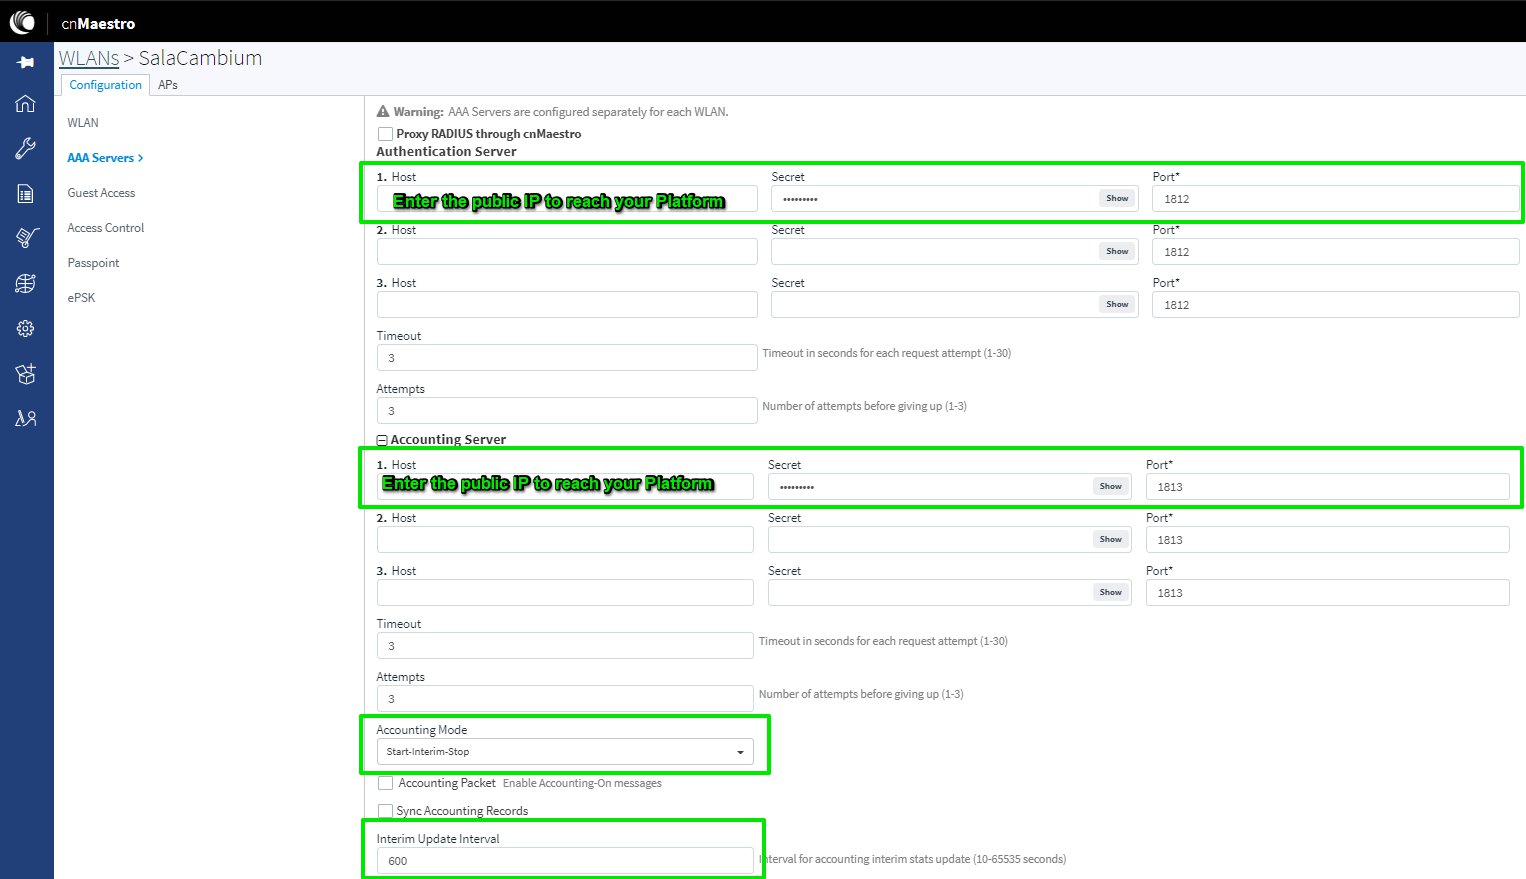
In order to add the Secret you need to get it from your HSNM as described in the Radius Secret paragraph.
Expand the Advanced Settings section and edit an identifier in the NAS-Identifier field
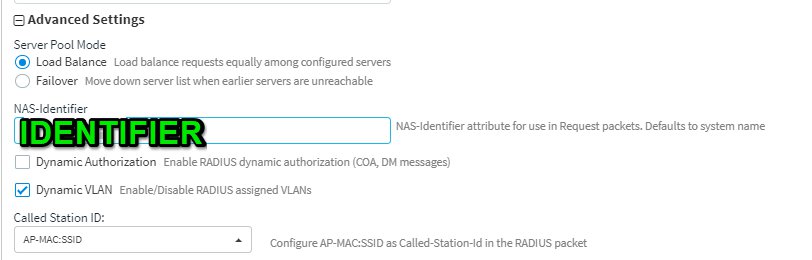
Upon completion of the above steps, click the Save button in the bottom left corner of the page.
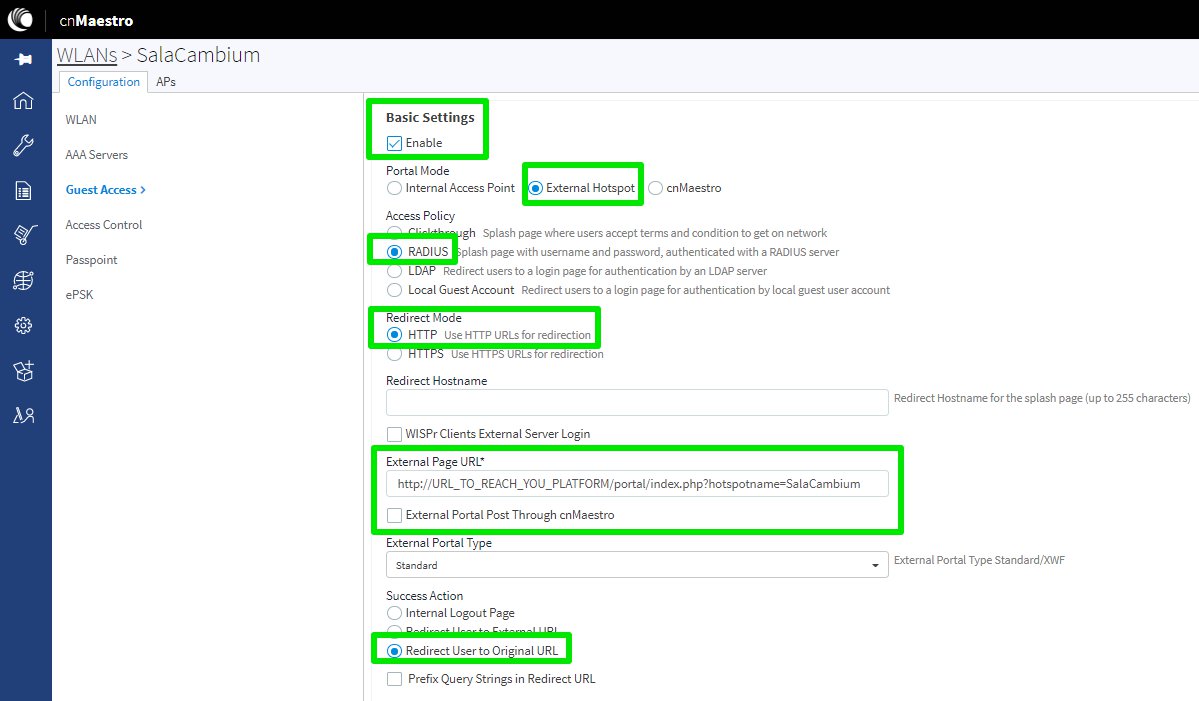
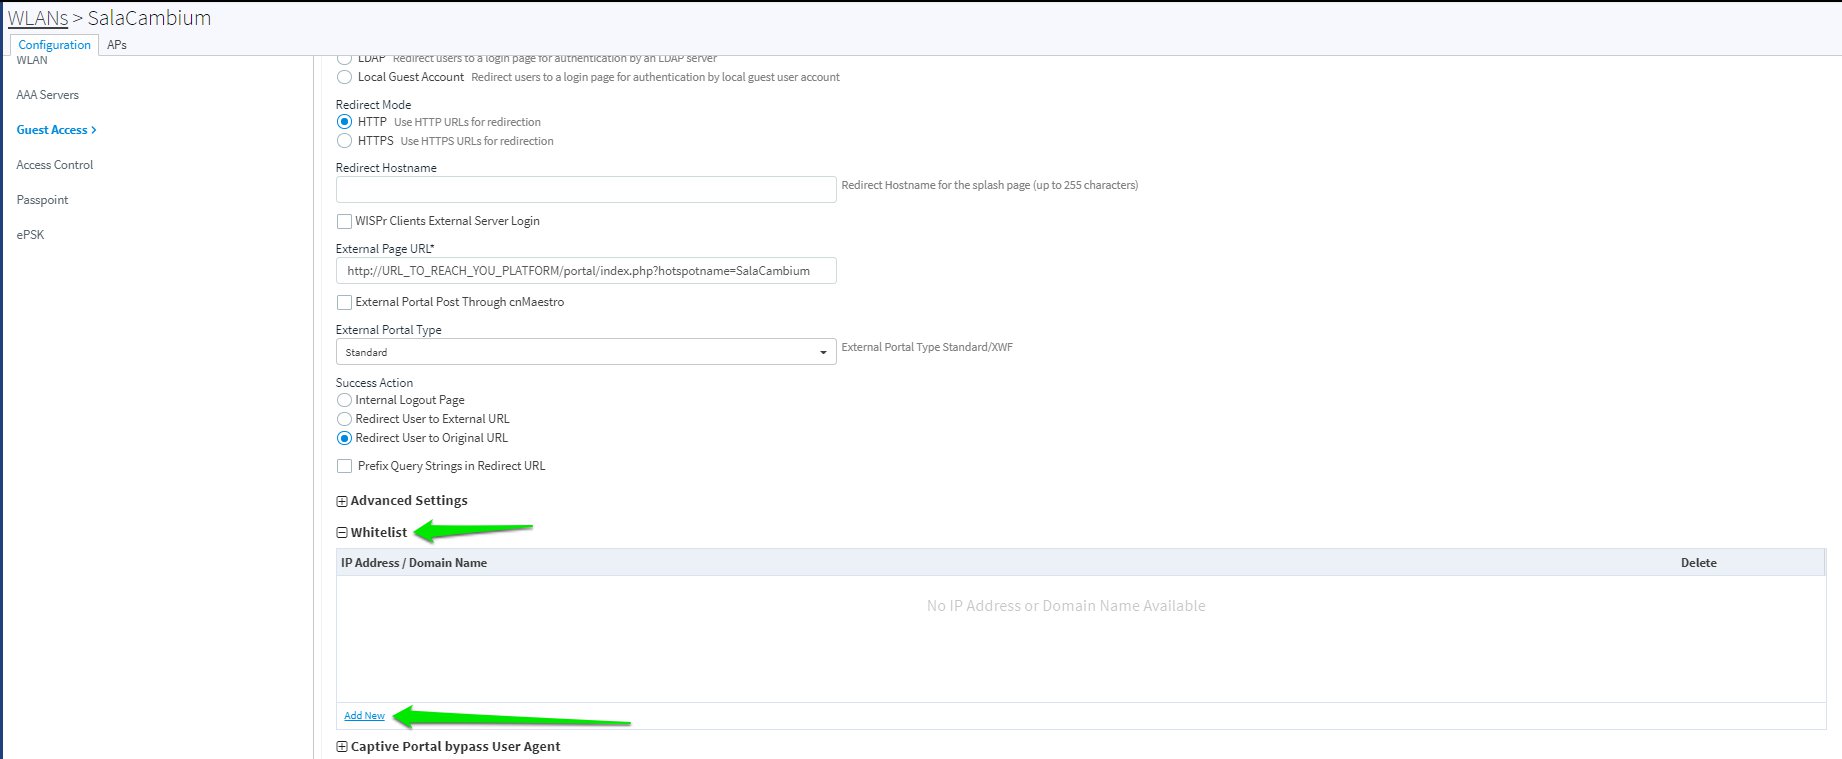
From the Configuration tab on the left, select Guest Access > Basic Settings and enter the relevant information in the following fields:
Now you need to configure the Walled Garden. Expand the Whitelist section from the Guest Access menu.
Click on Add New and add one by one the IP addresses or domains downloaded from your HSNM
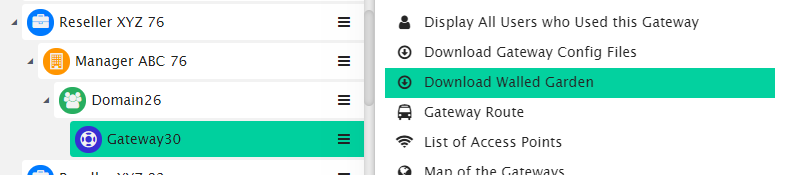
To know the accurate and relevant Walled Garden you need to add one by one, access your HSNM platform and click the contextual dropdown menu of your gateway. Select Download Walled Garden to get a .txt file with your accurate walled garden list as shown Figure Download Walled Garden.
Upon completion of the above steps, click the Save button to finish.
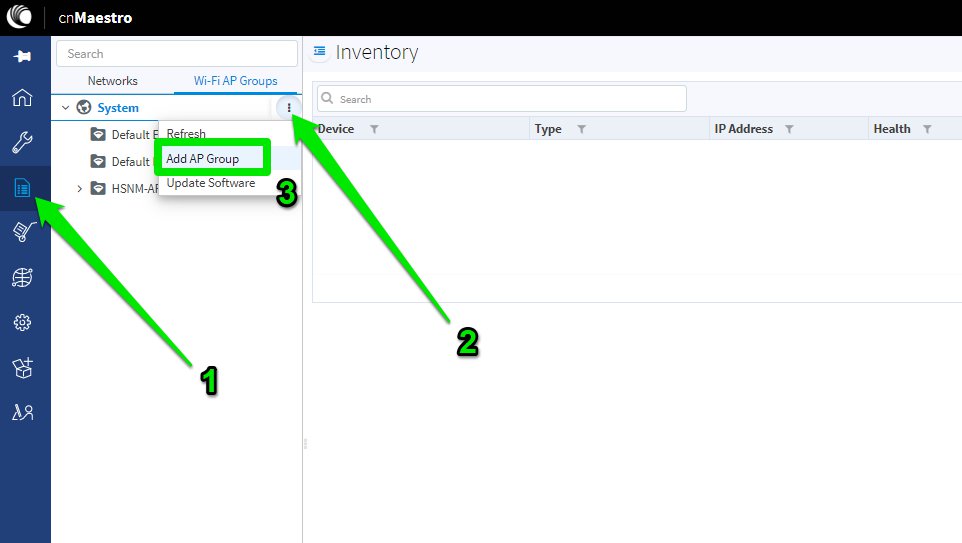
Now you have to add the AP group for the WLAN you have created. Click on the Inventory icon from the main menu on the left.
Select System > Add AP Group.
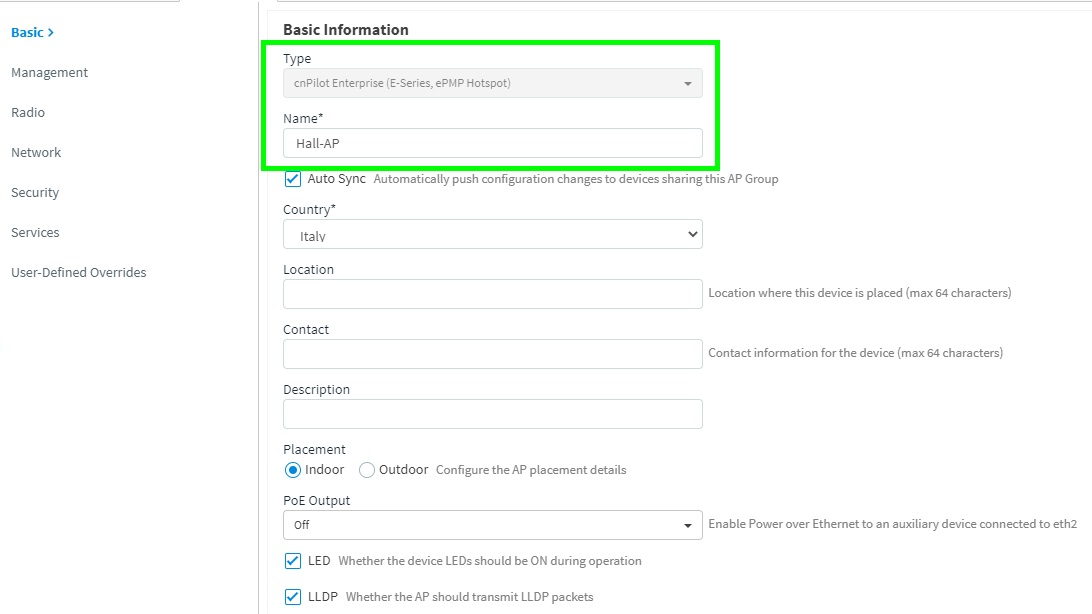
In the Basic Information section, define the Type, Name and all relevant
Scroll down and click on Add WLAN
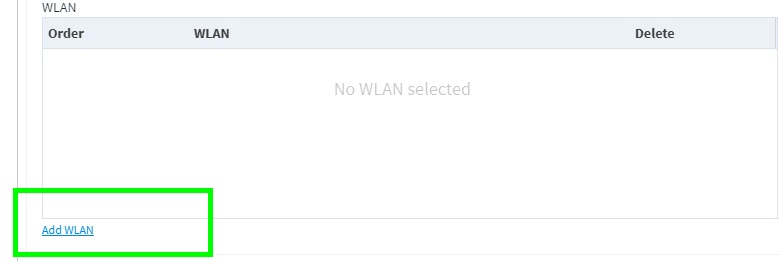
Select the WLAN you have prior created in Creating the WLAN and AP Group and click Add.
Once completed, click the Save button
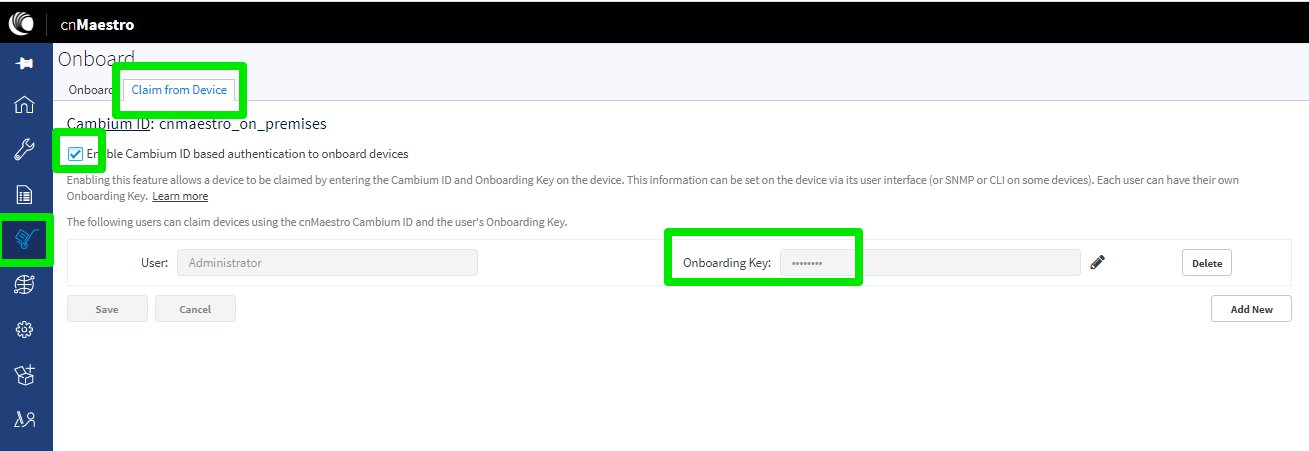
Now, you need to configure the cnPilot to work with your cnMaestro. First, click on the Onboard icon from the main menu on the left.
Select the Claim for Device tab and tick Enable Cambium ID based authentication to onboard devices
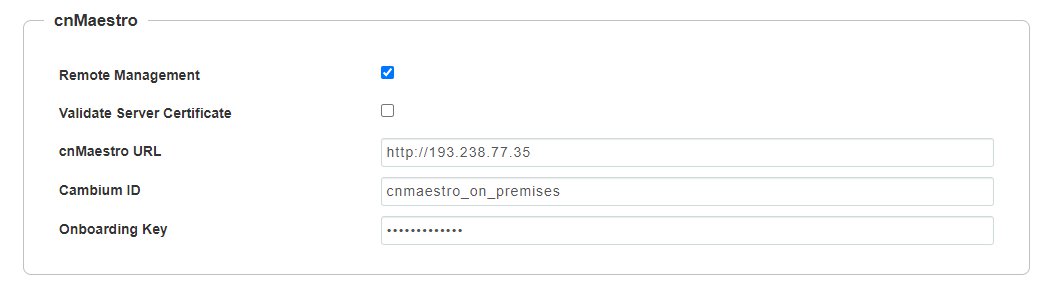
Connect to the web interface of your cnPilot by using your cnPilot’s IP address and go to Configure > System.
Configure the cnMaestro section and enter the relevant information in the following fields:
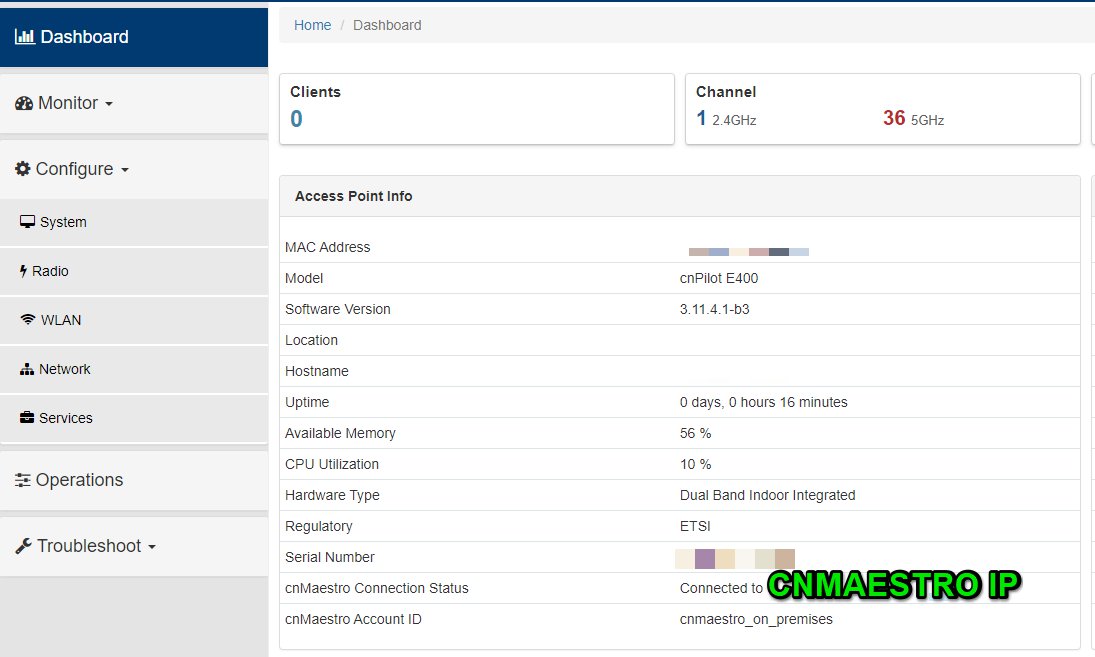
If the configuration is successful and the cnPilot communicates correctly with the cnMaestro, the dashboard of the cnPilot will display Connected to in the cnMaestro Connection Status field.
Obtain or copy the cnPilot’s MAC address because you will need to edit it inside the cnMaestro
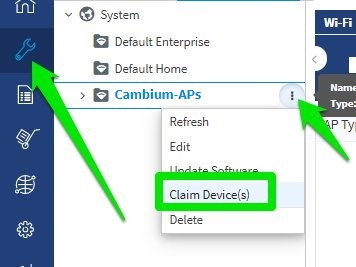
Now you can add it to the AP Group inside the cnMaestro. So go back to your cnMaestro web interface. Then click on the Manage icon from the main menu on the left.
Select the Wi-Fi AP Groups tree view and click on your group. From the menu select Claim Device(s)
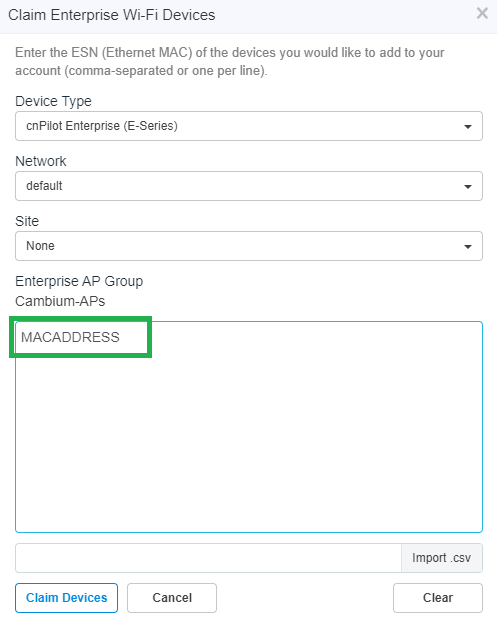
The above screen appears and you have to paste the cnPilot’s MAC address copied on Step 3
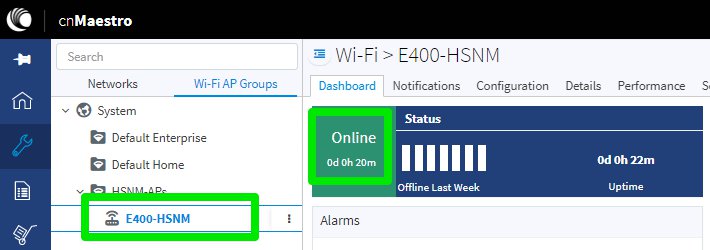
If the operation is successful, you’ll have your device online:
Now you can test the connection using a device.
If you need, you can configure dedicated logs from the cnMaestro/Pilot
Once logged in to your cnMaestro, from the main menu on the left click Application > Settings and press the Syslog tab.
Click Add on the top right corner for Event Syslog.
Enter the relevant information in the following fields:

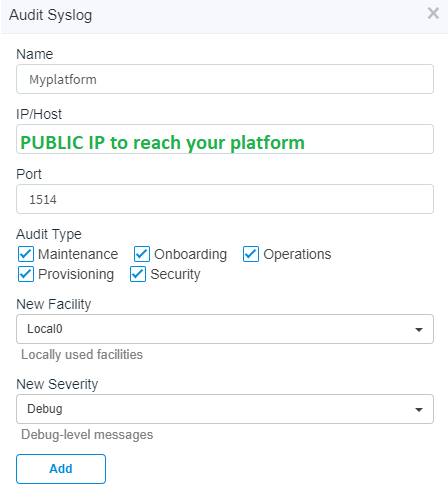
Click Add on the top right corner for Audit Syslog.
Enter the relevant information in the following fields:
Once completed, click the Add button
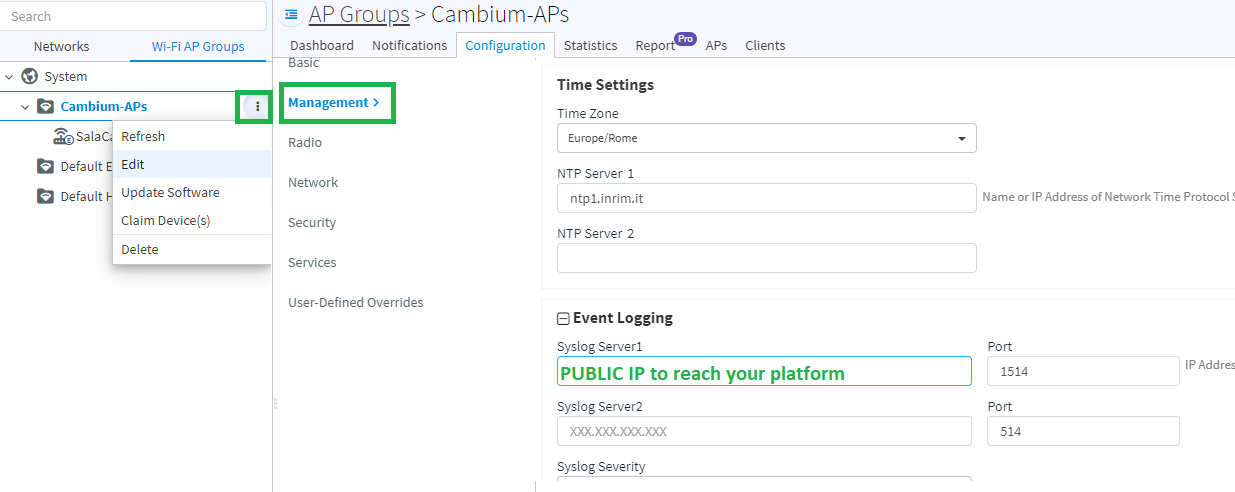
Now click the Manage icon from the main menu on the left. Choose the Wi-Fi AP Group and the related group.
From the menu, select Edit > Management. Scroll down till Event Logging and edit the public IP to reach your HSNM and port 1514.
Log in to your HSNM, select the gateway where you have selected Cambium Network cnMaestro or CnPilot standalone as type of gateway.
In the Activate Logs field, select Enabled with registration on separate file from the dropdown.
In the Internet Connection IP Address or DynDNS Name fields, digit the connection public IP of your cnPilot.

Once completed, click the Save button on the top right corner to save the entry.