
This chapter describes how to configure CloudTrax and OM2P Open Mesh.
Before proceeding further with the configuration, you need to configure HSNM with a domain and a gateway as described in Adding a New Gateway.
The first time you use CloudTrax, you need to create an account. This account will be your login for all networks you will create.
Type https://ct4.cloudtrax.com/login and click the Create Account button on the top-right corner of the page.

Fill in the fields to create a new account.
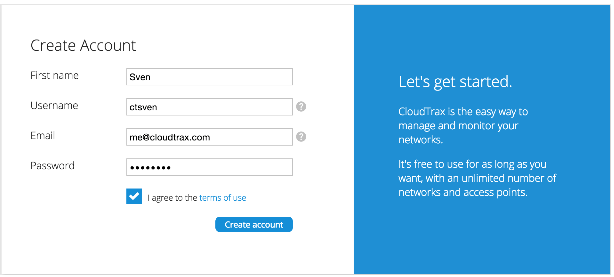
To complete the signup process, check your email address and click the link you have received.

Log in to your account.
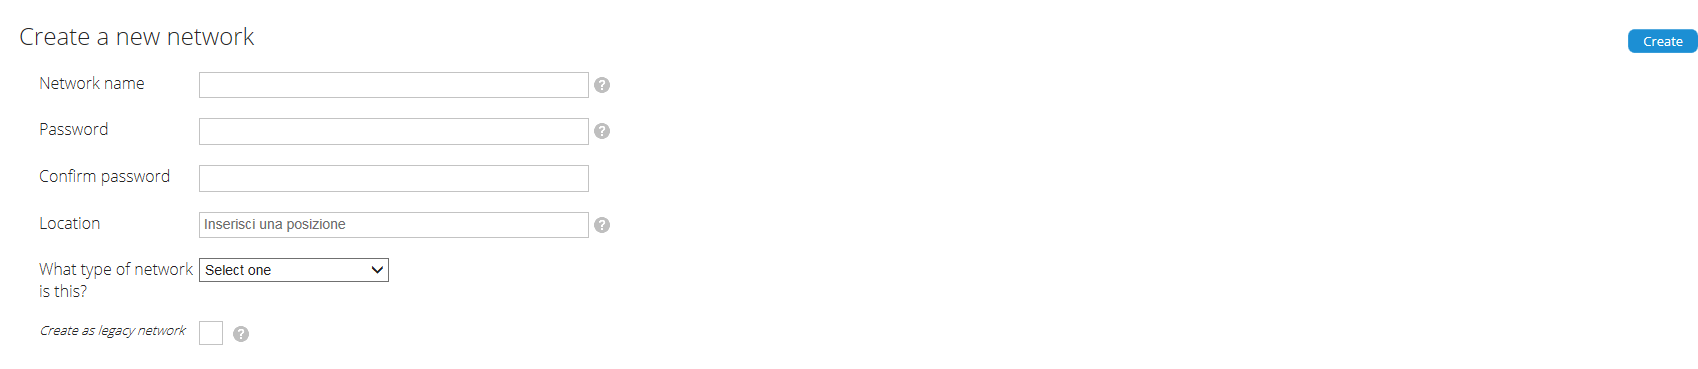
Then click the Create button.
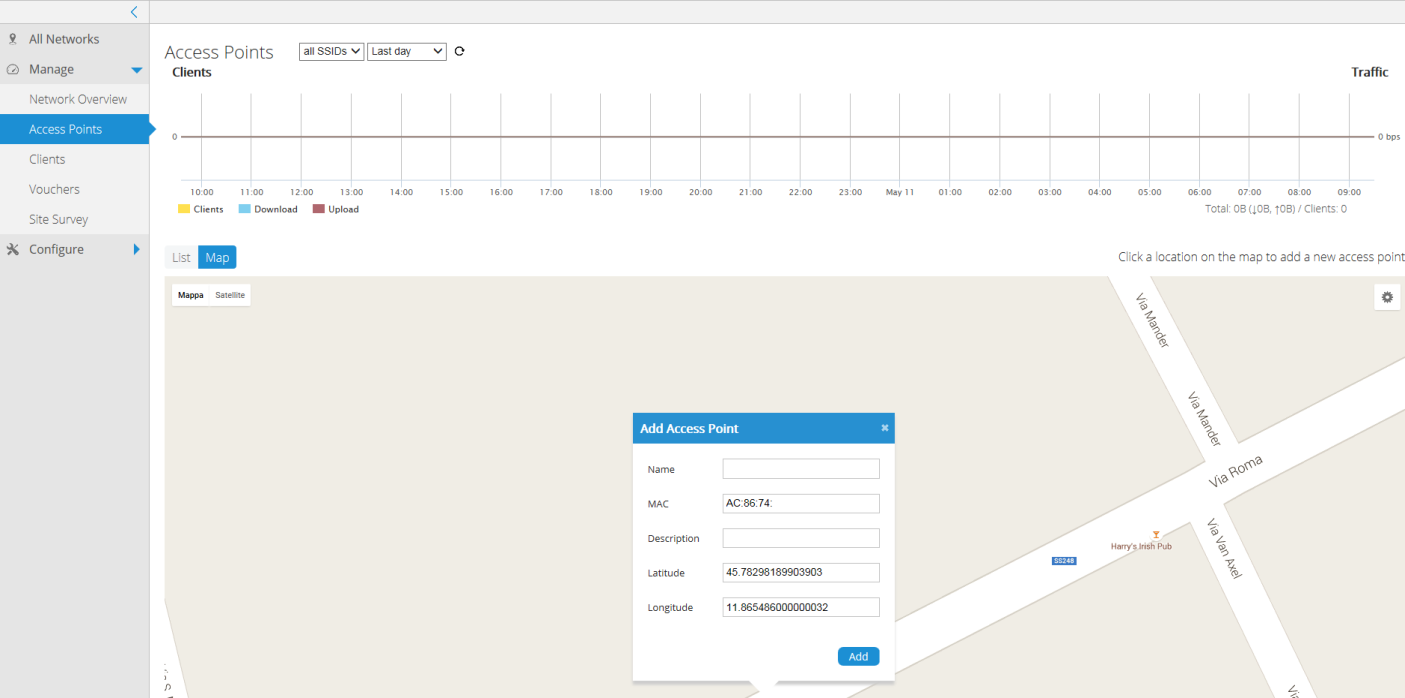
Now you can add the access points that you want to include in the network. Adding them to CloudTrax will allow you to manage and monitor the access points from anywhere. A Google map, centered on the address you entered when you created the network, will show a popup to enter your first access point.
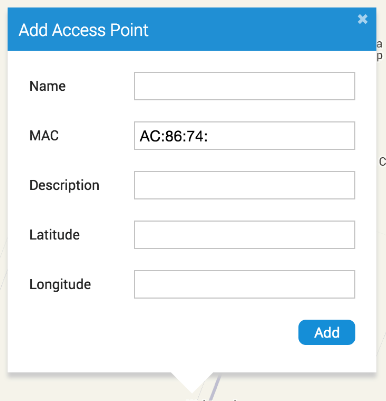
Enter a name for the access point.
The chosen name is used to refer to the access point location and will be displayed in the reports. It does not affect users.
Enter the WAN MAC.
A MAC address is a sequence of 12 digits that include the numbers 0-9 and letters A-F often separated by colons (e.g.: 00:02:6F:8A:B2:6E). This can be found on a label on the bottom of the router and on the side of the product box. For the MR500, 3 MAC addresses are shown. You need to enter the one on the top, listed as the “WAN MAC.”
You can enter the optional descriptive text that will be shown on the reports.
The description field is typically used to keep notes on where the access point is installed, etc.
Click the Add button below.
Repeat steps 4, 5, 6 and 7 for each additional access point.
Warning! Make sure that you have enabled a DHCP server on your network.
Once that you’ve added your access points to CloudTrax you need to install them. If you are using an enclosure, video installation guides are available here.
First, connect your Gateway unit to the Internet with an Ethernet cable. You can plug in directly to your high-speed modem or connect to a router or switch. Once the Ethernet cable is plugged in, connect the power.
In case you have an Internet connection through the cable, the access point will connect to CloudTrax.
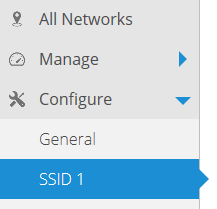
Select the Configure menu and then click SSID 1 to view the SSID configuration page.
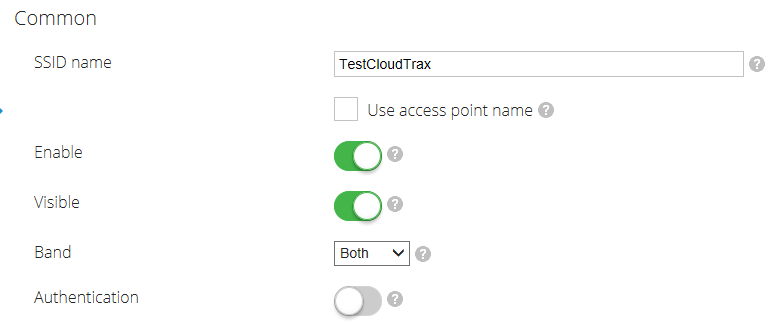
In the Common section, select your SSID name and disable the Authentication option.
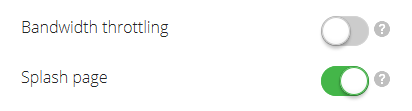
Then, from the Captive portal section, disable the Bandwidth throttling option and enable the Splash page option.
Now you need to configure the Splash page section.
Set the Splash page type to “Hosted remotely”.
In the Splash page URL field, type “Error! Hyperlink reference not valid.”
In the Splash page authentication type field, select “RADIUS”.
In Server address 1 field, enter your HSNM IP Address (the IP address you use to reach HSNM).
Enter the Server secret (the secret that you have set in the System Settings of your HSNM).
Now enable the Block unauthenticated users field.

Lastly, fill in the walled garden field with all the necessary and/or desired walled gardens. You also need to add your own IP address to reach HSNM.
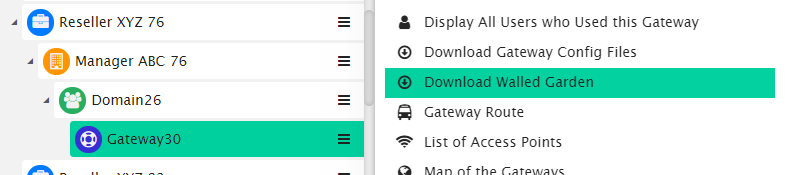
To know the accurate and relevant Walled Garden you need to add one by one, access your HSNM platform and click the contextual dropdown menu of your gateway. Select Download Walled Garden to get a .txt file with your accurate walled garden list as shown Figure Download Walled Garden.
Copy the walled garden from the .txt file and paste them in the Walled garden field of the CloudTrax. Here an example:
