Gateway & AP – Set-Up Guide
This chapter describes how to configure CradlePoint.
Before proceeding further with the configuration, you need to configure HSNM with a domain and a gateway as described in Adding a New Gateway.
The prerequisites required for configuration are:
Connect your PC to one of the two LAN ports.
Assign to the PC the network address 192.168.0.10, subnet mask 255.255.255.0 and gateway 192.168.0.1
Open the browser and enter the IP address 192.168.0.1.
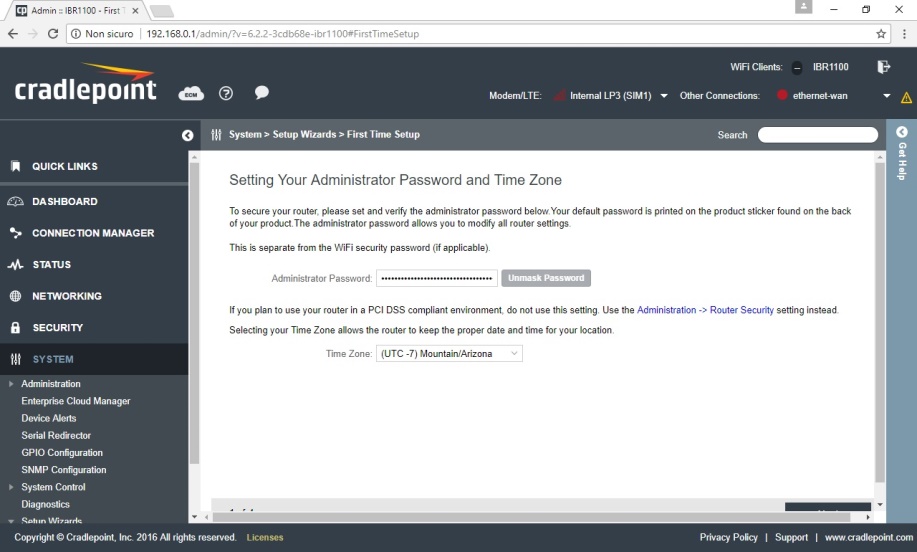
When accessing via browser for the first time, you will be displayed the initial configuration wizard that will allow you to define some configuration parameters.
Specify your Administrator Password and select your Time Zone.
Then, click the Next button on the right bottom corner.
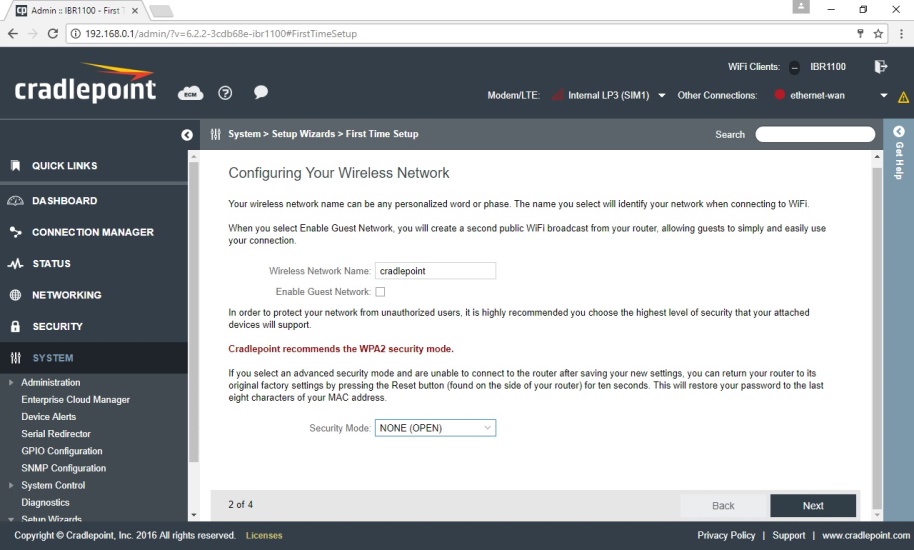
Type an SSID for the wireless network and in the Security Mode field, select “NONE”.
Then click the Next button on the right bottom corner.
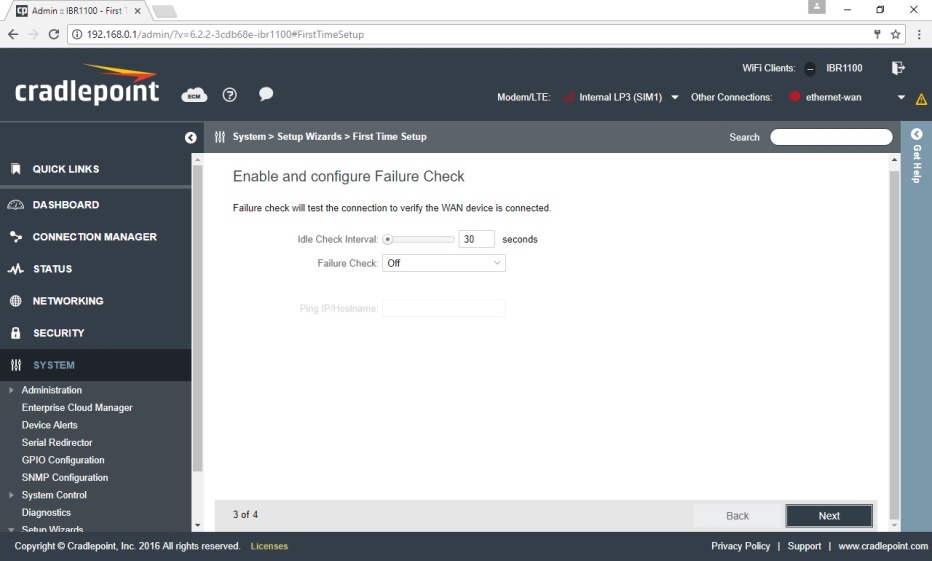
Disable the Failure Check feature.
Then, click the Next button on the right bottom corner.
In the Summary page, click the Finish button on the right bottom corner.
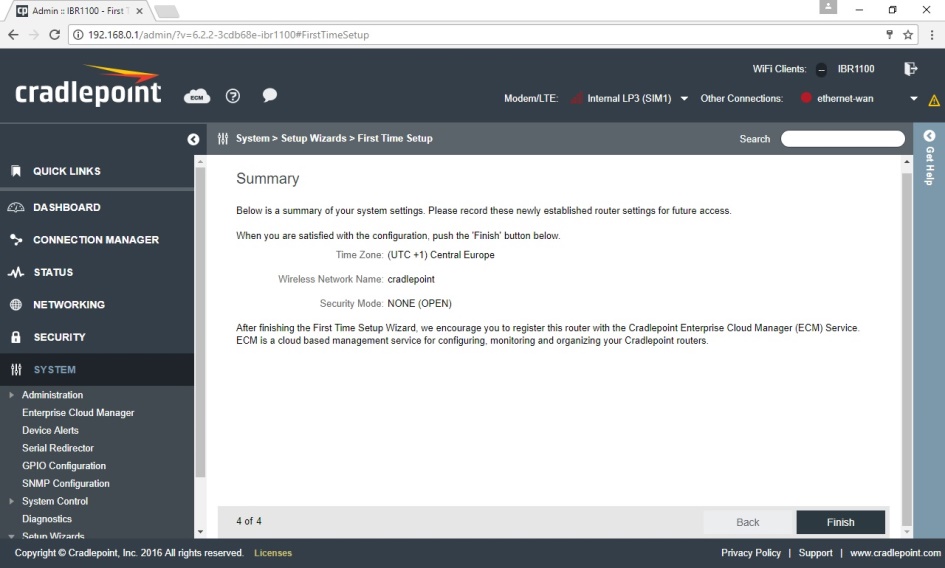
If you get an error advising you that the Gateway cannot contact the CradlePoint Cloud Service, click “OK”.
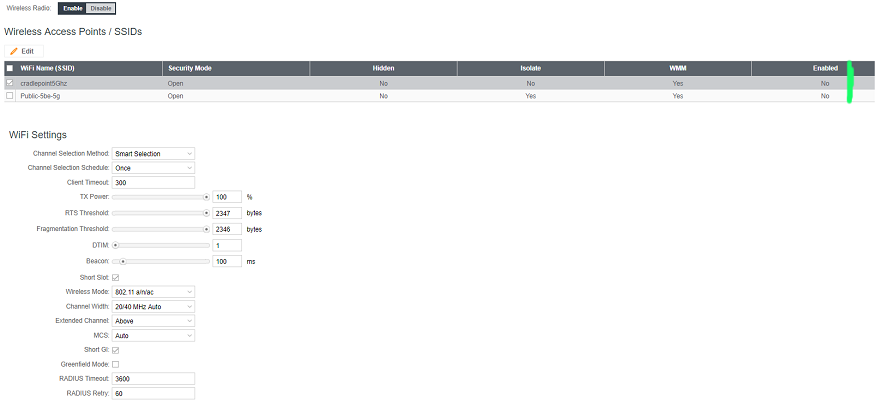
Go to Networking> Local Networks> WiFi Radio #1 (2.4 Ghz) to configure your wireless 2.4 Ghz settings like SSID, Encryption, Channel etc.

Generally, there are two SSIDs configured. You need to enable at least one.
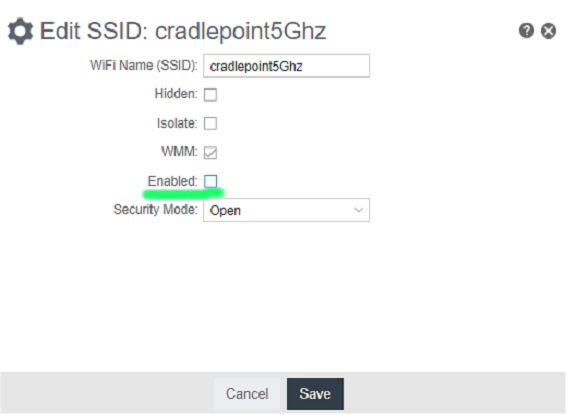
Go to Networking>Local Networks>WiFi Radio #1 (5 Ghz) and disable both the SSIDs in case you don’t need to use them.
Go to Networking>WiFi As WAN, Bridge or Client and disable the WiFi Client Mode.
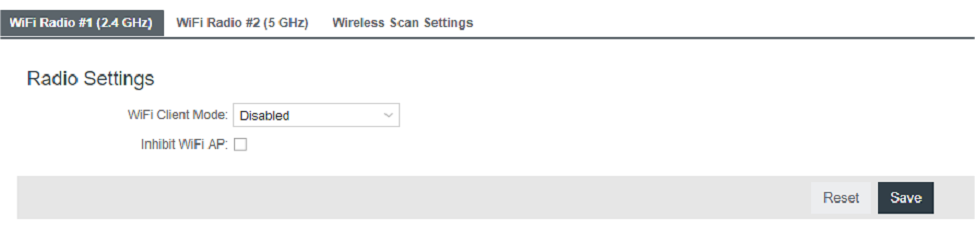
Once completed, click Save on the right bottom corner.
This section describes how to set an IP address to LAN network and how to choose the interfaces (generally LAN ports) that belong to it.
Select Networking>Local Networks>Local IP Networks, then tick Primary LAN.
Now, click the Edit button.
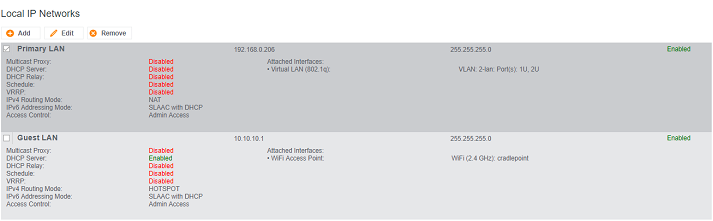
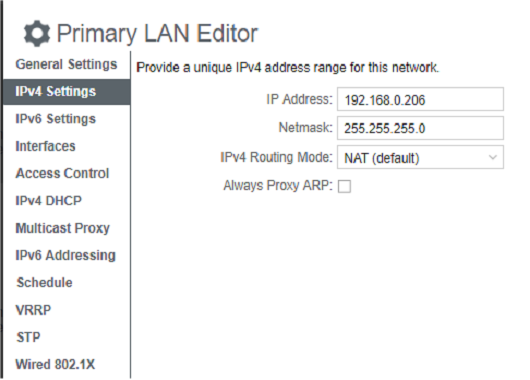
Select the IPv4 Settings menu on the left and enter the IP address for LAN ports used to manage your CradlePoint device.
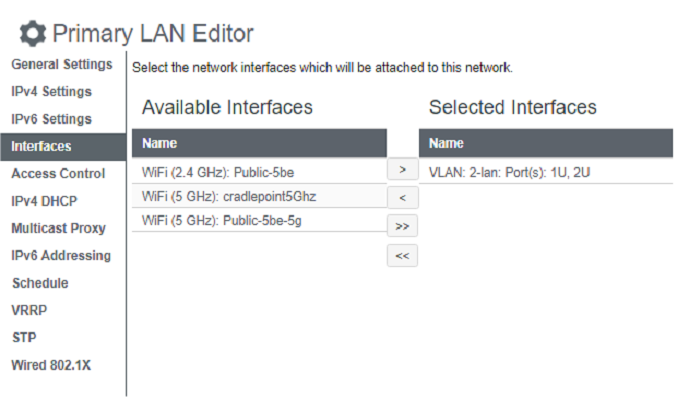
Click the Interfaces menu on the left and under Selected Interfaces, make sure that only “VLAN: 2-lan: Port(s): 1U,2U” is present.
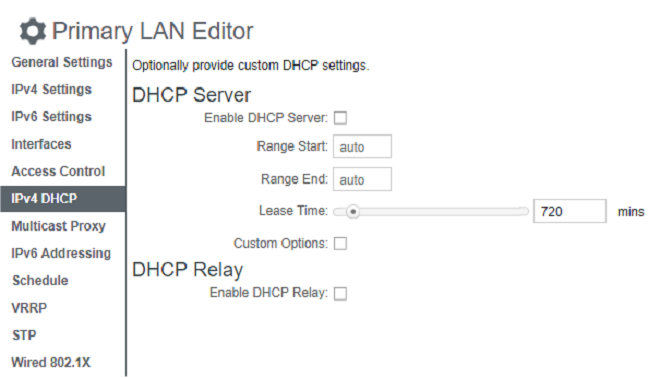
Select the IPv4 DHCP menu on the left and then uncheck the Enable DHCP Server checkbox.
Click Save to save the entry.
This section describes how to set an IP address to Hotspot network and how to choose the interfaces (generally the WiFi interfaces) that belong to it:
Select Networking>Local Networks>Local IP Networks.
Tick Guest LAN and click the Edit button on the top-left.

Select IPv4 Settings menu on the left and enter an IP address for the HOTSPOT interface (generally the WiFi interface).
In the IPv4 Routing Mode field, select “Hotspot”.
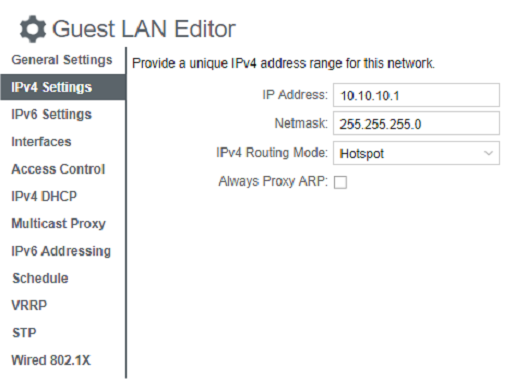
Now select the Interfaces menu on the left. Make sure that in the Selected Interfaces section only “WiFi (2.4 Ghz)” is present.

Select the IPv4 DHCP menu on the left and then check the Enable DHCP Server box.
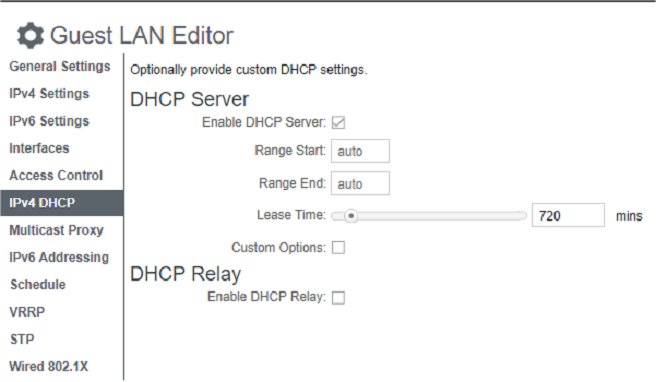
Once completed, click Save.
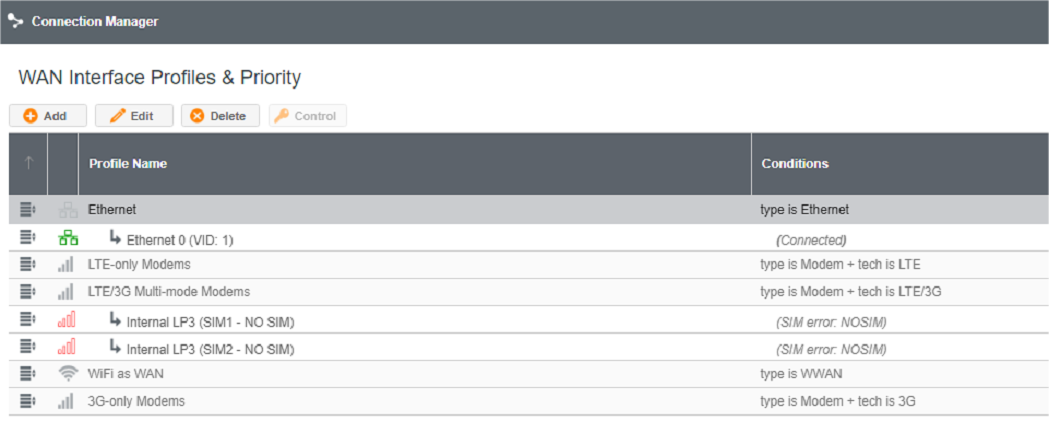
Generally, you need to connect the CradlePoint’s WAN interface to the switch where your xDSL router is connected. Therefore, you need to configure the CradlePoint’s WAN interface according to the network where you will install the CradlePoint device.
Select the Connection Manager menu. Under Profile Name, select “Ethernet”.
Now, click the Edit button at the top.
Select the General menu on the left and disable the Force NAT option.
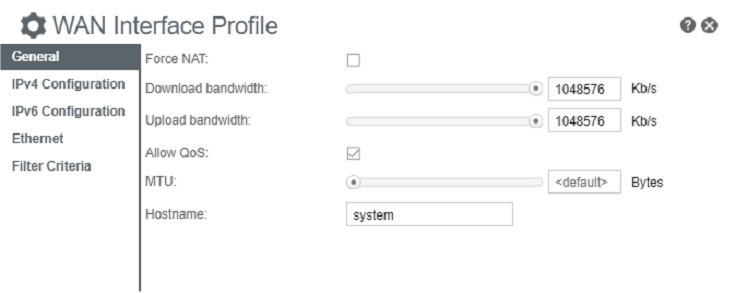
Now move to the Ethernet menu on the left and enter the IP address of the WAN interface according to your network configuration.
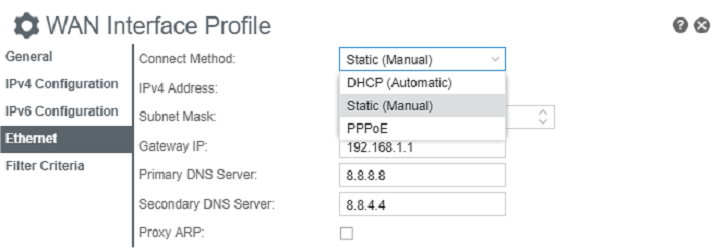
Once completed, click Save.
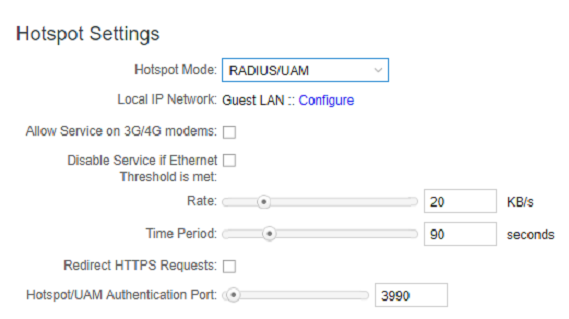
From Networking, select Local Networks>Hotspot Services.
Under the Hotspot Settings section, select “RADIUS/UAM” in the Hotspot Mode field.
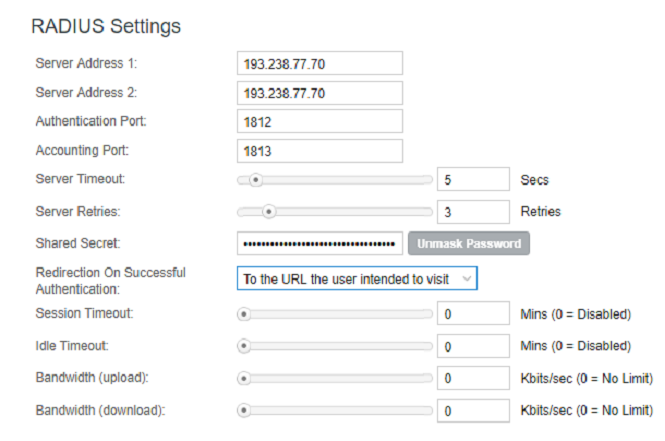
In the “RADIUS Settings” section:
In Redirection On Successful Authentication field, select “To the URL the user intended to visit”.
Type “0” in the Idle Timeout, Session Timeout and Bandwidth fields.
In the UAM Settings section:
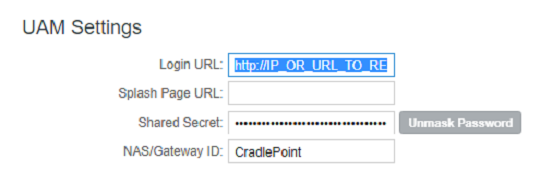
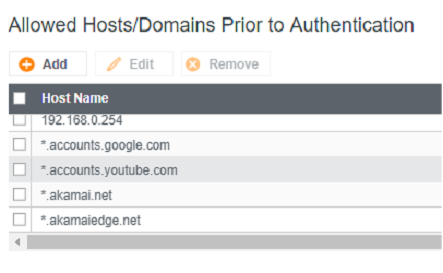
In the Allowed Hosts/Domains Prior to Authentication section, click the Add button and enter the URLs of the file downloaded from http://HSNMURL/functions/walledgarden.php?domain=HSNMDomainName&hotspotname=HSNMHotSpotName
Once completed, click Save.
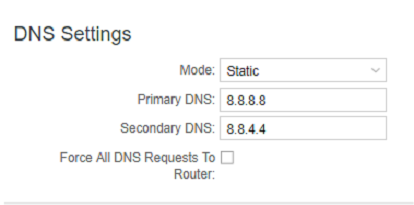
From Networking, select the DNS Servers menu. Under the DNS Settings, specify a DNS server for the gateway.