
This chapter describes how to configure Grandstream GWN Cloud.
Before proceeding further with the configuration, you need to configure HSNM with a domain and a gateway as described in Adding a New Gateway.
The prerequisites required for configuration are:
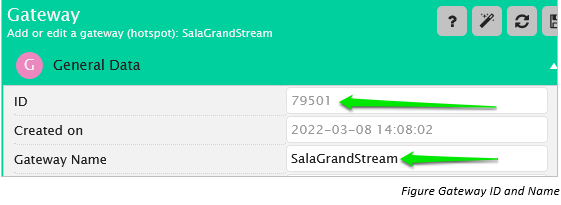
Inside HSNM, select your gateway, click the dropdown menu, and choose Edit.
Expand the General Data session.
In the Hardware Type field, choose Grandstream.
Connect the Grandstream AP to a network that provides internet connectivity.

To access your Grandstream account, open the browser and connect to https://eu.gwn.cloud/login if the devices will be installed within EUROPE. Connect to https://www.gwn.cloud/login if the devices will be installed outside EUROPE.
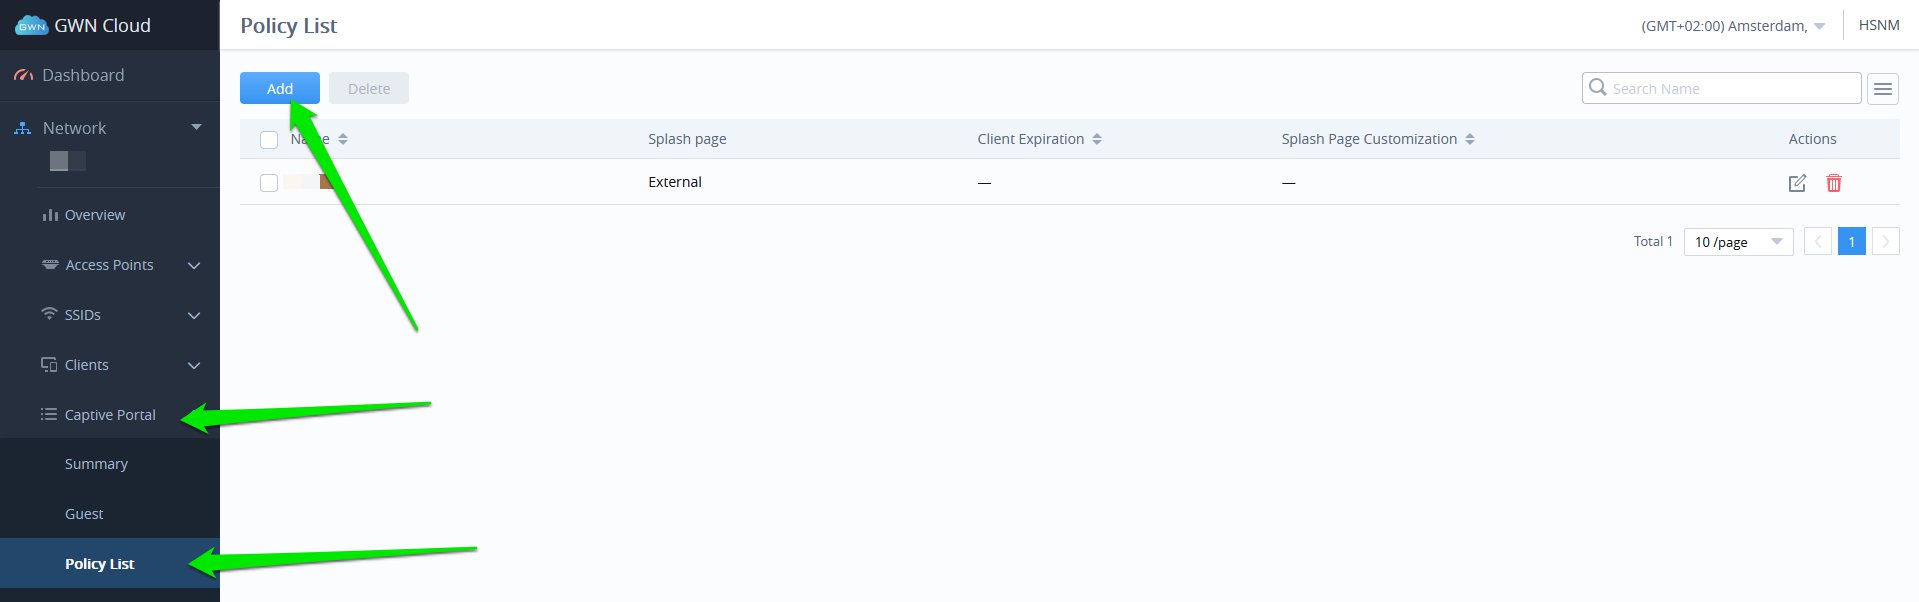
From the User Interface, click on Captive Portal > Policy List and select Add
Under the Portal Policy section, complete as follows:
If you want to use HTTP (no payments and no socials), enter on External Splash Server Address http://fqdn_of_your_appliance/gatewayid/your_gw_id.
In order to add the Secret you need to get it from your HSNM as described in the Radius Secret paragraph.
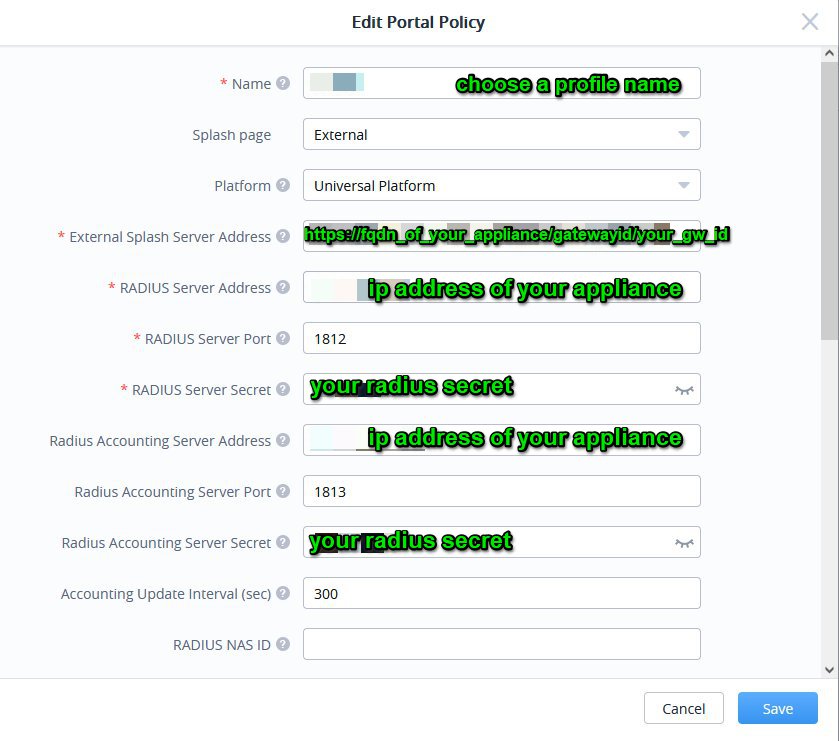
Scroll down and keep the configuration as follow:

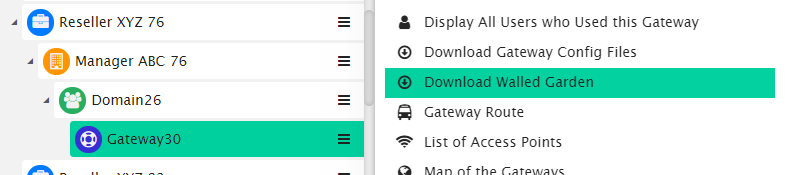
To configure the walled garden, continue from the page just described in the previous steps and enter the list of the walled garden you can download from your gateway appliance.

To know the accurate and relevant Walled Garden, you need to add one by one, access your HSNM platform and click the contextual dropdown menu of your gateway. Select Download Walled Garden to get a .txt file with your accurate walled garden list as shown Figure Download Walled Garden.
Once you’ve completed the configuration of the walled garden, click the Save button.
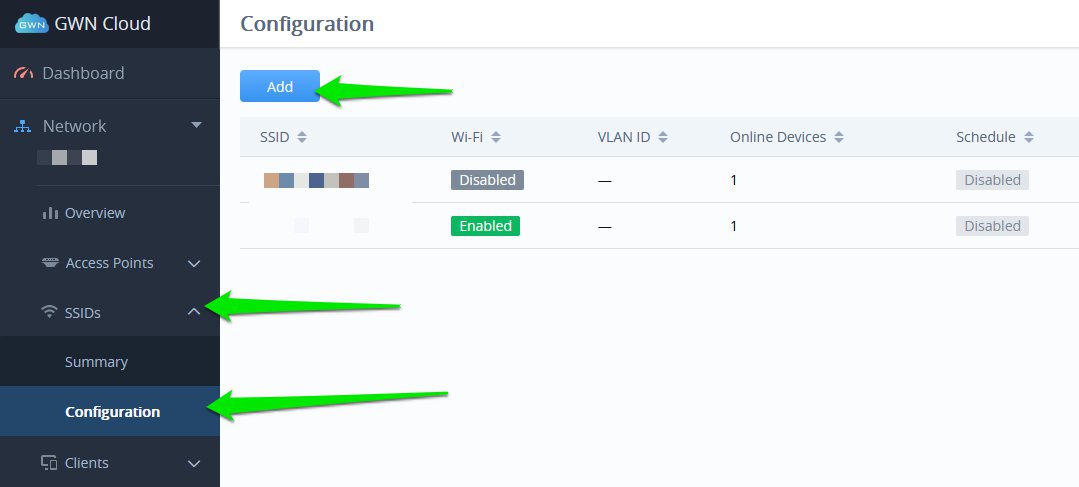
From the User Interface, click on SSIDs > Configuration and select Add.
Under the Wi-Fi Settings section, complete as follows:
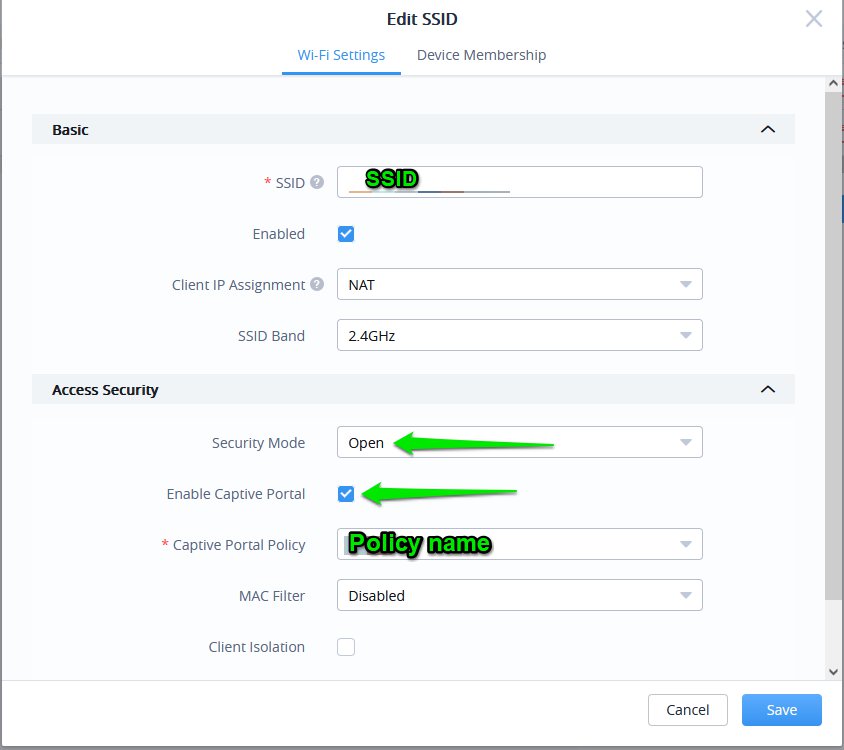
When you’ve completed the configuration of the SSID, click the Save button.
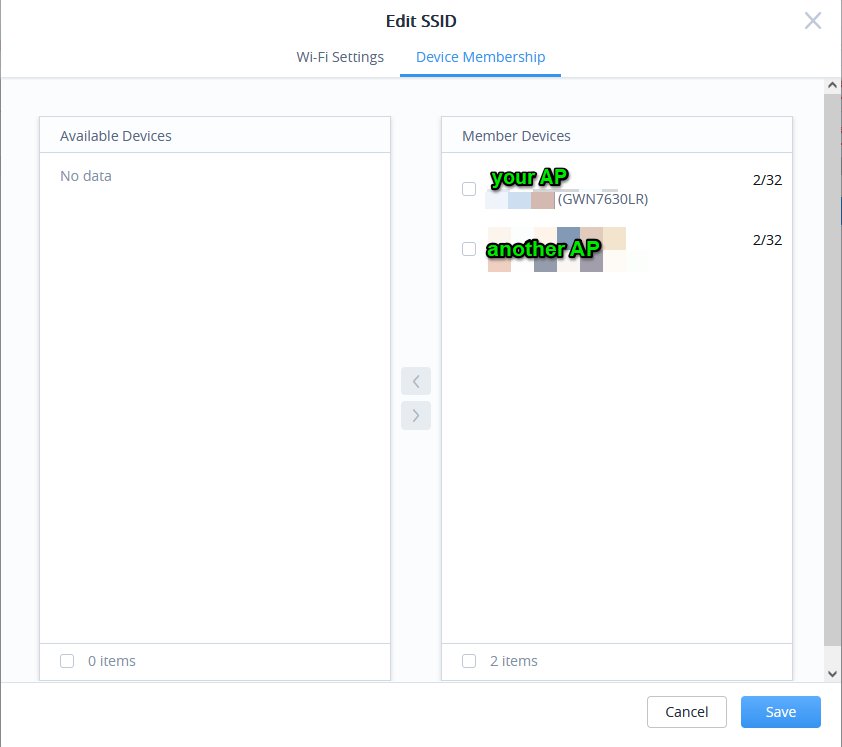
Move to the Device Membership section and ensure your AP is entered in the Member Devices group.
It is possible to add to this list all the APs that will have to broadcast the hotspot network
If everything is correct, click the Save button.
Once you have set all the steps described above, you will get your Grandstream GWN Cloud configured and ready to work with HSNM.