
This chapter describes how to configure LigoWave Infinity Cloud Controller.
Before proceeding further with the configuration, you need to configure HSNM with a domain and a gateway as described in Adding a New Gateway.
Open the browser and connect to https://controller.ligowave.com/home?next=%2F in order to access your LigoWave account.
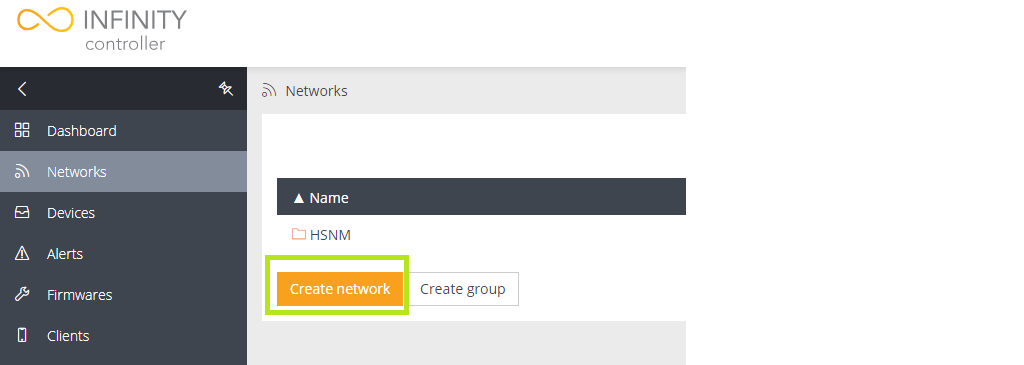
Click the Networks menu on the left and then click the Create Network button.
Specify the Network name. Then, select a Parent group.
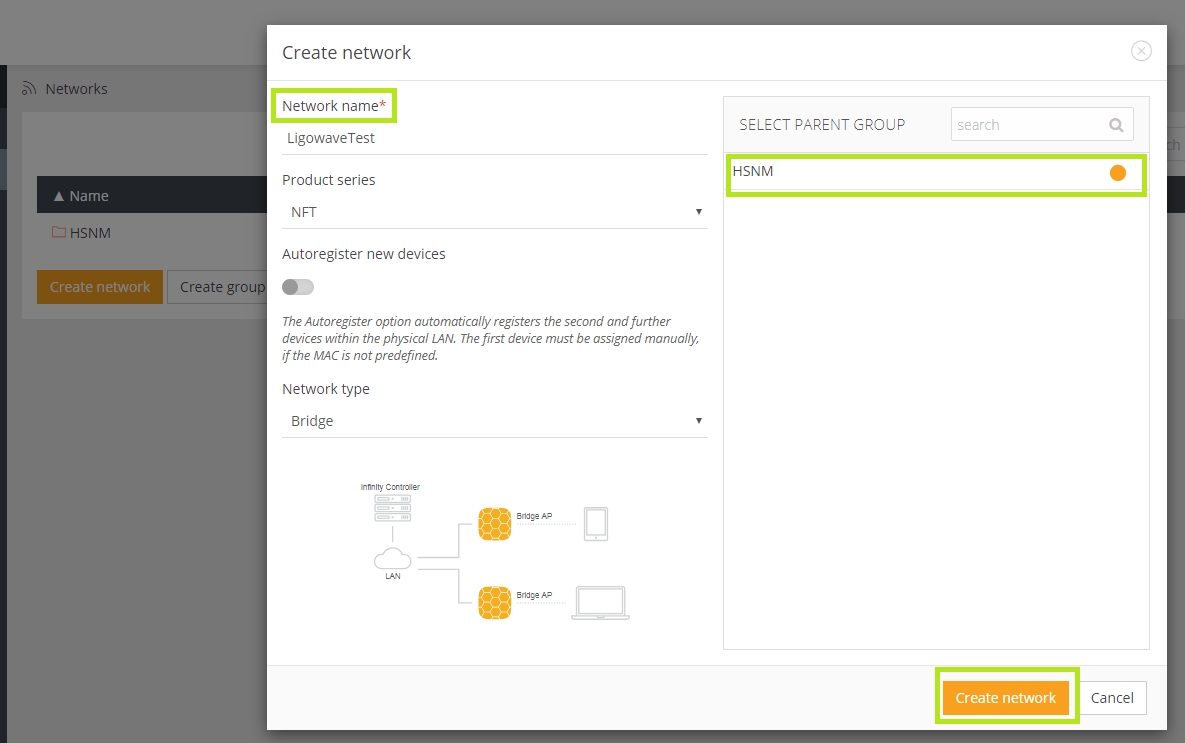
Once completed, click the Create network button.
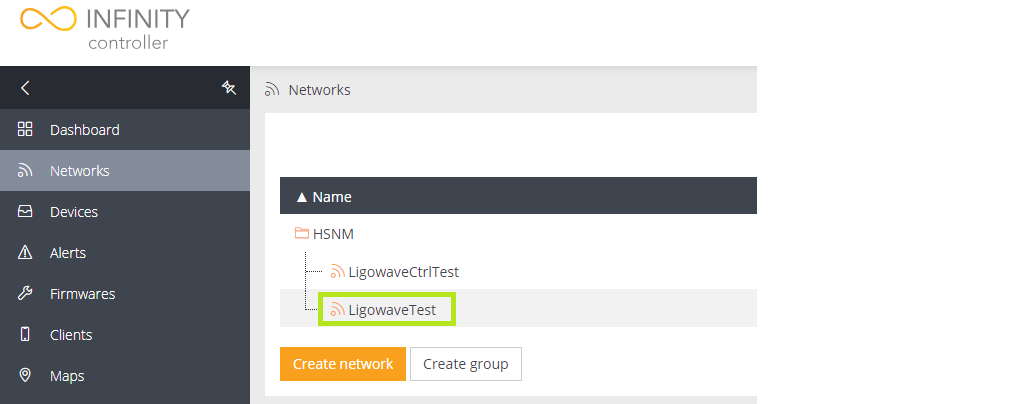
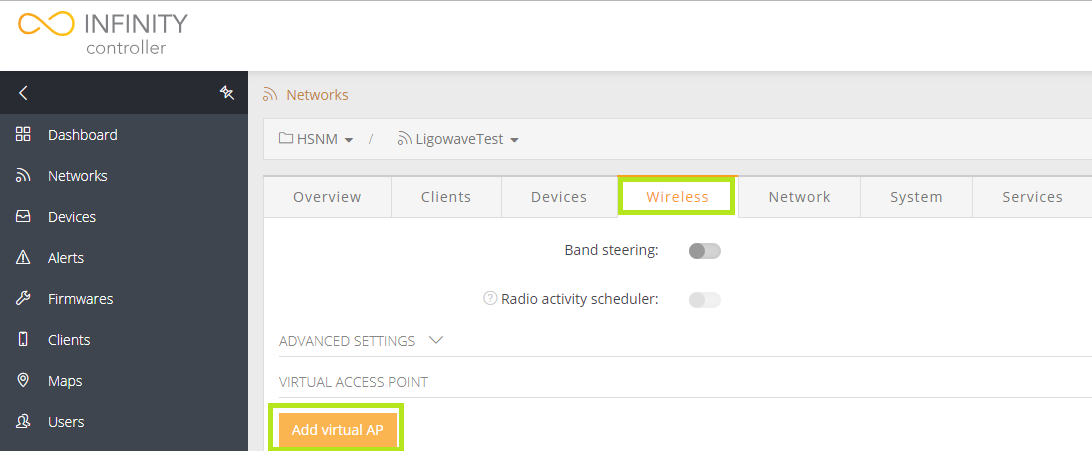
Now, select the Network name you have just created.
Select the Wireless tab and then click the Add virtual AP button.
Specify the SSID. In the Security Mode field, select “Open”.
Then, enable the Broadcast SSID option.
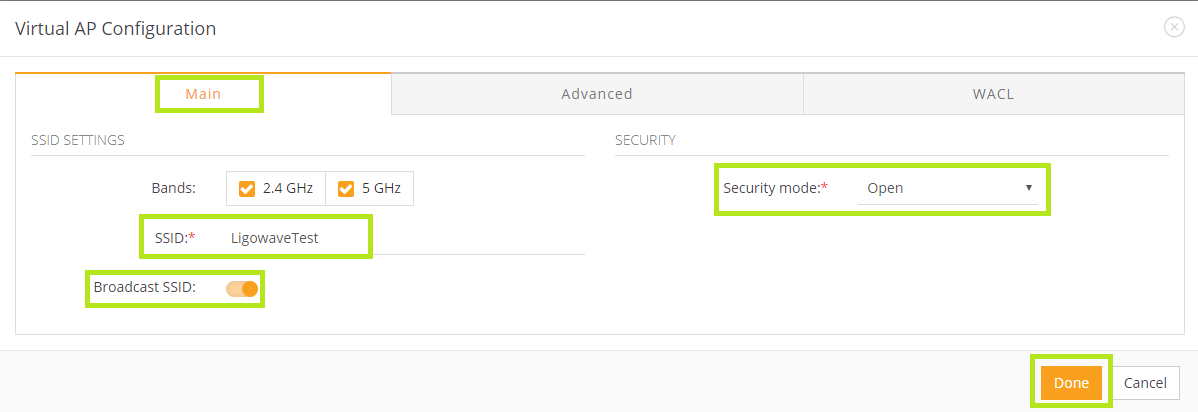
Click Done to save the entry.
To be able to contact the controller, the AP needs to be connected to a network where TCP ports 1883 and 8883 are open.
After configuring your AP to be managed through the Infinity Controller, you need to connect it to your network. In so doing, it will be able to access the internet and communicate with the controller.
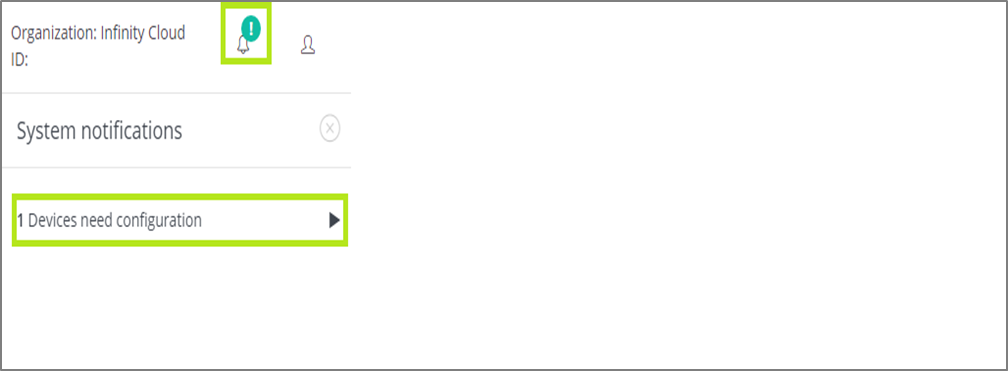
In the Controller dashboard, a notification about a new AP to be configured will appear.
Below, click 1 Devices need configuration.
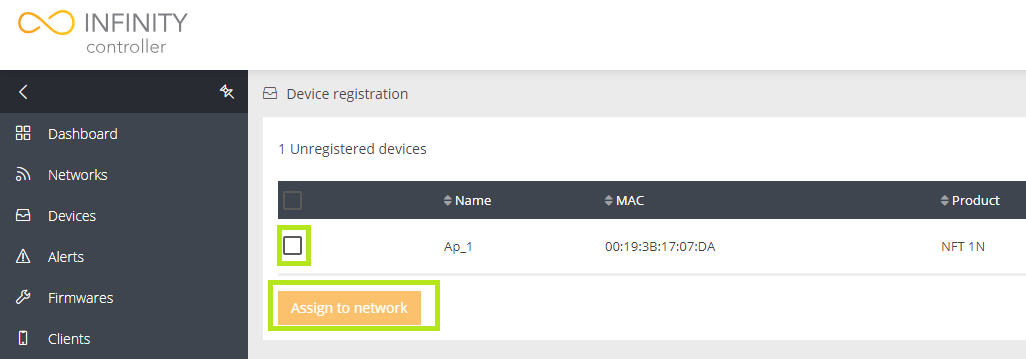
Then, select the AP you need to add to the controller and click the Assign to network button.
Select the network you need to assign to the AP.
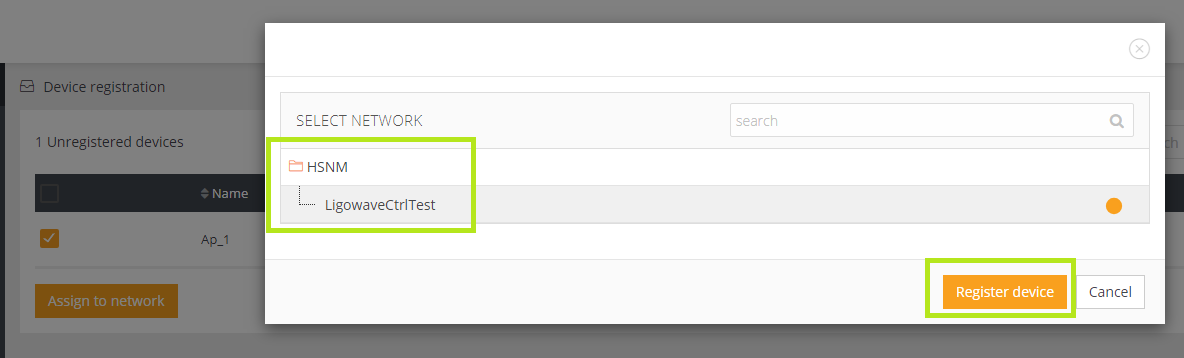
Click the Register device button in order to complete the AP registration procedure.
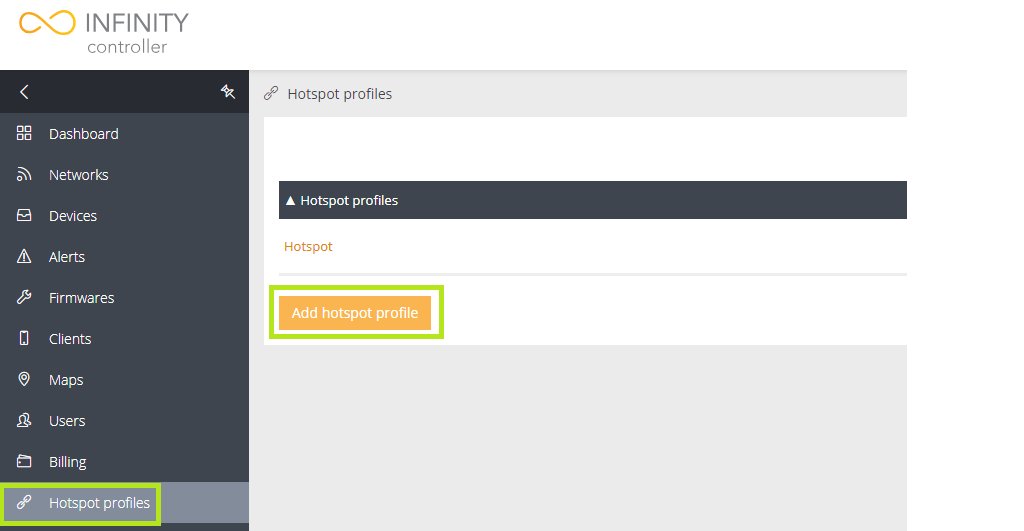
Select the Hotspot profiles menu on the left. Then, click the Add hotspot profile button.
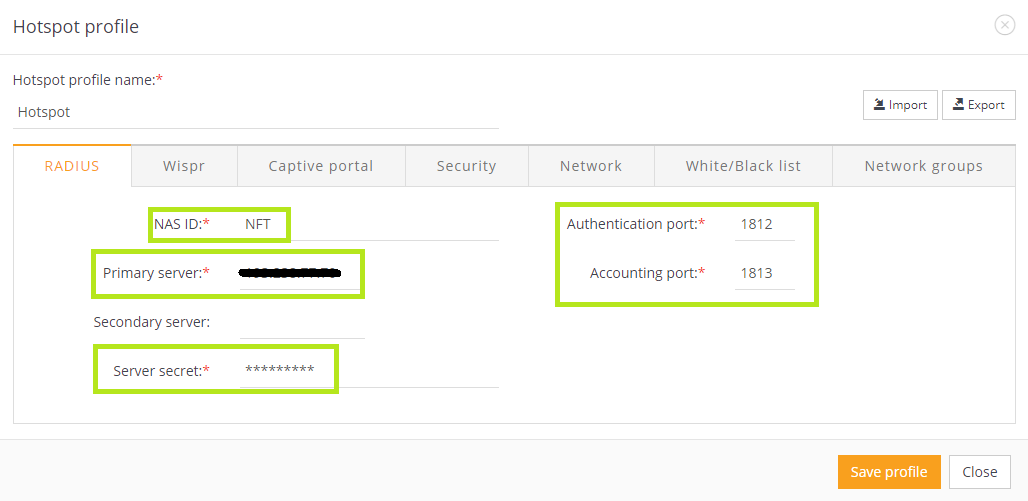
First, select the RADIUS tab and enter the details as follows:
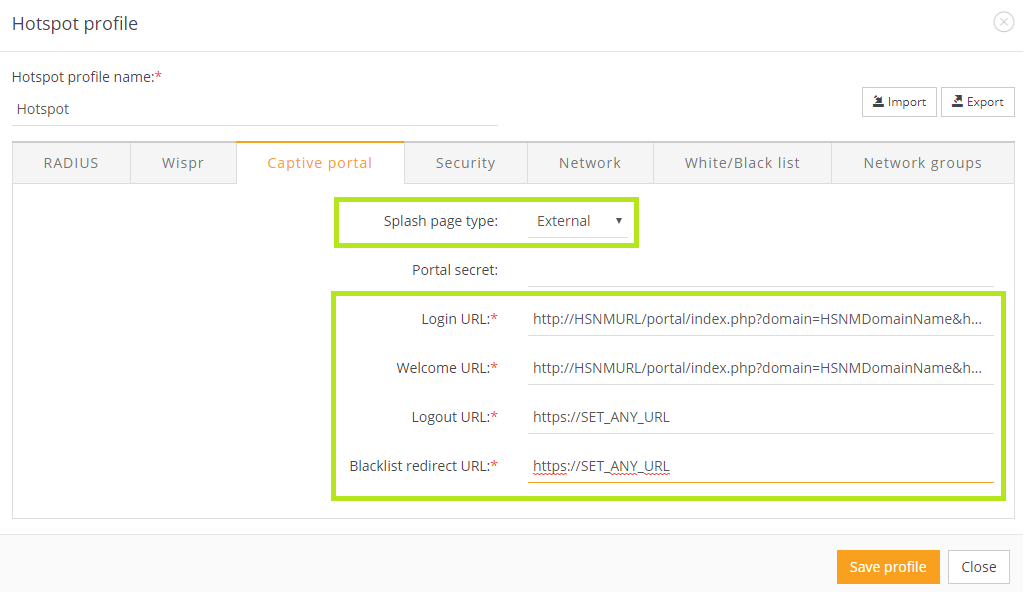
Now select the Captive portal tab.
In the Splash page type field, select “External”.
In both Login URL and Welcome URL fields, enter the URL used to reach the Welcome portal:
http://HSNM Hotspot ManagerURL/portal/index.php?domain=HSNM Hotspot ManagerDomainName&hotspotname=HSNM Hotspot ManagerHotSpotName
In both Logout URL and Blacklist redirect URL fields, specify the URL that you prefer.
The Logout URL and the Blacklist redirect URL are not necessary for HSNM Hotspot Manager to correctly work, but they are mandatory in LigoWave configuration.
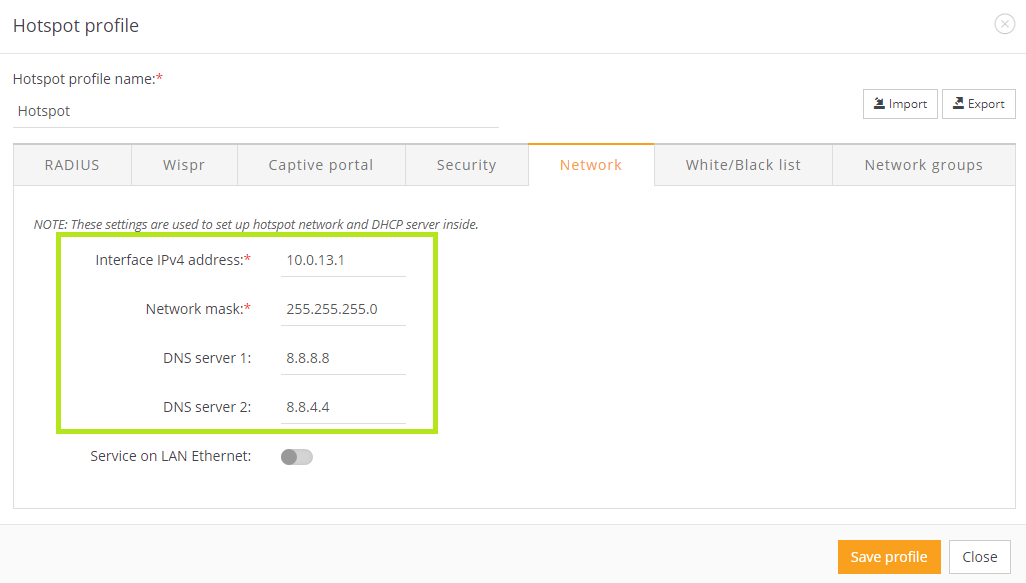
Move to the Network tab. Here you need to configure an IP Address for the Hotspot network that will be used to assign, via DHCP, an IP to the connected devices.
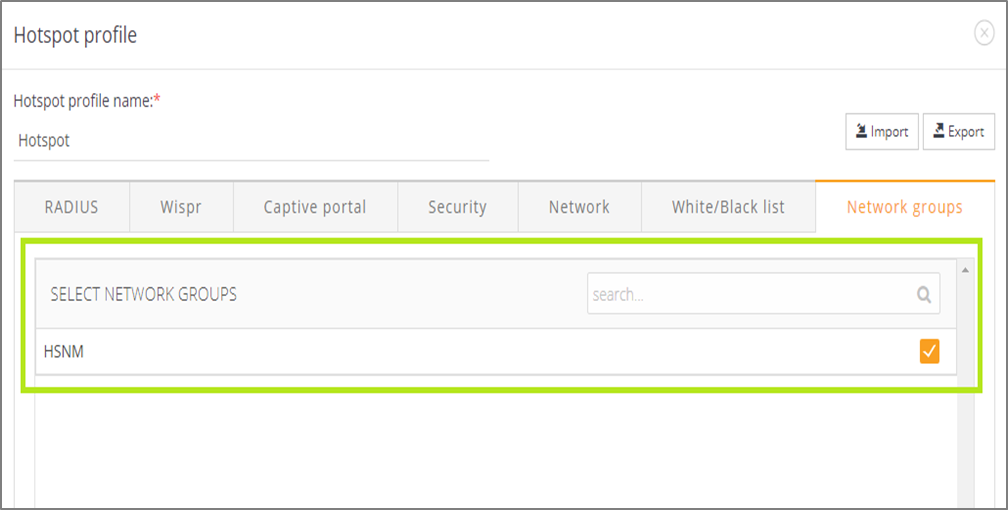
Move to the Network groups tab and select the “Network Group” created in “Adding a Network”.
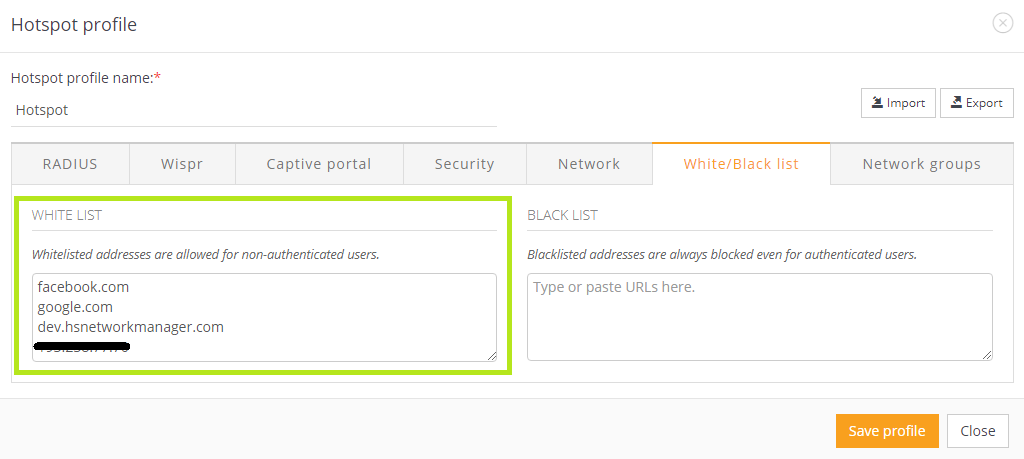
Select the White/Black list tab and add the needed walled garden in the White list.
Add the minimum requested walled garden in order to reach the Welcome Portal:
Warning! You need to add the Walled garden URLs in the FQDN domain name format. For example, walled garden such as “facebook” won’t be accepted. The correct format is “facebook.com” or “api.twitter.com” etc.
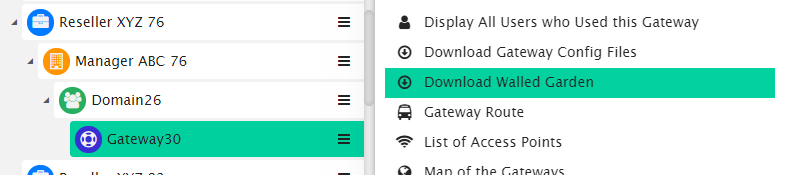
To know the accurate and relevant Walled Garden you need to add one by one, access your HSNM platform and click the contextual dropdown menu of your gateway. Select Download Walled Garden to get a .txt file with your accurate walled garden list as shown Figure Download Walled Garden.
Once completed, click the Save profile button.