
This chapter describes how to configure the Pepwave gateway
Before proceeding further with the configuration, you need to configure HSNM with a domain and a gateway as described in Adding a New Gateway.
The prerequisites required for configuration are:
Log in to the Pepwave InController 2 interface.
In the middle of the page, in the Group session, click the group level’s name to expand the various tabs.

Then move to Network Settings > Captive Portals and click Add an External Captive Portal.
Enter the details as follows
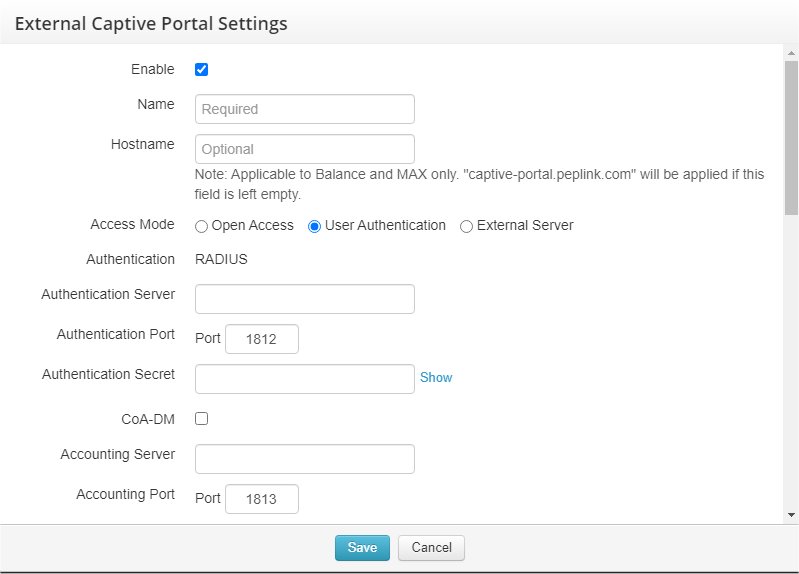
Click Save to save the entries.
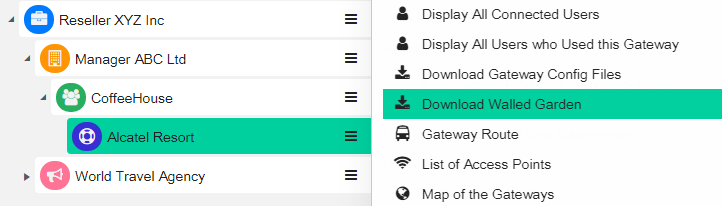
To know the accurate and relevant Walled Garden, you need to add one by one, access your HSNM platform and click the contextual dropdown menu of your gateway. Select Download Walled Garden to get a .txt file with your accurate walled garden list as shown Figure Download Walled Garden.
Now move to Wi-Fi Ap> Group-wide SSID Settings and click the Add new SSID button.

Enter the details as follows:
Security Settings
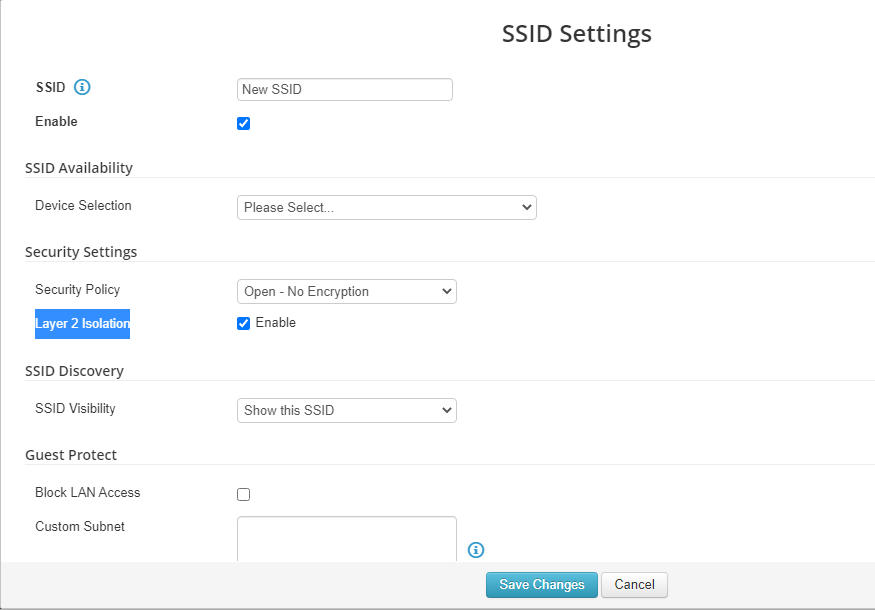
Click Save Changes to save the entries.
Move back to Network Settings > VLAN Networks and then select Untagged LAN.
Enter the details as follows
Settings for Balance and MAX
DHCP Server Settings for Balance and MAX
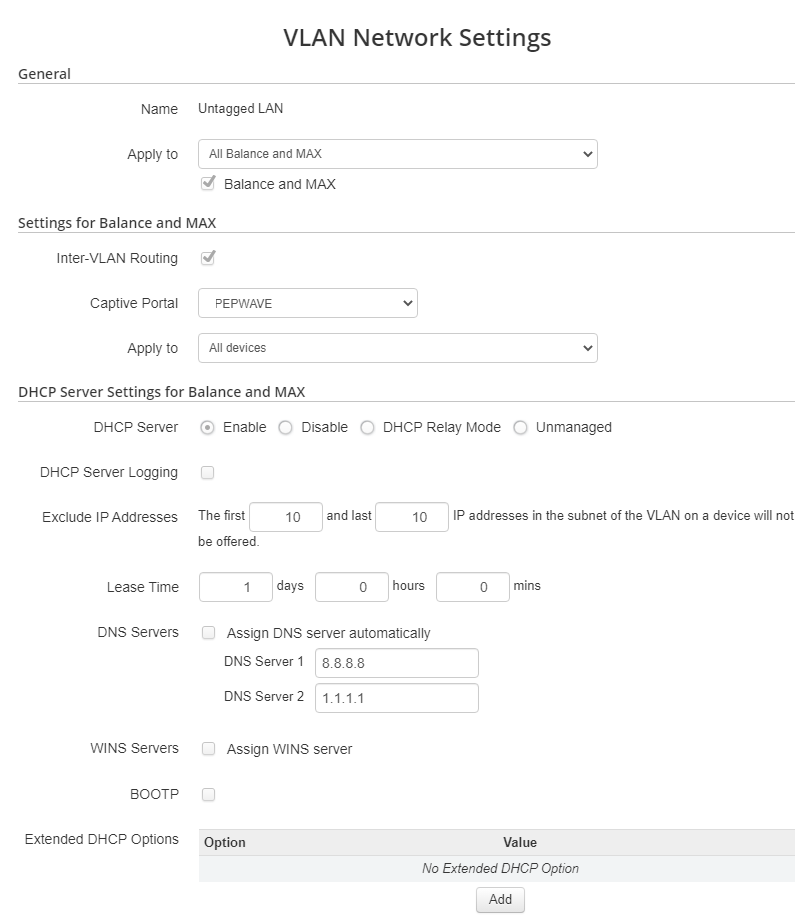
Click Save to save the entries.
To complete the set up, you need to move to Dashboard> Devices and then click on the name of your device.

From the tab, select Settings > Remote Web Admin.
Then from the top menu, select Advanced.
From the menu on the left, scroll down till QoS, then click Bandwidth Control.
Under Individual Bandwidth Limit, flag Enable.
Enabling it will allow you to set up speed values via radius attributes.
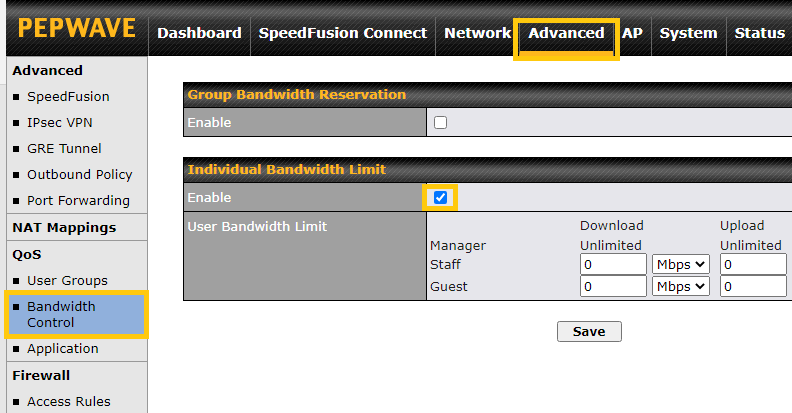
Click Save to save the entries.
The configuration is now complete.