
This chapter describes how to configure Ruckus Unleashed Access Point.
Before proceeding further with the configuration, you need to have your HSNM configured with a domain and a gateway as described in Adding a New Gateway.
The prerequisites required for configuration are:
Access to Ruckus Unleashed AP web interface through its IP address.
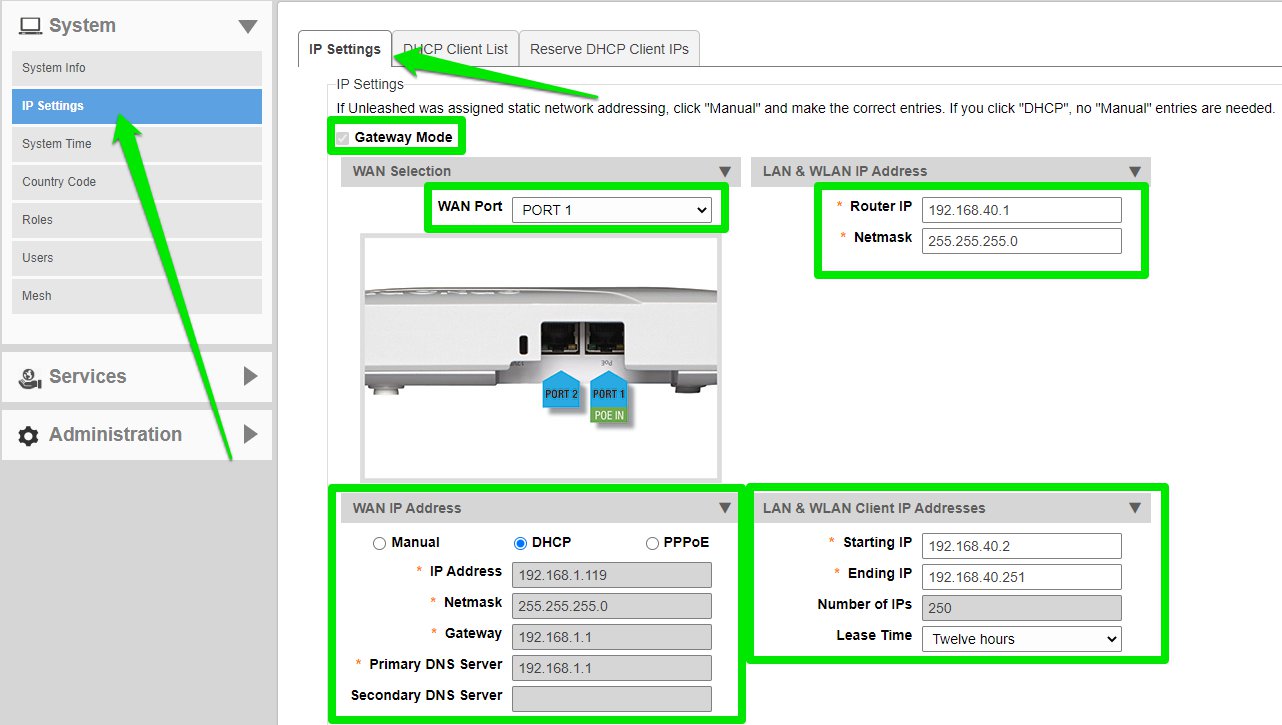
The first step is to configure an IP address to your Ruckus AP according to your local network. From the left sidebar, click on Admin & Services tab, select System > IP Settings > IP Settings; flag Gateway Mode, then choose the AP’s port to use as WAN port and choose if you want to set a manual IP Address based on your local network configuration, or if you want to use DHCP or PPPoE.
WAN Port is the port to use to connect AP to your local network: in this case on WAN IP Address section you can choose Manual to set an IP address of your local network or DHCP to obtain an IP address from a local DHCP server.
Now define the network IP to use on hotspot network (LAN&WLAN IP Address) and the DHCP pool to use for guests (LAN&WLAN Client IP Addresses).
NOT USE the same subnet used for WAN Port.
Access to Ruckus Unleashed AP web interface through the new Ip address set before
Click on Admin & Services tab, select Services > AAA Servers > Authentication Servers and then click Create New
Configure the Accounting with:
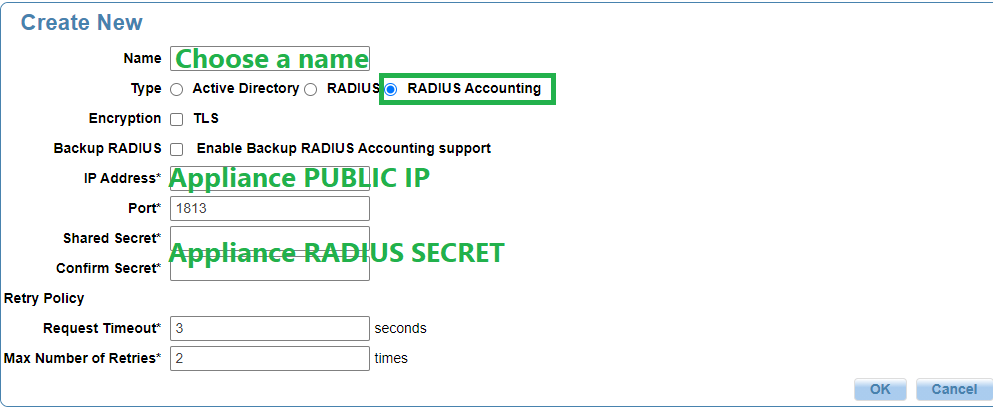
In order to add the Secret you need to get it from your HSNM as described in the Radius Secret paragraph.
Once completed, click the OK button
Click again Create New button for the Authentication configuration
Configure the Authentication with:
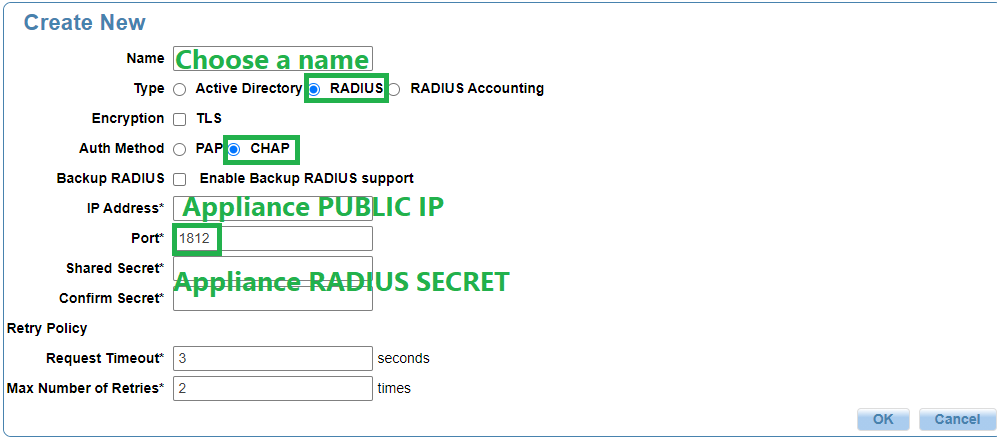
In the IP Address fields enter the public IP used to reach your HSNM and the Radius Secret preset in your HSNM.
In order to add the Secret you need to get it from your HSNM as described in the Radius Secret paragraph.
Once completed, click the OK button on the bottom right corner.
Click on Admin & Services tab, select Services, then select Hotspot Services section and click Create New.
In the General tab configure with:
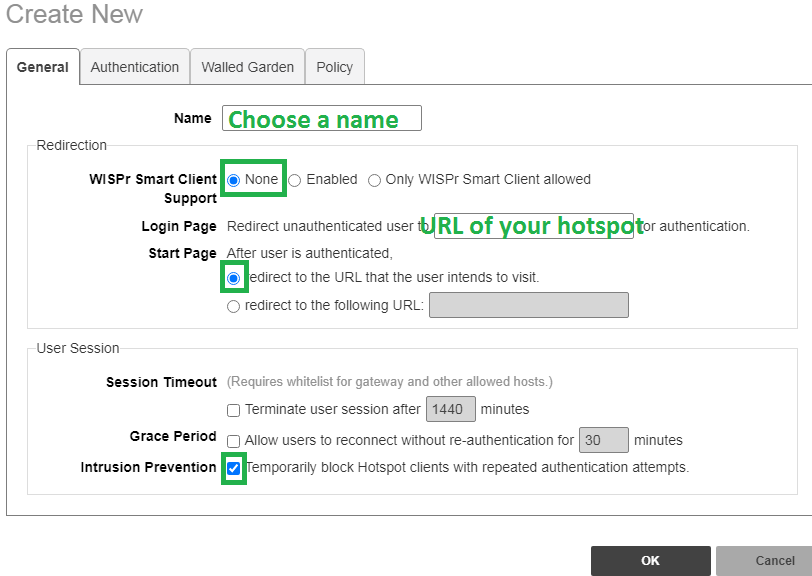
The URL of the Hotspot must be in this format: http:// HSNM _IP_OR_DOMAIN/portal?gateway=RackusAP
Once completed, click the OK button on the bottom right corner.
Click on Admin & Services tab, select Services, then Hotspot Services, and select the Authentication tab.
In the Authentication/Accounting Servers header configure with:
You need to add the Authentication and Accounting Servers previously created in the Configuring the Radius Accounting and Authentication
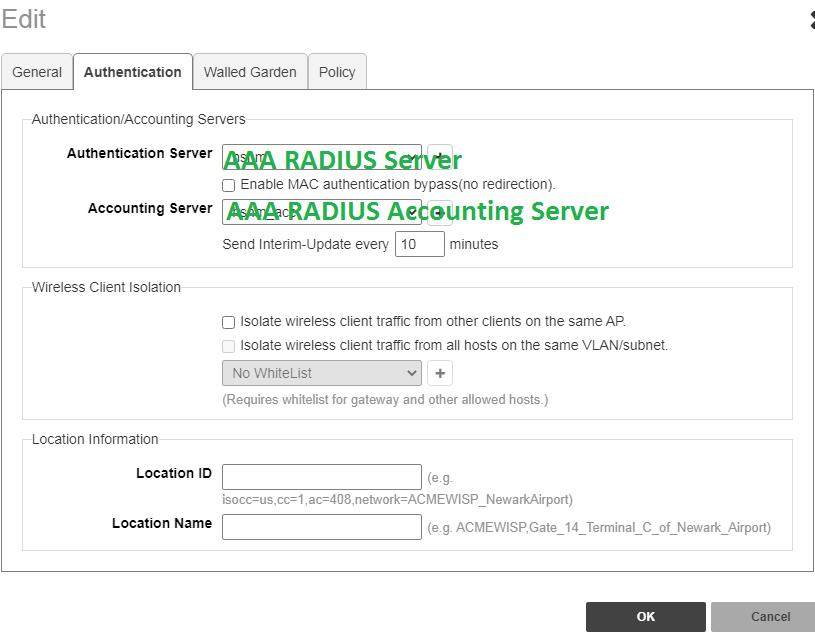
Once completed, click the OK button to save the entry.
In the main page of your Ruckus interface, select WiFi Networks menu on the upper left corner of the management interface, click on Create to create a new WLAN. Configure with:
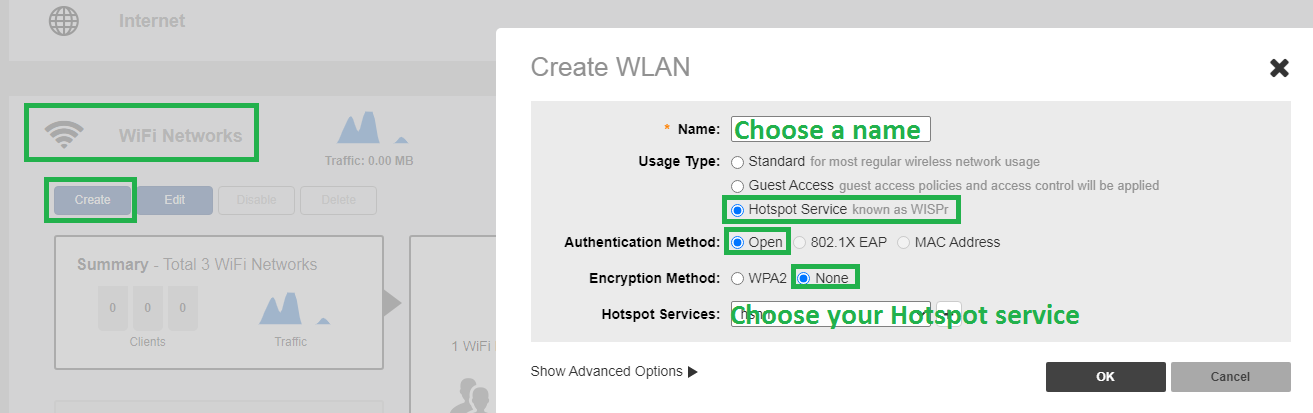
Once completed, click the OK button to save.