
This chapter describes how to configure Ruckus VSCG.
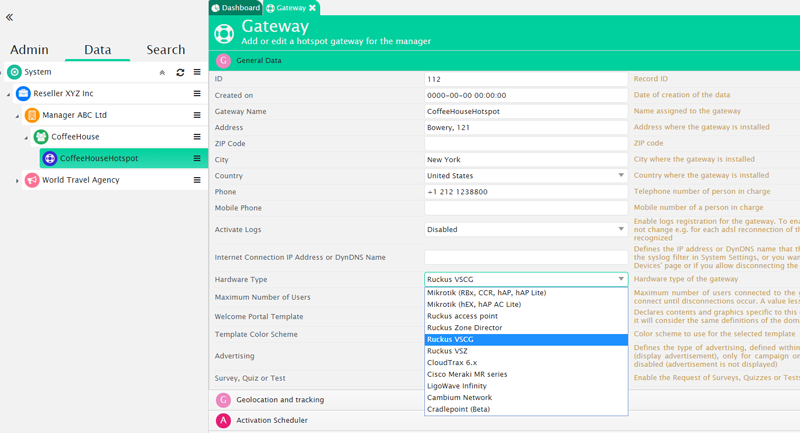
Before proceeding further with the configuration, you need to configure HSNM with a domain and a gateway as described in Adding a New Gateway.
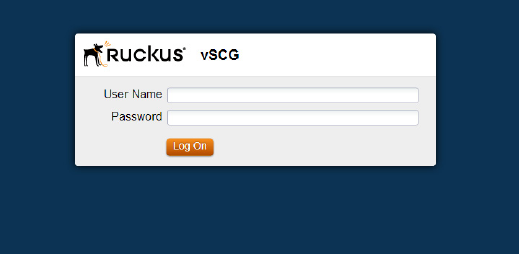
Access your Ruckus VSCG Portal with your credentials or by using the credentials Ruckus provided you with.
Click the Configuration tab at the top, then click Hotspot (WISPr) on the left. Click Create New to create a new Hotspot Profile.
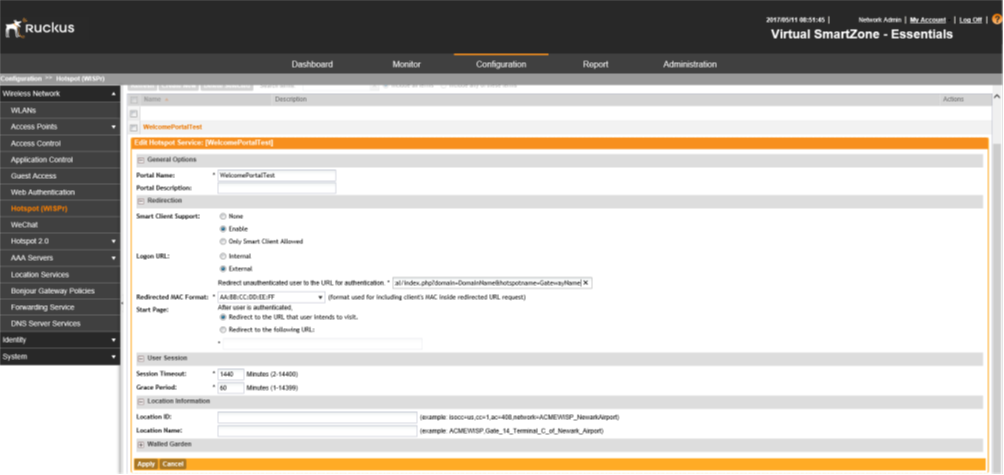
In General Options, specify the “Portal Name” and the “Portal Description”.
In Redirection, tick “Enable” in the Smart Client Support and “External” in the Logon URL. In the “Redirect unauthenticated user to the URL for authentication” field, enter the Appliance Welcome Portal URL where the end user wil be redirected (the URL will be like http://IP_OR_DOMAIN_TO_REACH_HSNM/portal/index.php?domain=DomainNameCreatedOnAppliance&hotspotname=GatewayNameCreatedOnAppliance).
In User Session, you can either change the “Session Timeout” and “Grace Period” or maintain the default values.
Expand the menu of the Walled Garden by clicking the + icon.
Add one by one the walled garden you need for social login, payments, etc.
Click Apply to save the entry.
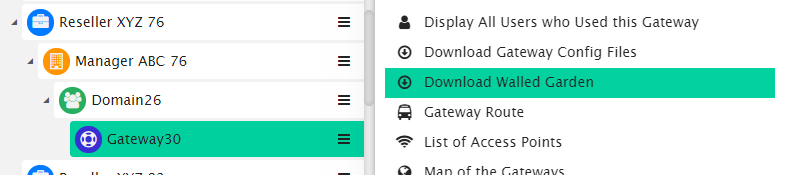
To know the accurate and relevant Walled Garden you need to add one by one, access your HSNM platform and click the contextual dropdown menu of your gateway. Select Download Walled Garden to get a .txt file with your accurate walled garden list as shown Figure Download Walled Garden.
Click the Configuration tab at the top, then click AAA Servers on the left and scroll down to Non- proxy AAA.
In the “Authentication Service” section, click Create New and specify a name and a description.
In the Type field, check the Radius checkbox.
In the Primary Server menu, enter the details as follows:
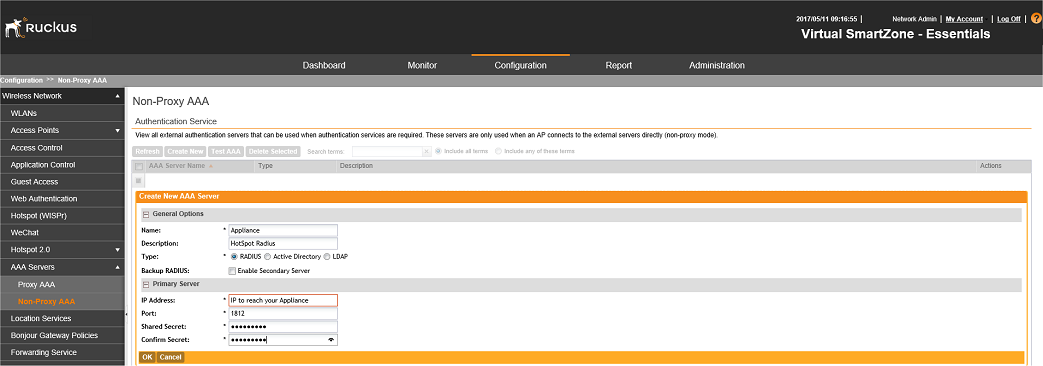
Once completed, click the OK button.
Click the Configuration tab at the top. In the “Accounting Service” section, click Create New and specify a name and a description.
In the Primay Server menu, enter the detals as follows:
Once completed, click the OK button.
Click the Configuration tab at the top and then click WLANs on the left.
Click Create New in the “WLAN Configuration” section.
Then, specify a name, SSID and description for your wireless network that you will configure on your Ruckus AP.
In Hotspot Portal, select the Hotspot (WISpr) Portal created in “Configuring the Hotspot Service”. Then, disable the Bypass CNA option and both the “Use the Controller as Proxy” checkboxes below. Now, select the AAA Server previously created in “Configuring the Radius Server”.
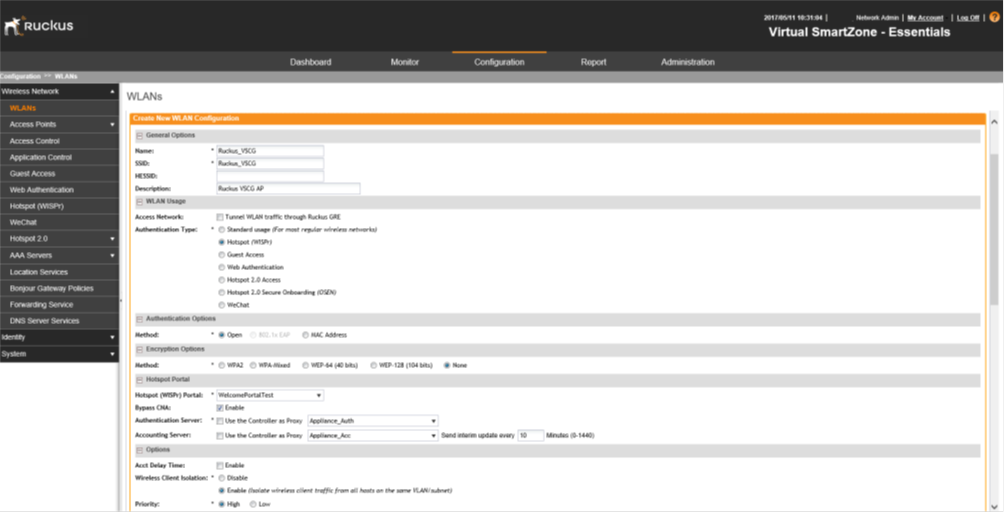
To save the entries, click the OK button.
Click the WLANs menu on the left and then click Create New in the “WLAN Groups” section. Specify a name and a description.
Expand the WLAN List below, find and select the “WLAN Name” that you have just created.
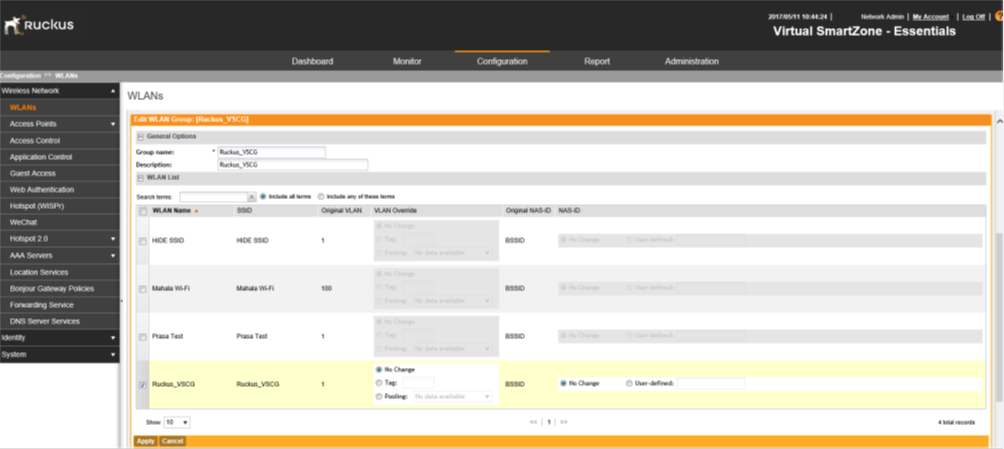
Once completed, click the Apply button.
Install the latest firmware to your AP so that you can configure your Ruckus AP (like Ruckus R300, R500 or R600 etc) and connect to Ruckus VSCG controller.
Make sure that it is is configured as a “Stand Alone” AP.
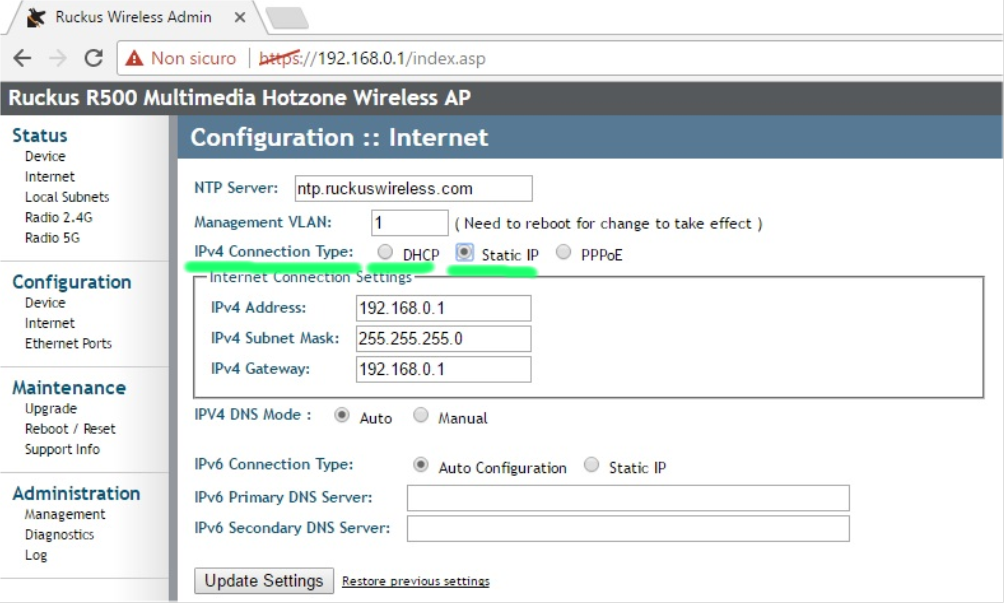
Connect via web to the IP of your AP (generally 192.168.0.1) and from the Configuration section on the left, select Internet.
In the IPv4 Connection Type field, check “Static IP”. Below, set an IP by entering the relevant details according to your network configuration.
Now connect the Ruckus AP to your network. Login through SSH and run this command in order to configure it with Ruckus VSCG controller:

Make sure that the Ruckus AP is able to reach Ruckus VSCG.
Go back to Ruckus VSCG web configuration. Click the Configuration tab at the top and then click the Access Point menu on the left.
Scroll down to APs and click. Now you can view the list of all the APs managed by VSCG.
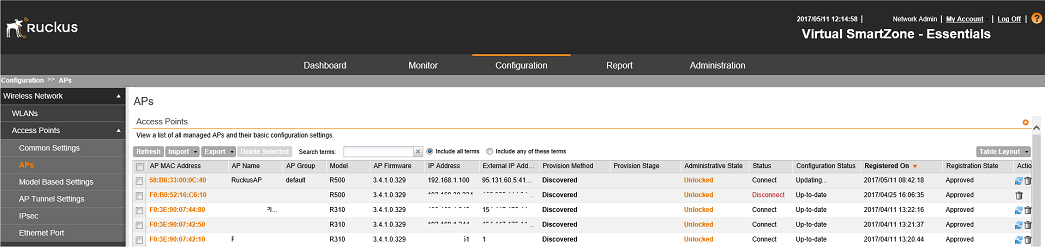
Order the list by clicking on the “Registered on” column. In this way, your AP will be the first to be displayed.
Now click the corresponding “MAC Address” of your AP.
In the Radius Option section, enable the two “WLAN Group” checkboxes and select the “WLAN Group” previously created in “Configuring the WLAN”, Step 3.
Once saved, you have completed your configuration. Now, you can connect a device to the WiFi network of the Ruckus Access Point and you will be redirected to the HSNM Welcome Portal.