This chapter describes how to configure Teltonika-RUT950.
Before proceeding further with the configuration, you need to configure HSNM with a domain and a gateway as described in Adding a New Gateway.
The prerequisites required for configuration are:
Once logged in to your Teltonika-RUT950 router, select the Network menu at the top and scroll down to WAN.
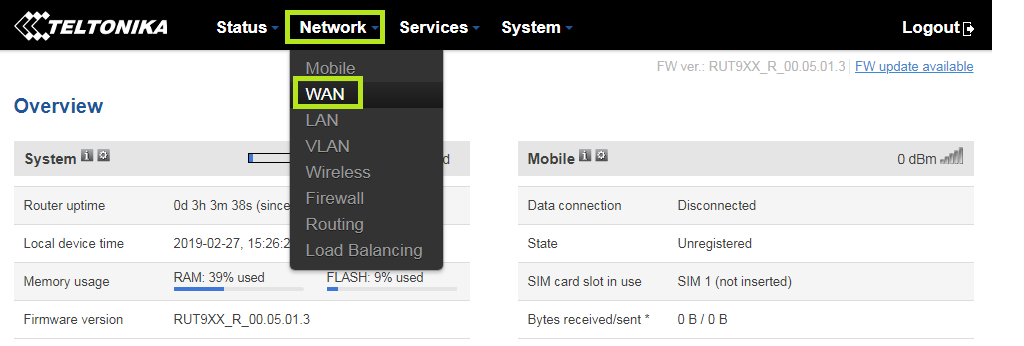
Tick the Wired WAN interface as the main WAN and then click the Edit button.
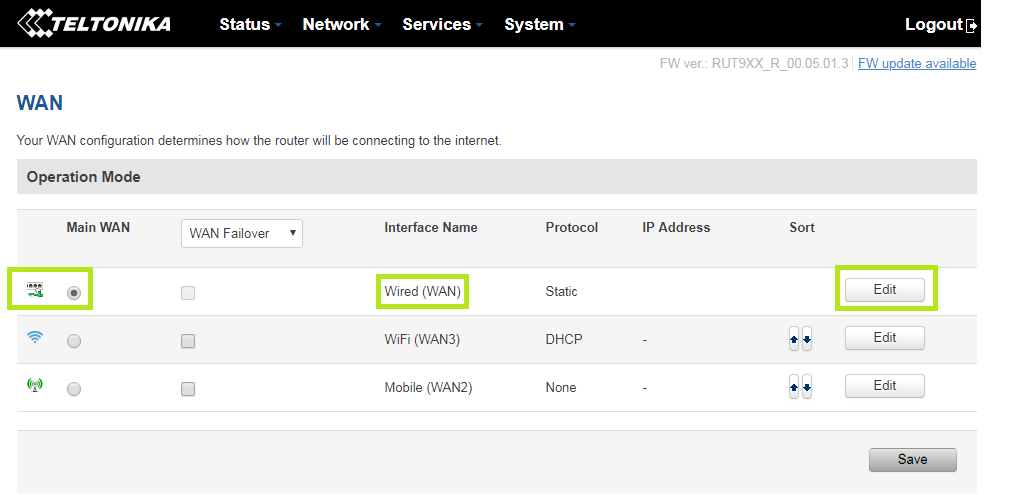
The WAN interface will be connected to your LAN network. Therefore:
Under the General Setup section, enter an IP address. Make sure that you select “Static” in the Protocol field.

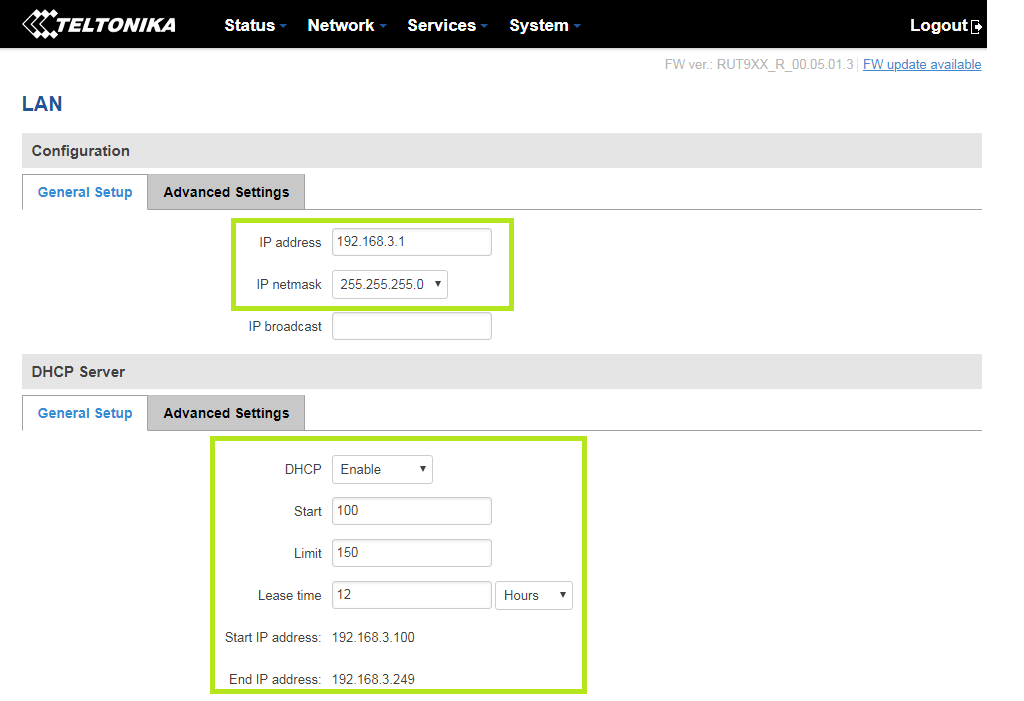
Select the Network menu and then click LAN.
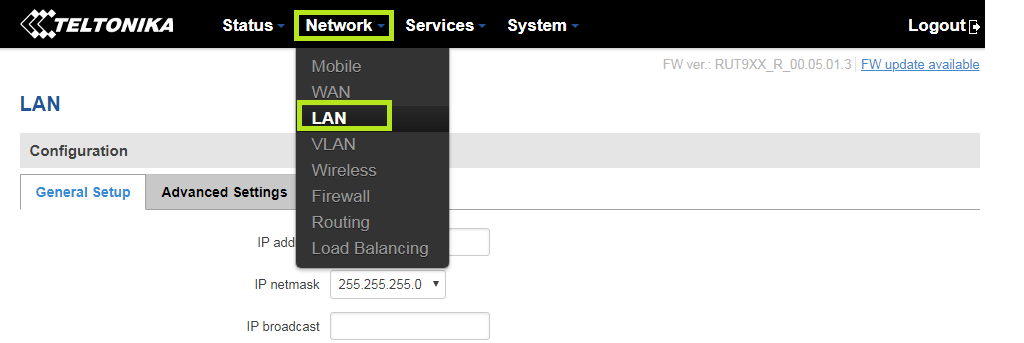
Set up an IP configuration that differs from your company LAN network.
Configure the DHCP server according to your needs.
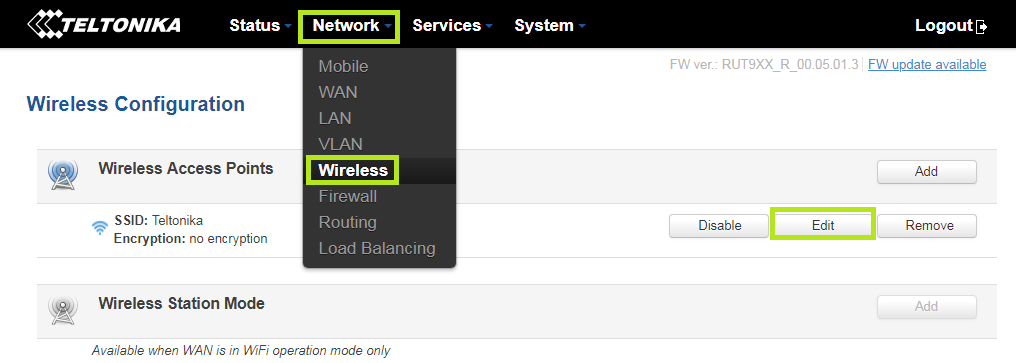
From the Network menu, scroll down to Wireless. Then, click the Edit button.
Under the Device Configuration section, select the General Setup tab. Then, check the Enable Wireless box.
Under the Interface Configuration section, select the General Setup tab and specify an SSID.
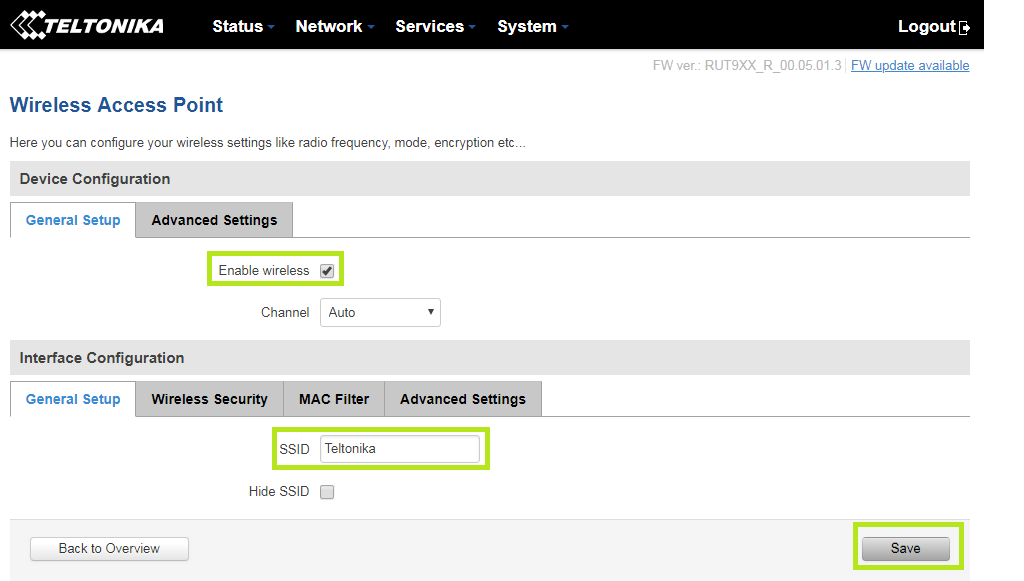
Click the Save button.
Select the Wireless Security tab. In the Encryption field, select “No Encryption”.
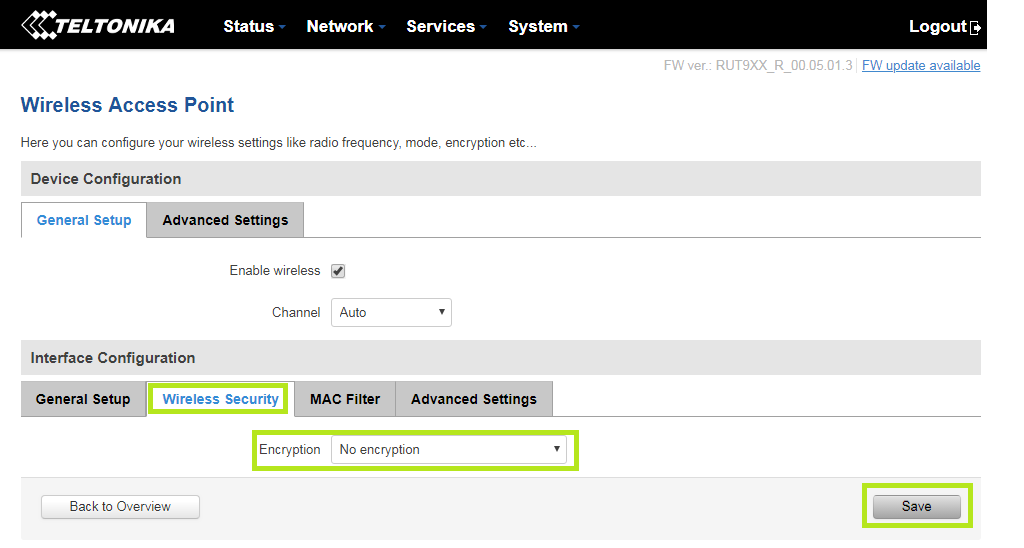
Once completed, click the Save button.
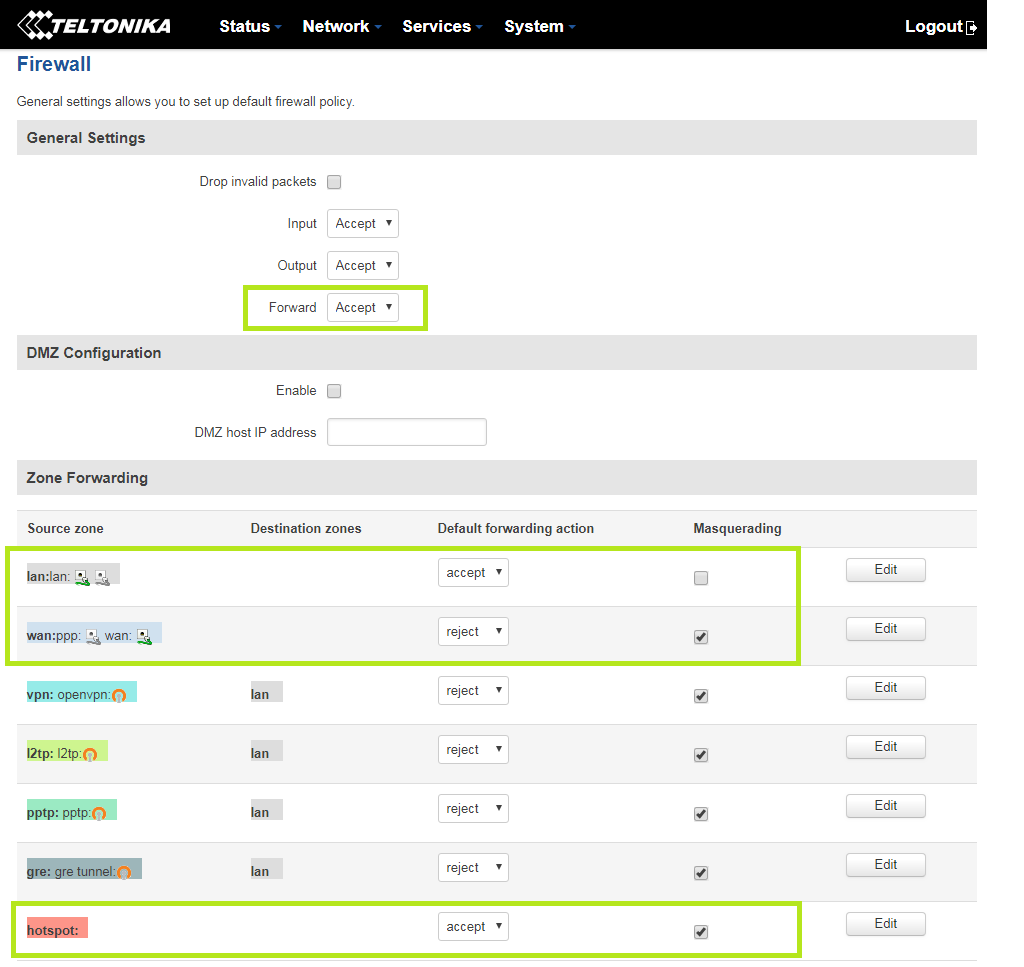
From the Network menu, scroll down to Firewall.
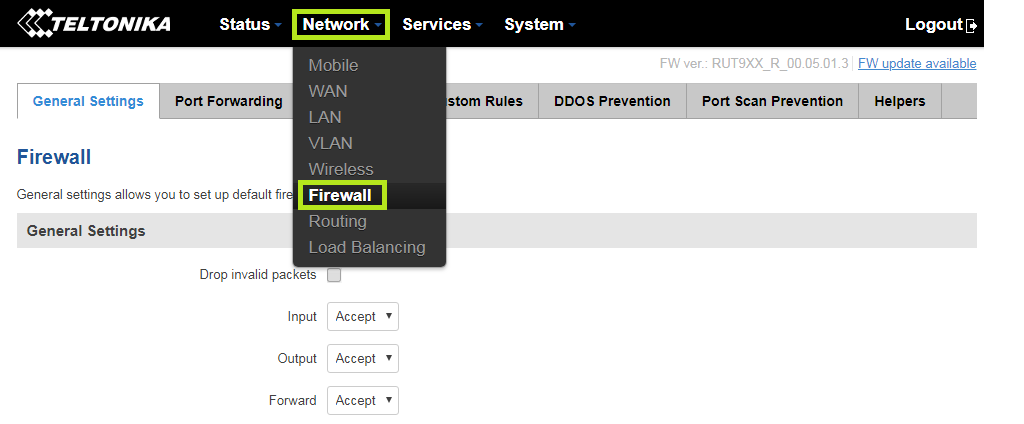
Configure the Firewall as shown in the image below.
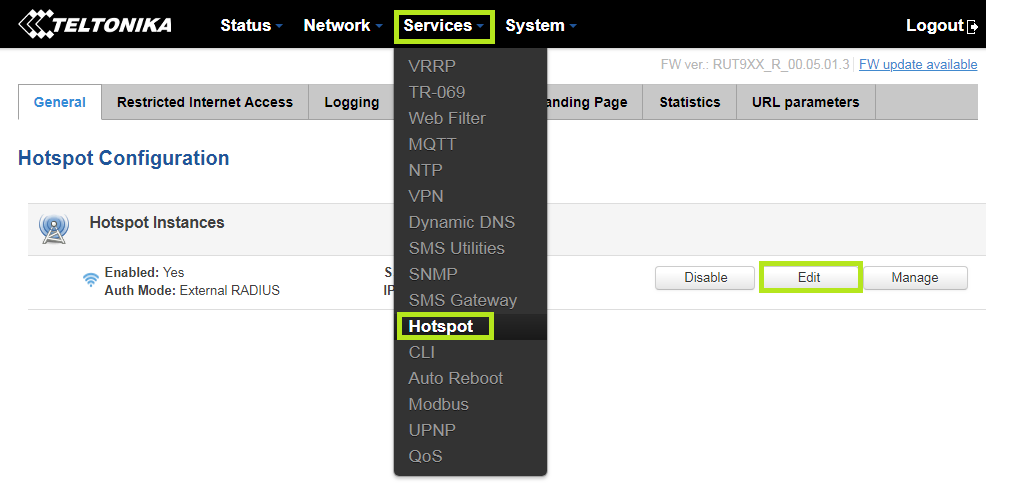
From the Services menu at the top, scroll down to Hotspot. Then click the Edit button.
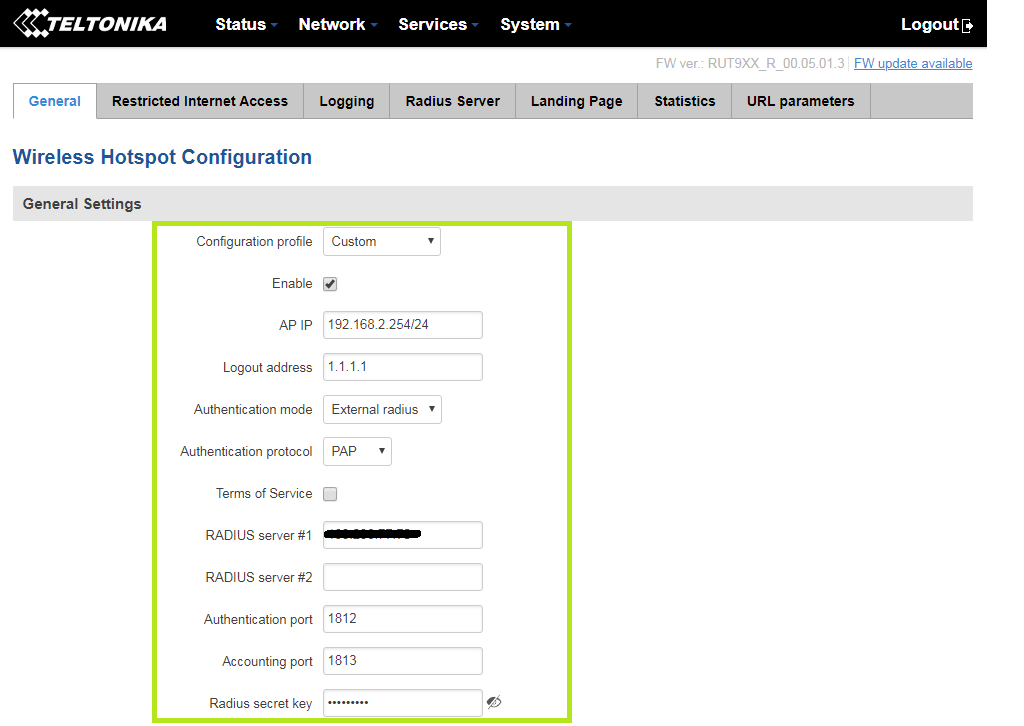
In the General Settings section, enter an IP Address that differs from the WAN and LAN IP Address you have previously inserted.
In the Logout address field, type “1.1.1.1.”
In the Authentication Mode field, select “External Radius”.
In the Authentication protocol field, select “PAP”.
In the Radius server #1 field, enter the Server address used to reach HSNM.
In the Authentication port field, type “1812”.
In the Accounting port field, type “1813”.
In the Radius Secret Key field, enter the radius secret typed in the System Settings session of your HSNM. To know the relevant radius secret, please read the Radius Secret paragraph.
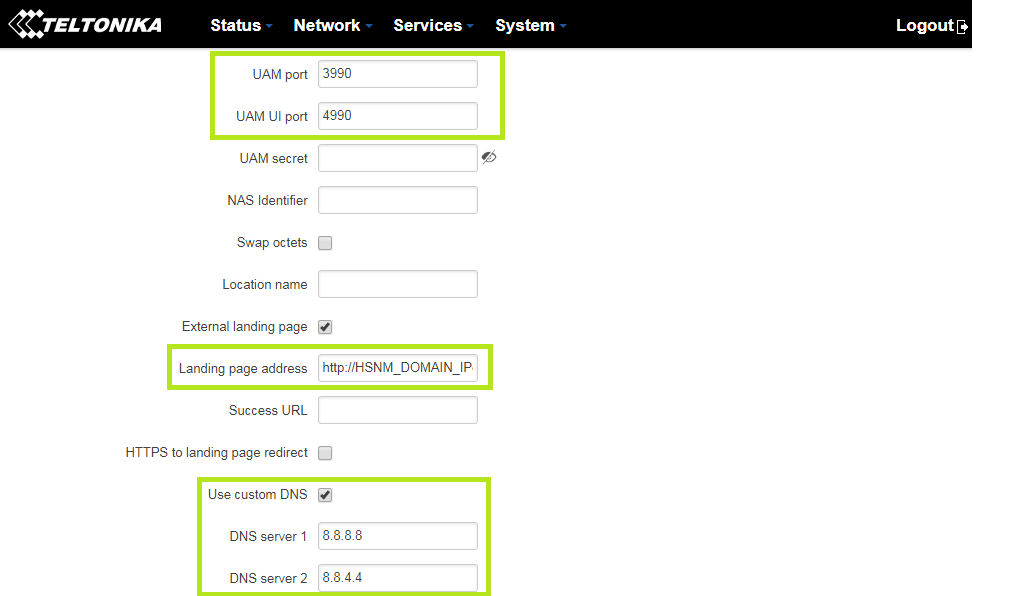
In the UAM PORT and UAM UI PORT fields, maintain the default values.
Check the External landing page box.
In the Landing page address field enter:
http://HSNM_DOMAIN_OR_IP/portal/index.php?hotspotname=GATEWAY_NAME_SET_IN_HSNM
Then configure the Custom DNS server as shown in the image below.
From the Wireless Hotspot Configuration section, add the needed walled gardens in order to be able to reach the Welcome Portal or to be able to use Social Network login.
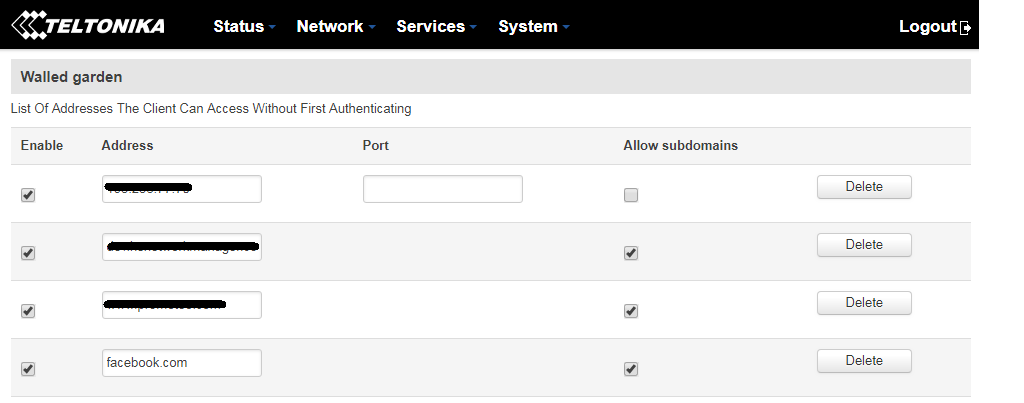
Warning! You need to add the Walled garden URLs in the FQDN domain name format. For example, walled garden such as “facebook” won’t be accepted. The correct format is “facebook.com” or “api.twitter.com” etc…
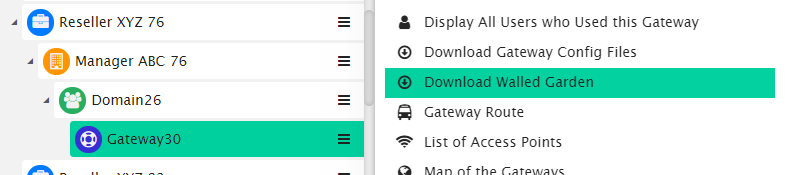
To know the accurate and relevant Walled Garden you need to add one by one, access your HSNM platform and click the contextual dropdown menu of your gateway. Select Download Walled Garden to get a .txt file with your accurate walled garden list as shown Figure Download Walled Garden.