
This chapter describes how to configure FortiGate 60E-POE.
Before proceeding further with the configuration, you need to configure HSNM with a domain and a gateway as described in Adding a New Gateway.
The prerequisites required for configuration are:
Log in to your FortiGate interface.
Click the Network menu on the leftto expand it.
Scroll down to the Interfaces menu.
Click the + Create New button.
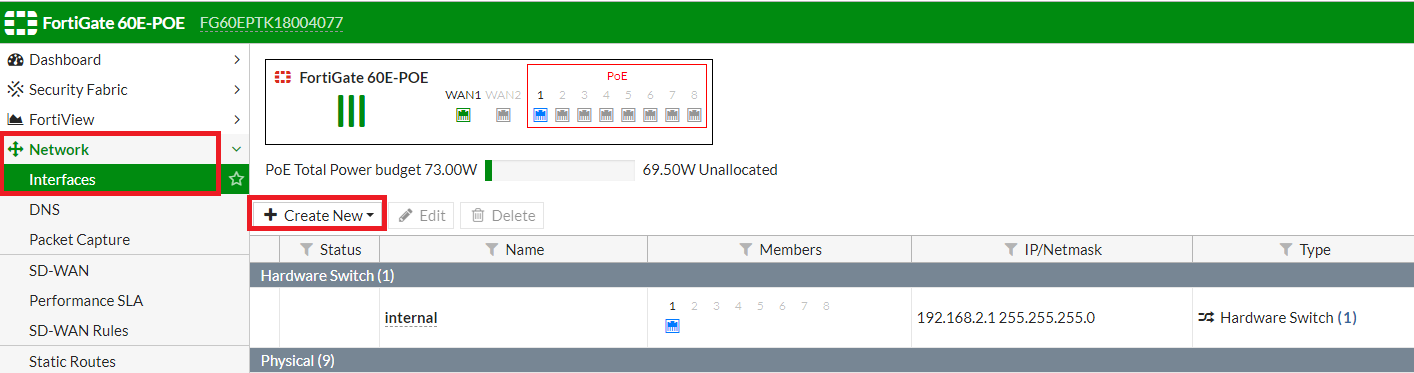
Add an available interface as a member and configure the parameters (based on your network and need) as shown in the example below.
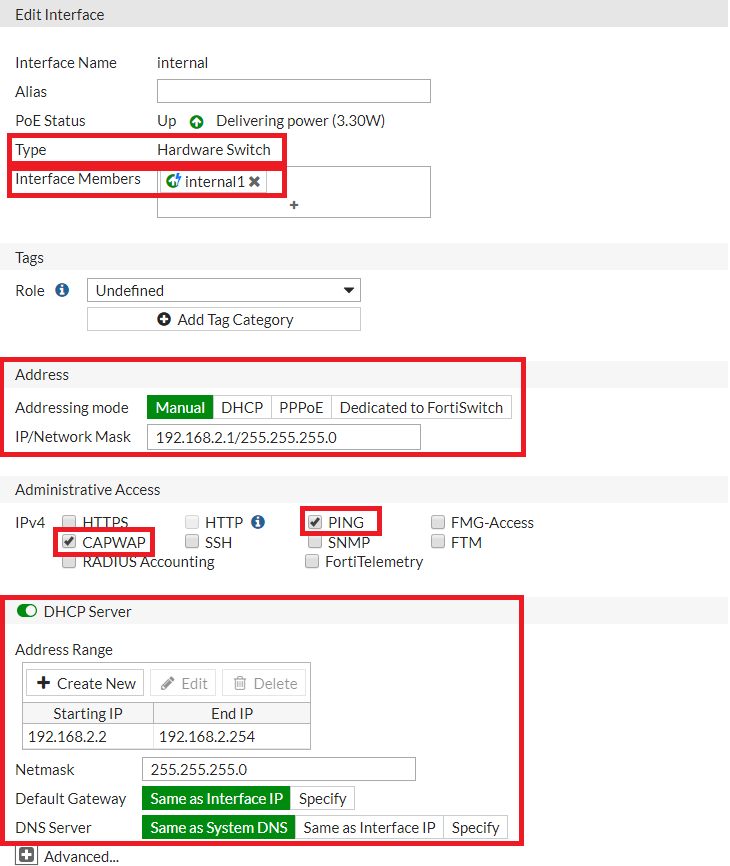
Click OK to save the entries.
Click the Network menu on the left to expand it.
Select the Interfaces menu and then select the WAN1 Interface.
Click the Edit button.
Complete the configuration (based on your network and needs) as shown in the image below.
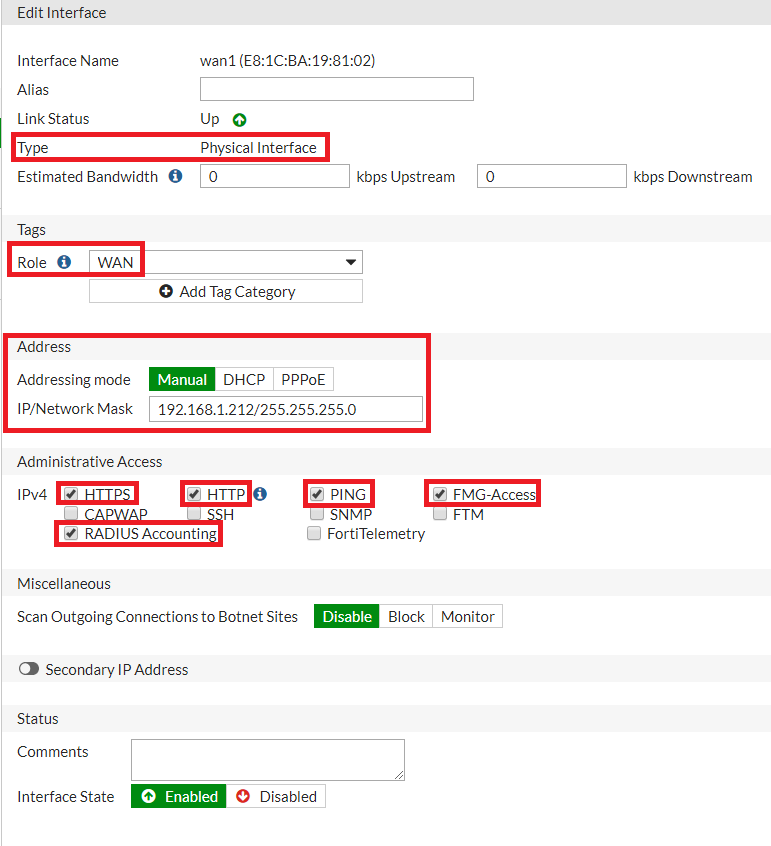
Once completed, click OK.
From the Network menu on the left, select Static Routes.
Click the + Create New button.
Edit the revelavant details according to your network configuration.
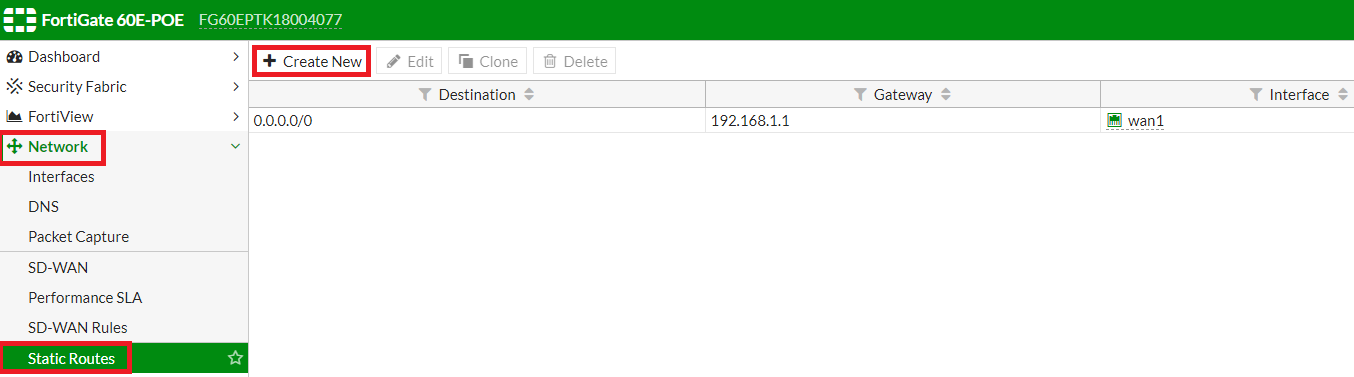
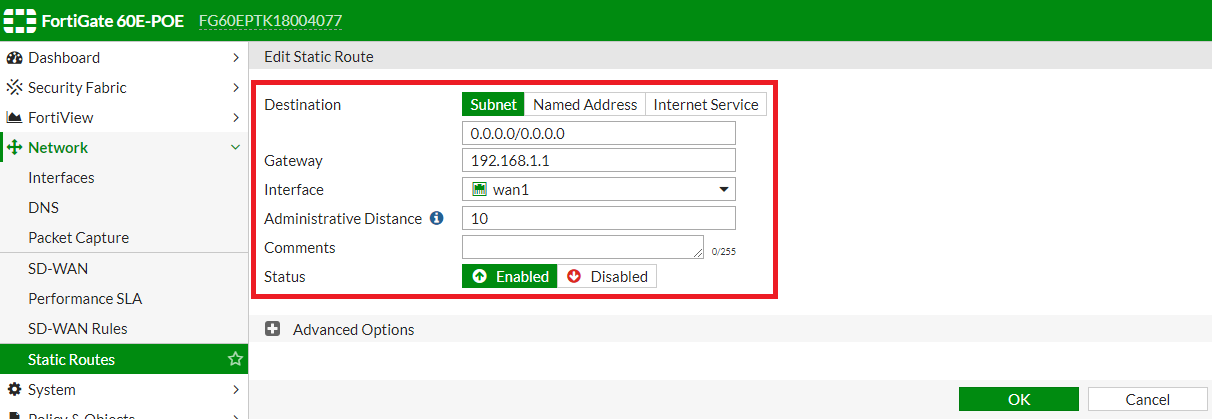
Click OK to save the entry.
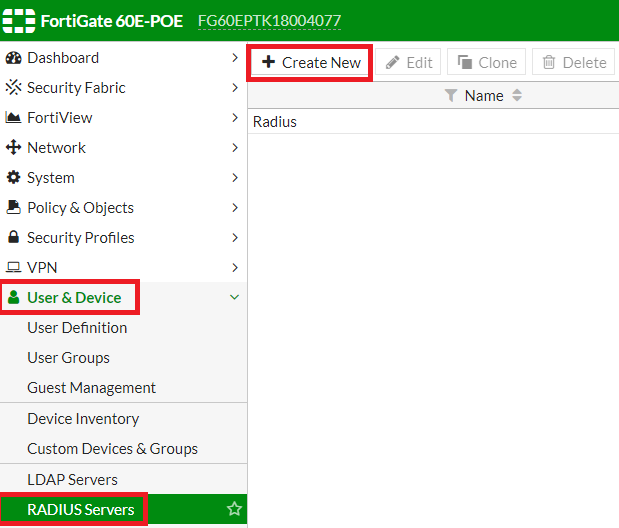
Click the User & Device menu on the left to expand it.
Scroll down to RADIUS Servers.
Click the + Create New button.
Edit the parameters as shown in the image below.
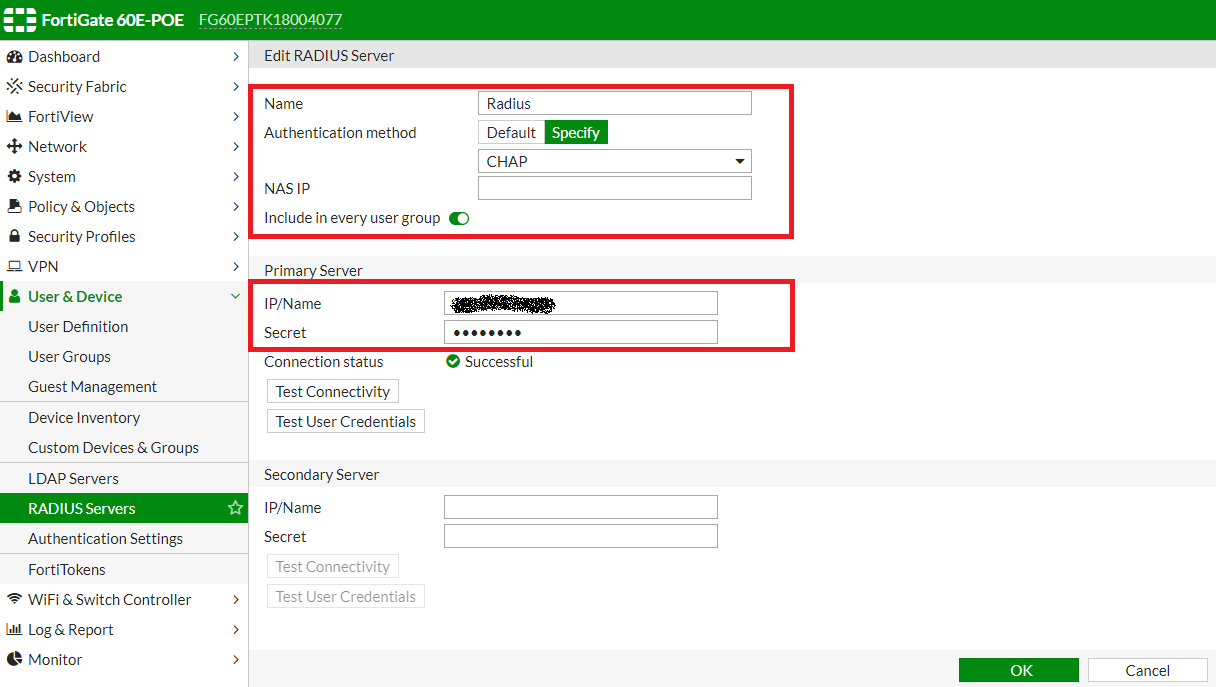
The IP of the primary Radius server is the IP address of your HSNM while the secret is the one you set in your HSNM configuration.
Click OK to save the entries.
From the Users & Devices menu on the left, select User Groups.
From the right window, click the + Create New button.
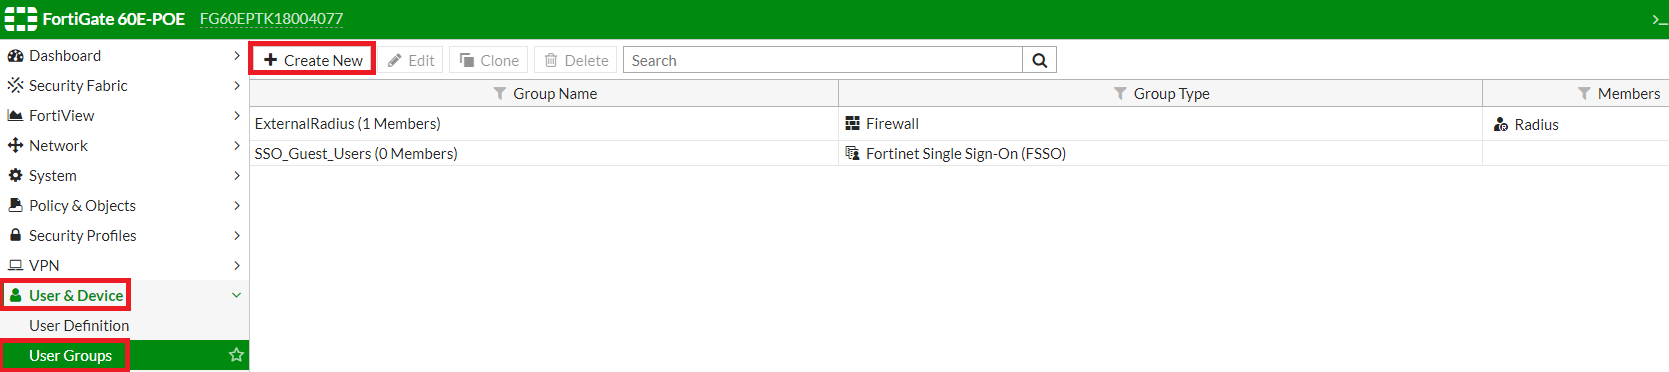
Edit the parameters as shown in the image below.
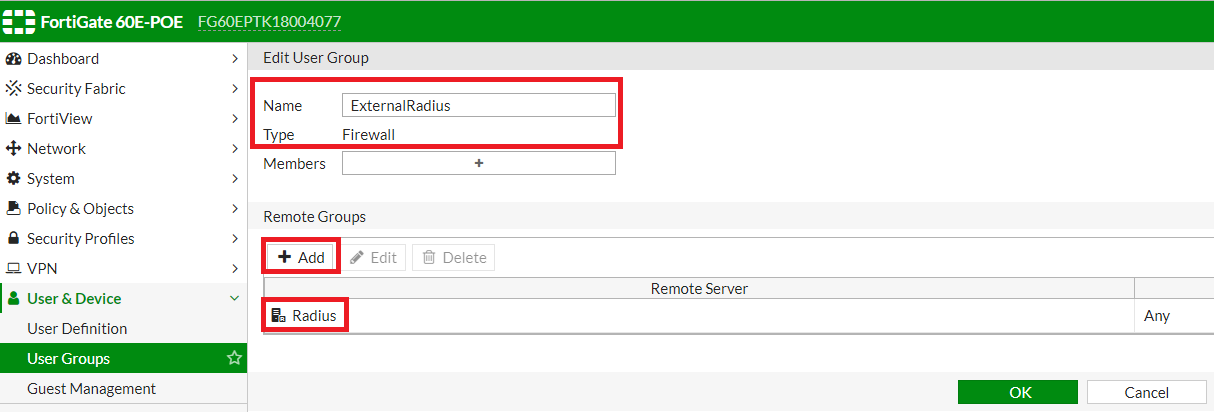
In the Remote Groups section, select the Radius server you have just created in Configuring a Radius Server.
Click OK to save the entries.
Expand the Users & Devices menu on the left.
Select WiFi & Switch Controller and then scroll down to SSID.
From the right window, click the + Create New button.
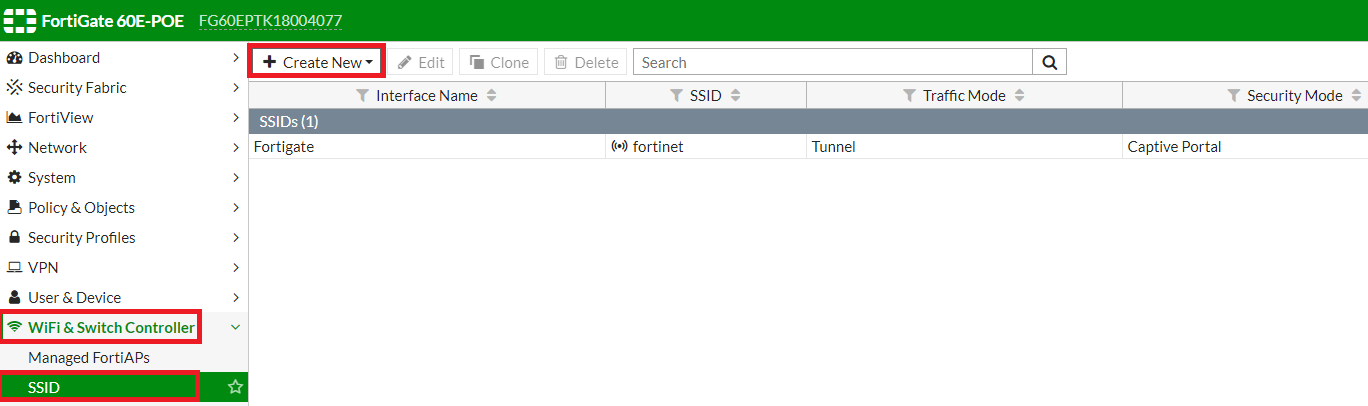
Edit the parameters as shown in the image below.
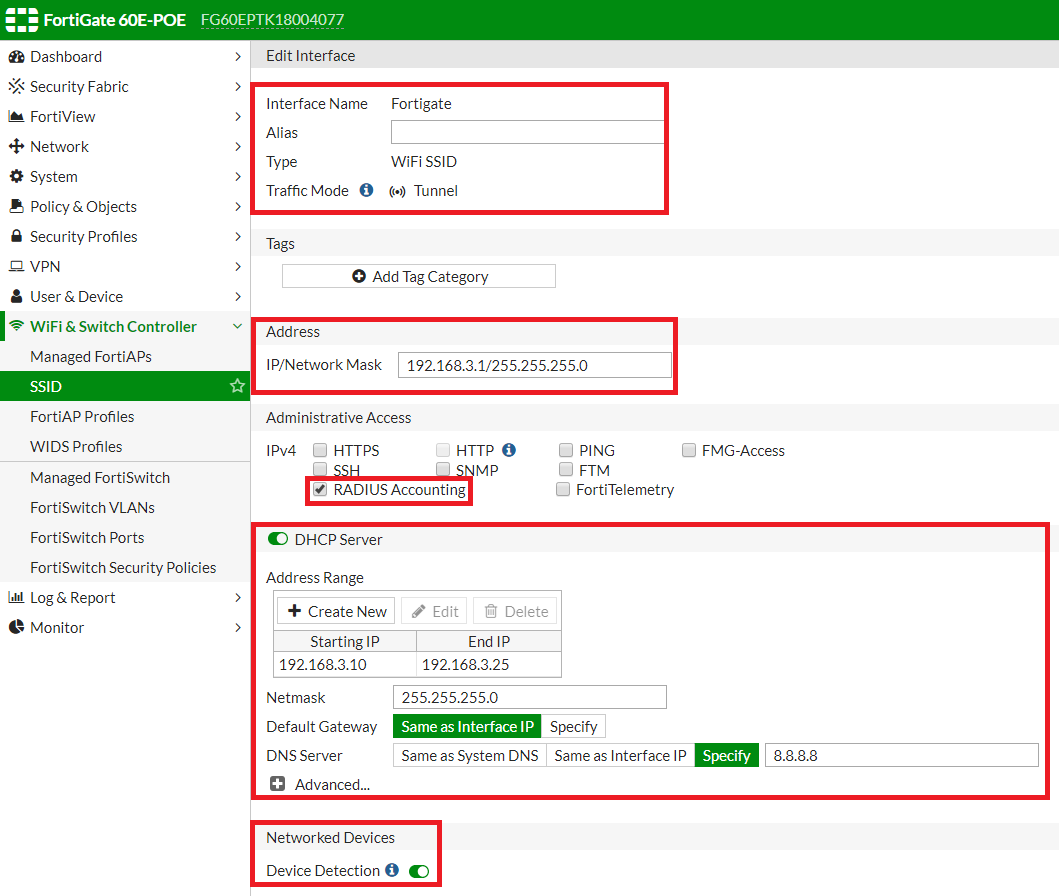
In the Authentication Portal field, tick External.
Now you need to edit the URL where users are redirected in order to reach the HSNM welcome portal. The URL is: HSNM_DOMAIN_OR_IP/portal/index.php?hotspotname=GATEWAY_NAME_SET_IN_HSNM
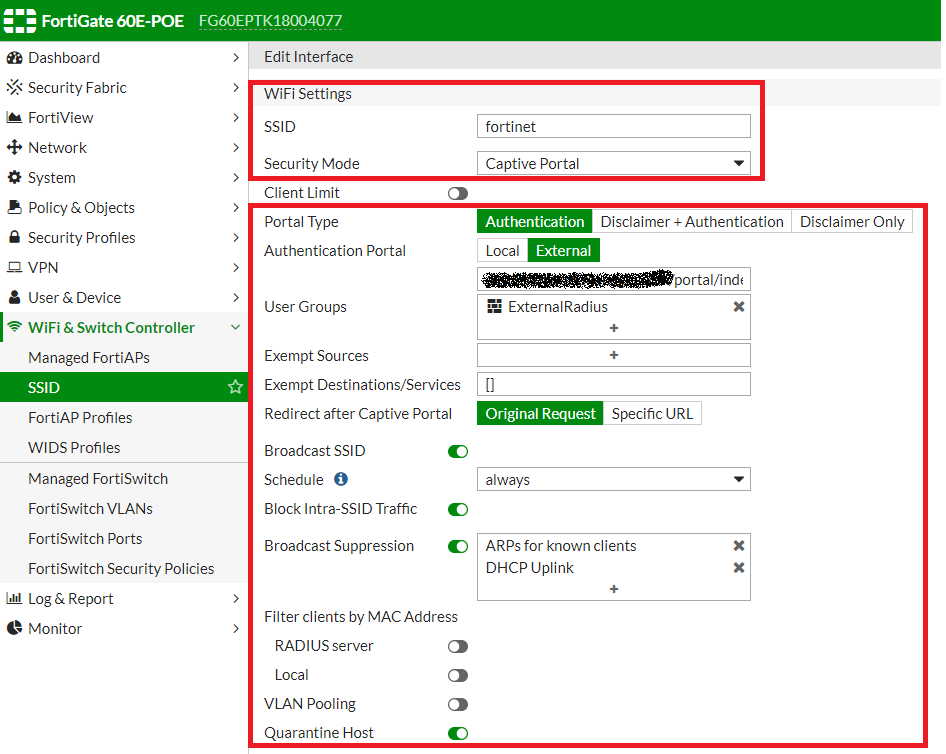
Warning! Do not edit any HTTP (http://) or HTTPS (https://) protocol before the FQDN.
Click OK to save.
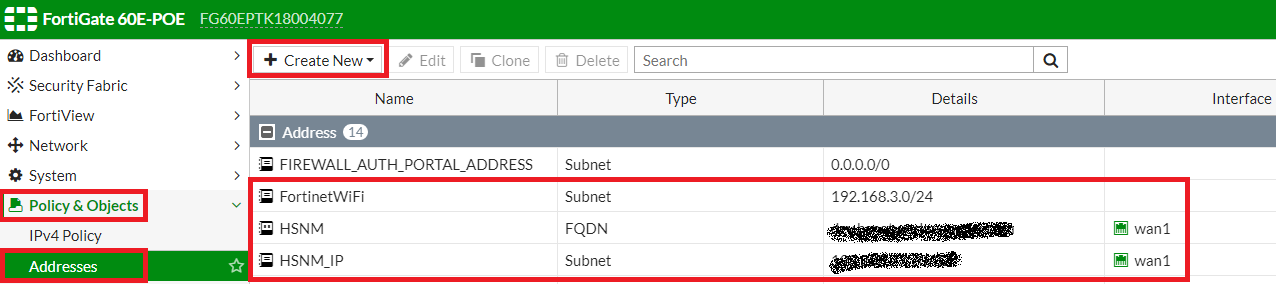
Expand the Policy & Objects menu on the left.
Scroll down to Addresses.
From the right window, click the + Create New button.
Enter the relevant information:
add entries for the IP of the WiFi network created in the Configuring SSID for the Hotspot WiFi Network paragraph, IP address and FQDN, if you have one, for your HSNM as shown in the image below
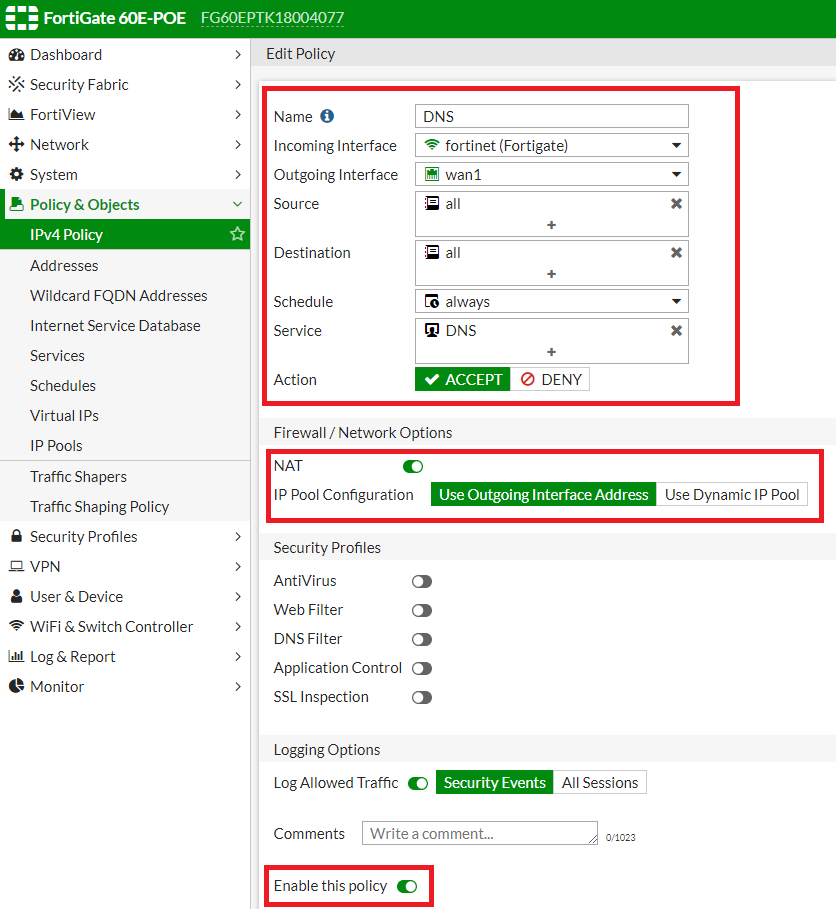
Expand the Policy & Objects menu on the left.
Scroll down to IPv4 Policy.
Click the + Create New button.

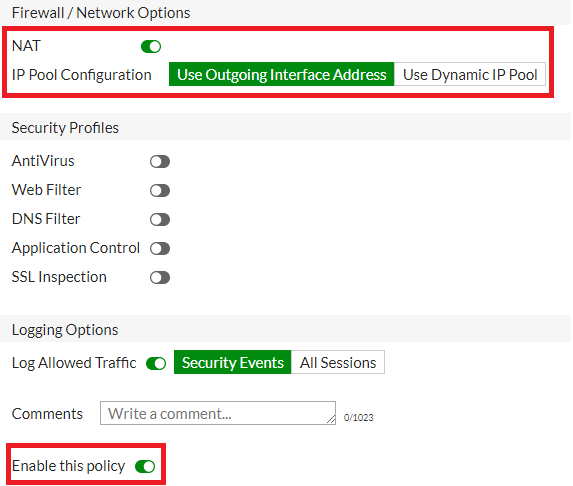
Create a Policy for your DNS as shown in the image below.
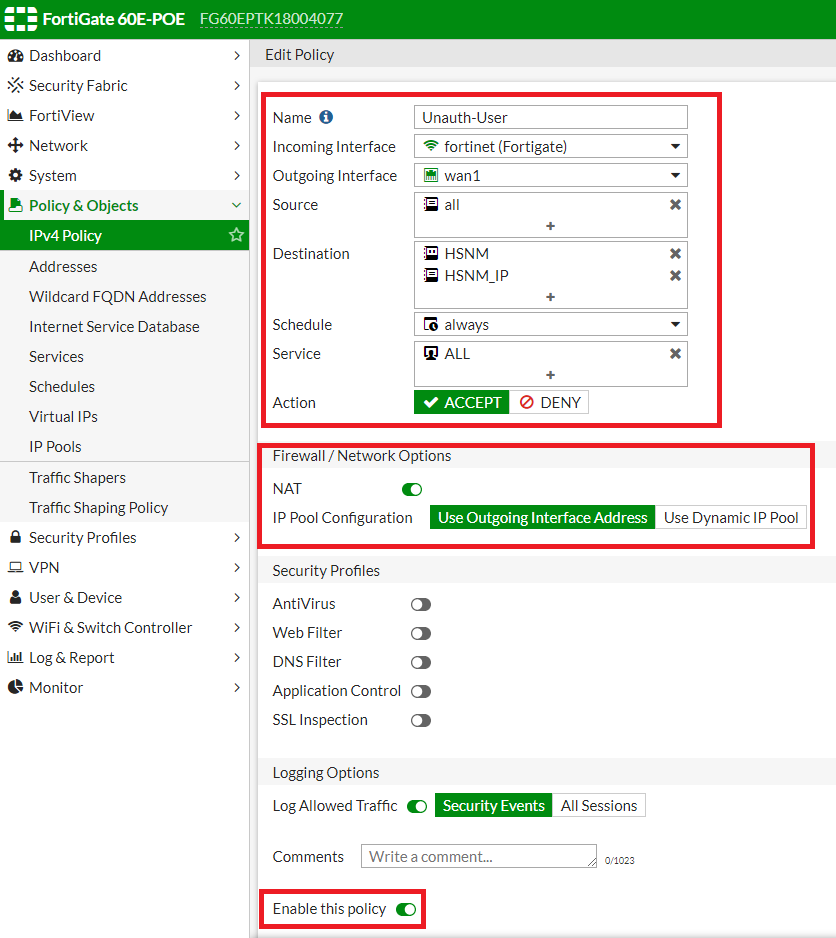
Then, create a Policy to authenticate users.
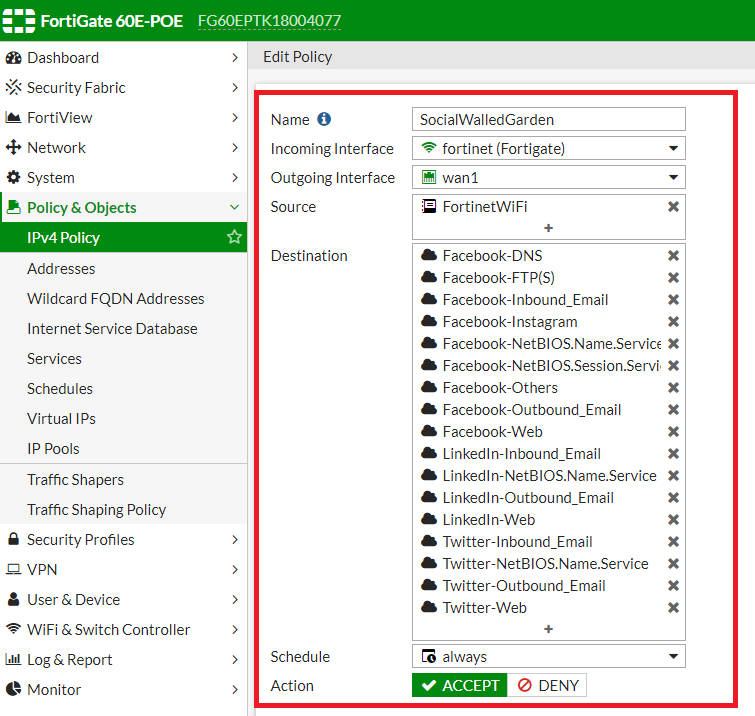
Then the Policy (if any) for social login.
Lastly, configure an outbound rule to let the customers surf the web after the login.
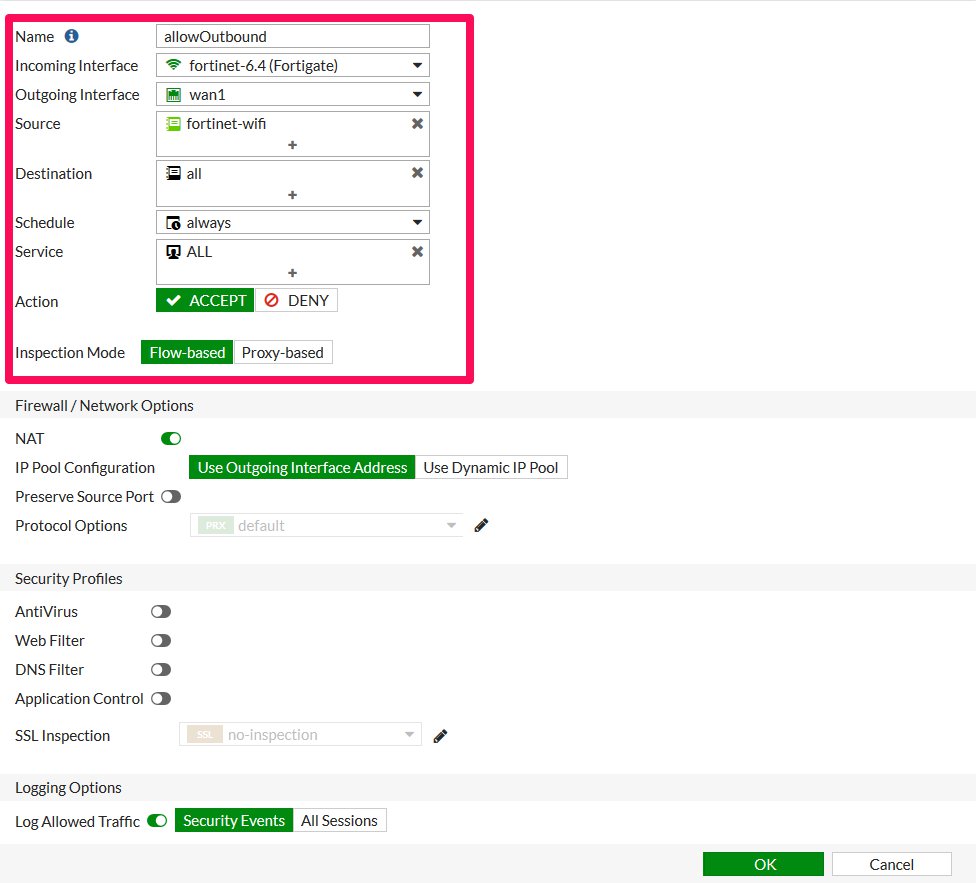
Once completed, click the OK button.
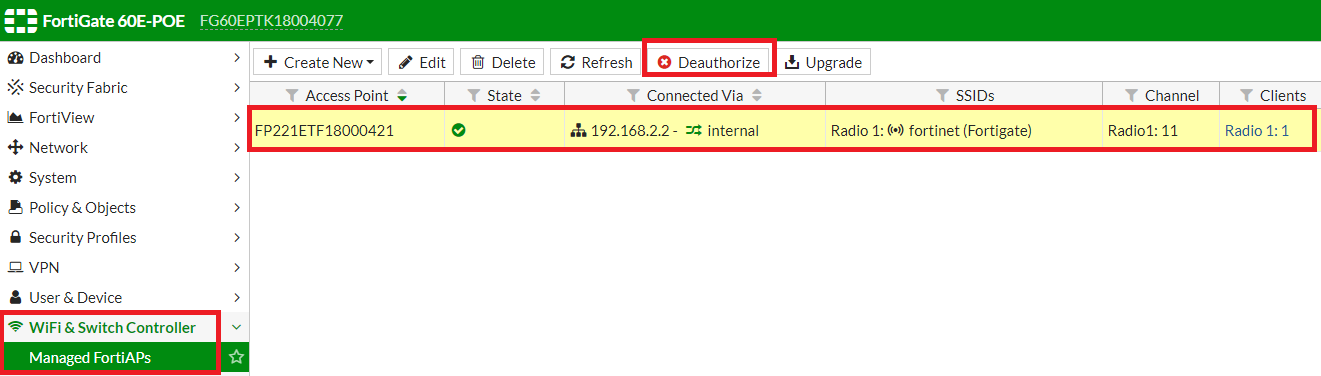
This session describes how to authorize an AP configured in the Configuring the AP Interface paragraph
Expand the WiFi & Switch Controller menu on the left.
Scroll down to Managed FortiAPs.
A list of managed or unmanaged FortiAPs will appear. Select your AP and click the Authorize button at the top to allow FortiGate to manage it.
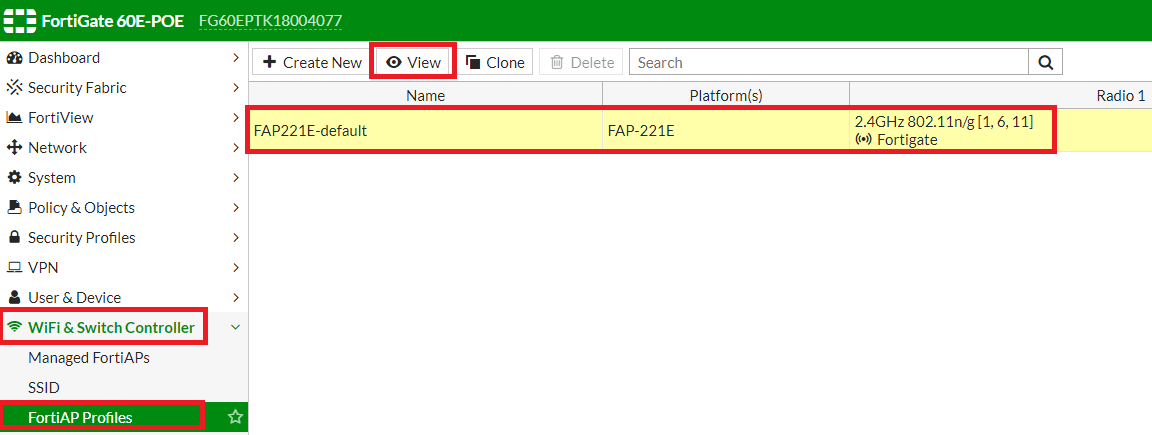
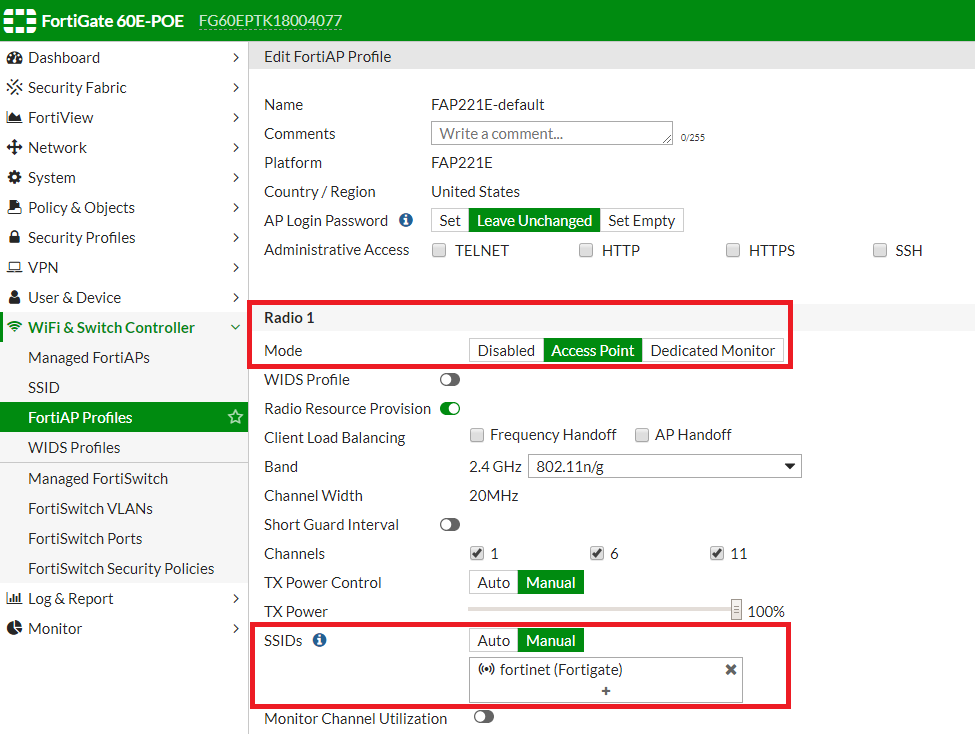
From the WiFi & Switch Controller menu on the left, click FortiAP Profiles.
Select the default profile available in the list.
Click the View button.
In the Radio1 section, tick Access Point.
In the SSIDs field, add the SSID previously created in “Configuring SSID for the Hotspot WiFi Network”.
In this way, connected AP, will take the configuration profile just created in the FortiGate.
At this point, the configurations are almost completed. Yet, before users are able to connect and reach the HSNM Welcome Portal, you need to enter some commands from the FortiGate CLI.
Open the FortiGate CLI from the top right corner of your FortiGate Web GUI.

To configure Radius accounting server, type this command:
The policy ID can be found from the ID column of the policy list. The policy ID to choose is the one you created for Unauthenticated user.
Now, the configuration for your FortiGate and FortiAP is completed. Therefore, users are able to connect to the Hotspot network and reach the HSNM Welcome Portal in order to sign in and be authenticated for surfing.