
This chapter describes how to configure the EnGenius Controller.
Before proceeding further with the configuration, you need to configure HSNM with a domain and a gateway, as described in Adding a New Gateway.
The prerequisites required for configuration are:
Log in to your EnGenius Cloud interface.
At the top left, click Configure > Access Points > SSID
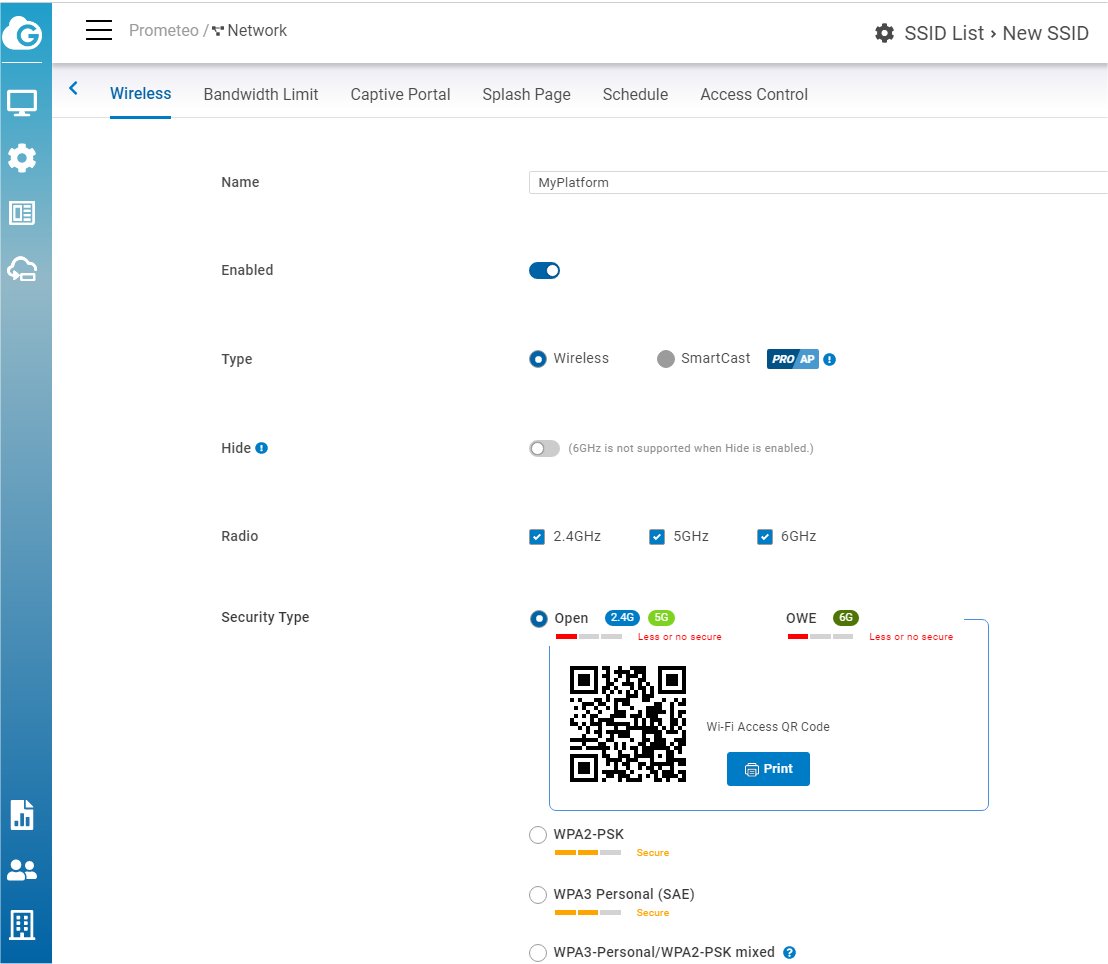
On the right, click + Add SSID. By clicking on the Add button, you are redirected to a page that allows you to add a new profile. This page is divided into six sessions (Wireless, Bandwidth Splash Page, Schedule and Access Control).

In the Wireless session, make sure Enabled is switched ON.
Enter the details as follows:
Click Apply to save the entry.
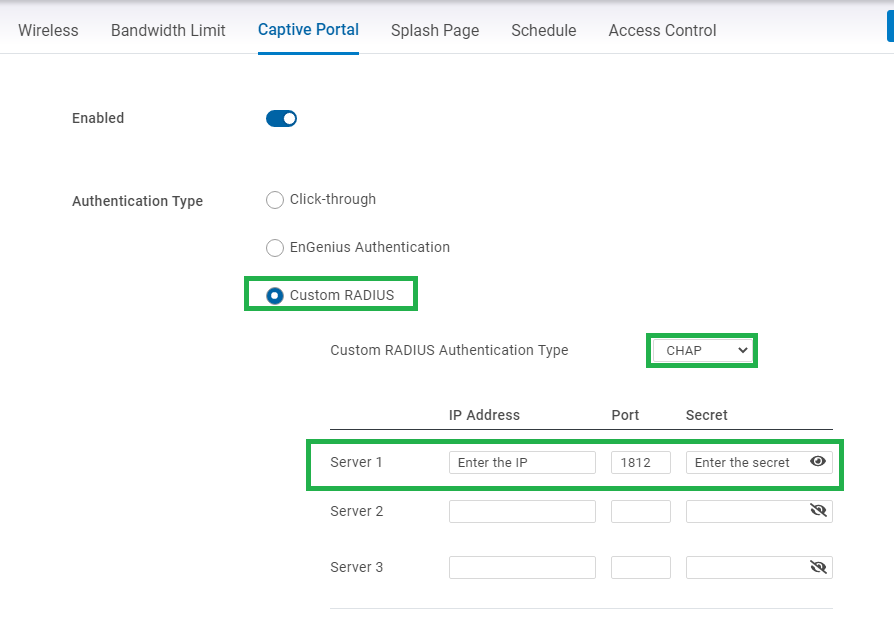
Move to Captive Portal. Switch Enabled to ON.
In the Authentication Type, select Custom Radius.
In the Custom RADIUS Authentication Type session, enter the details as follow:
Scroll down and tick Accounting Server, then enter the details as follow:
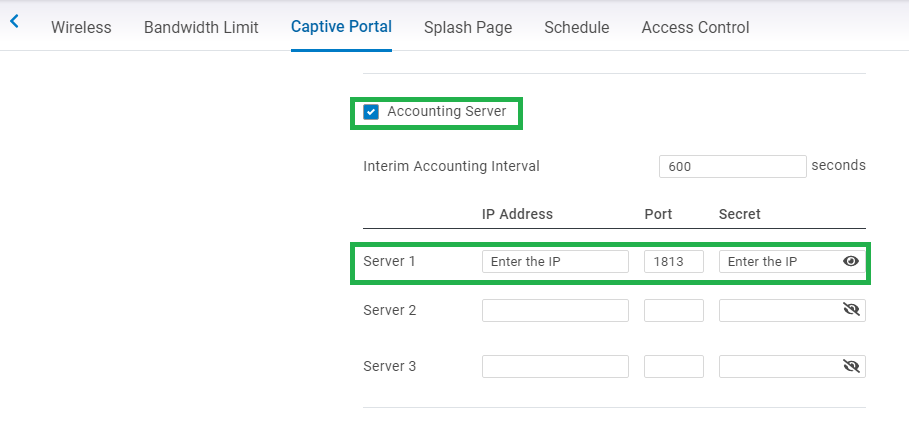
Click Apply to save the entry.
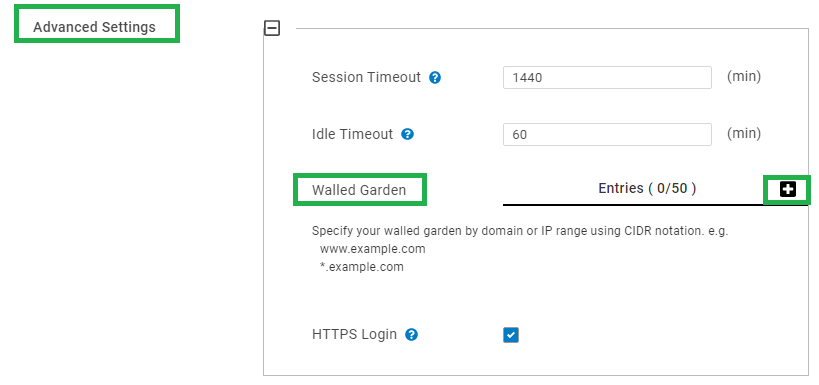
To set up the walled gardens, continue from the page just described in the previous steps and enter the walled garden list.
Scroll down to Advanced Settings.
In the Walled Garden session, you must specify your walled garden by domain or IP range. HSNM’s IP or domain is a required entry, otherwise the redirection will not work correctly.
Enable HTTPS Login if require the HTTPS. You need to have a valid SSL certificate loaded into HSNM.
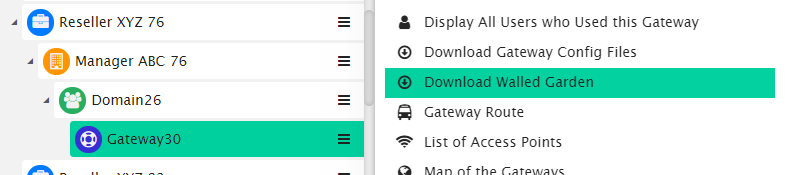
To know the accurate and relevant Walled Garden, you need to add one by one, access your v platform and click the contextual dropdown menu of your gateway. Then, select Download Walled Garden to get a .txt file with your accurate walled garden list, as shown in Figure Download Walled Garden.
Once you’ve completed the configuration of the walled garden, click the Apply button.
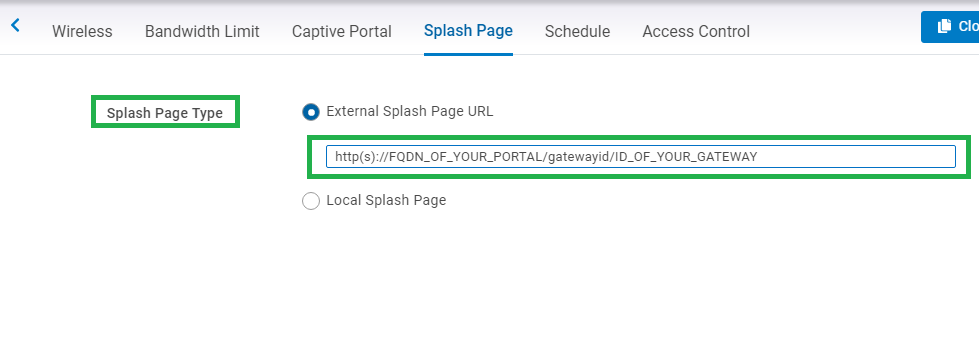
In the Splash Page Type, tick External Splash Page URL.
Specify the Welcome Portal URL in the following format: http(s)://FQDN_OF_YOUR_PORTAL/gatewayid/ID_OF_YOUR_GATEWAY where the ID_OF_YOUR_GATEWAY stands for the ID you can find in your HSNM’s Gateway.
Click Apply to save the entry.
Once you have set all the steps described above, you will get your EnGenius Controller configured and ready to work with HSNM.