
This chapter describes how to configure TP-Link Omada Controller and EAP AP with software version less than 4.0.
Before proceeding further with the configuration, you need to have a HSNM with a domain and a gateway as described in Adding a New Gateway.
The prerequisites required for configuration are:
Download the Omada controller from TP-Link official website: https://www.tp-link.com/it/support/download/eap-controller/#Controller_Software. You can choose between the 32bit and 64bit version.
You need to install the controller in a computer that is on the same network of where you will connect the EAP Access Point. In order to be able to manage the EAP through the Controller, you need to connect both of them on the same network.
Before proceeding with configuring the Controller, be sure you have connected the EAP Access point in order the Controller is able to recognize it and manage it.
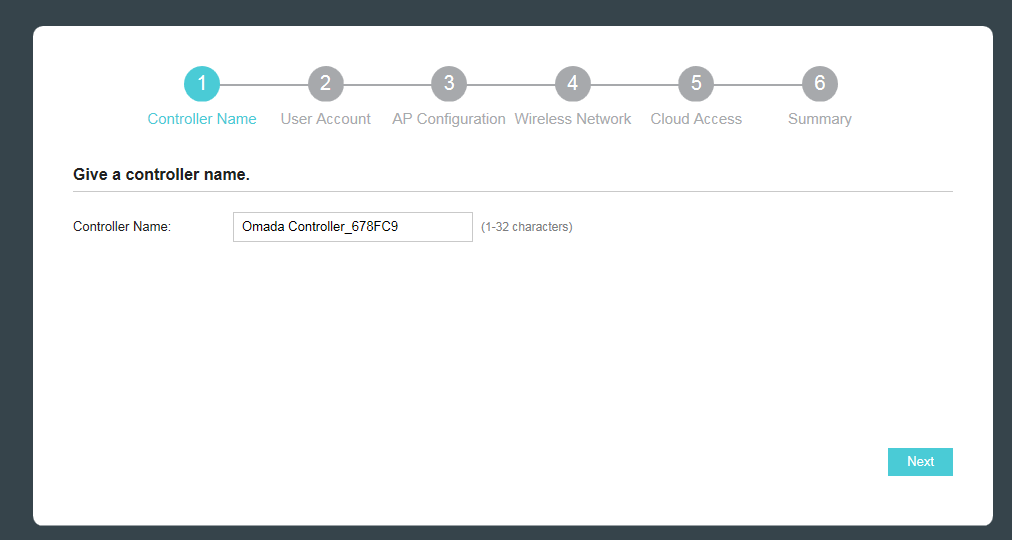
Once the controller has been installed, you can start it by double clicking the TP-Link icon created on your desktop.
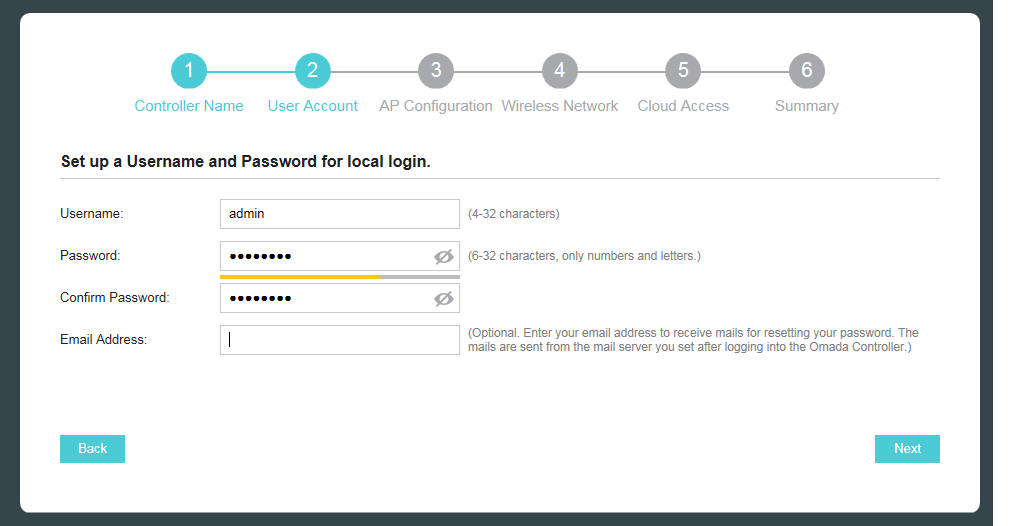
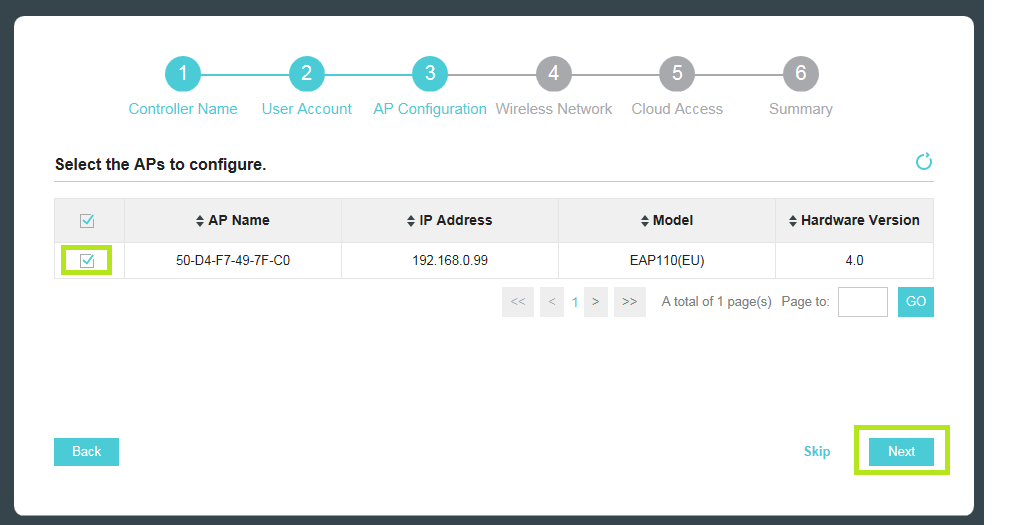
Follow now the wizard to configure the Controller and to be able to manage EAP Access Point:
If you have connected your EAP Access Point as previously described, it will appear during the controller configuration wizard.
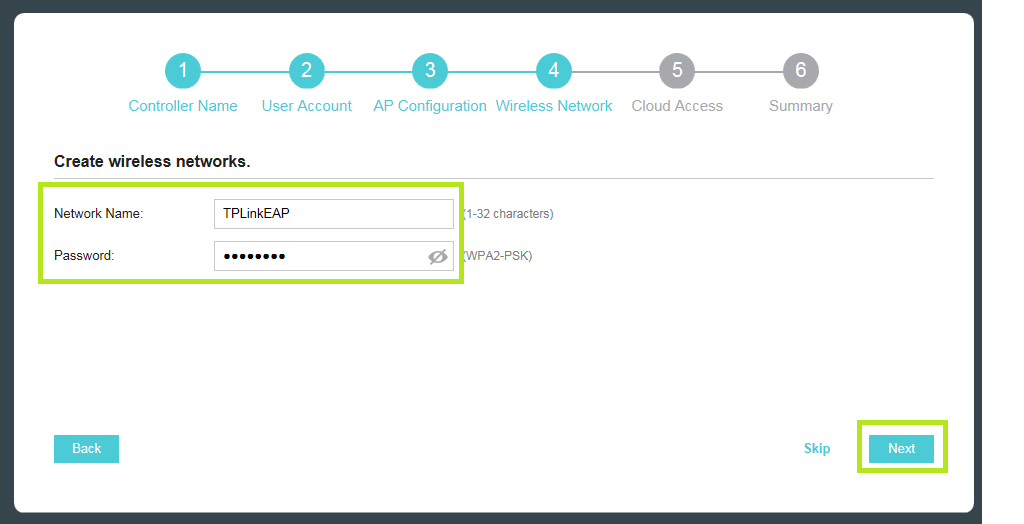
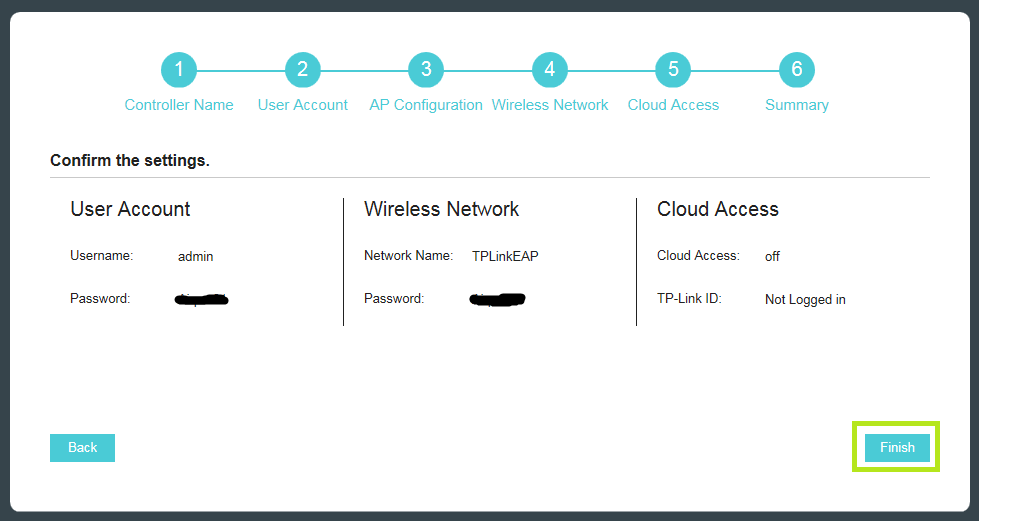
At Step 4, the wizard requires you to configure an SSID and to enter a password. You can skip this step and create an SSID without a password later but, if you want, you can follow the wizard creating an SSID with a password and remove the password after. Here we followed the wizard.
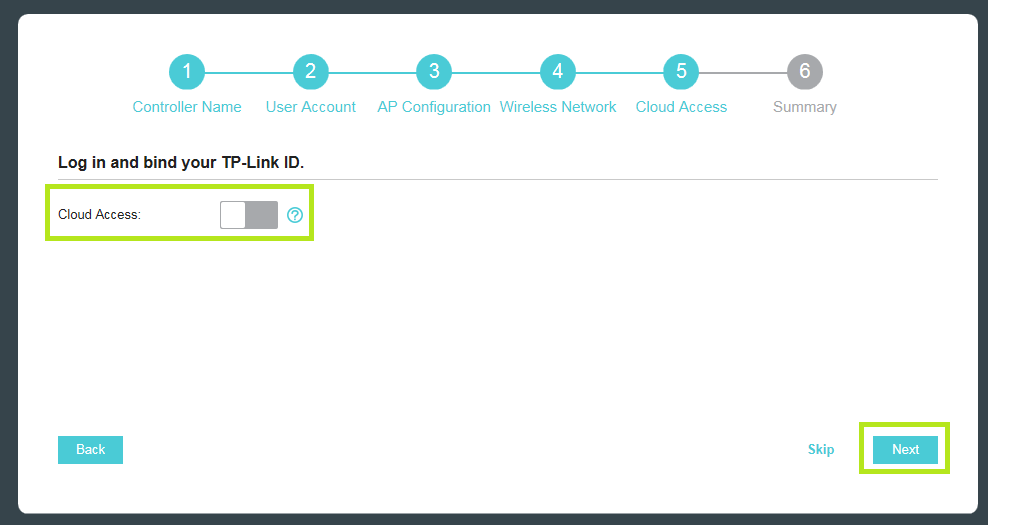
If you want, in order to be able to manage the controller you installed on your computer remotely, you can enable the Cloud Access and configure it following the TP-Link documentation. In the example, we disabled it because it is not mandatory for getting the controller working with HSNM.
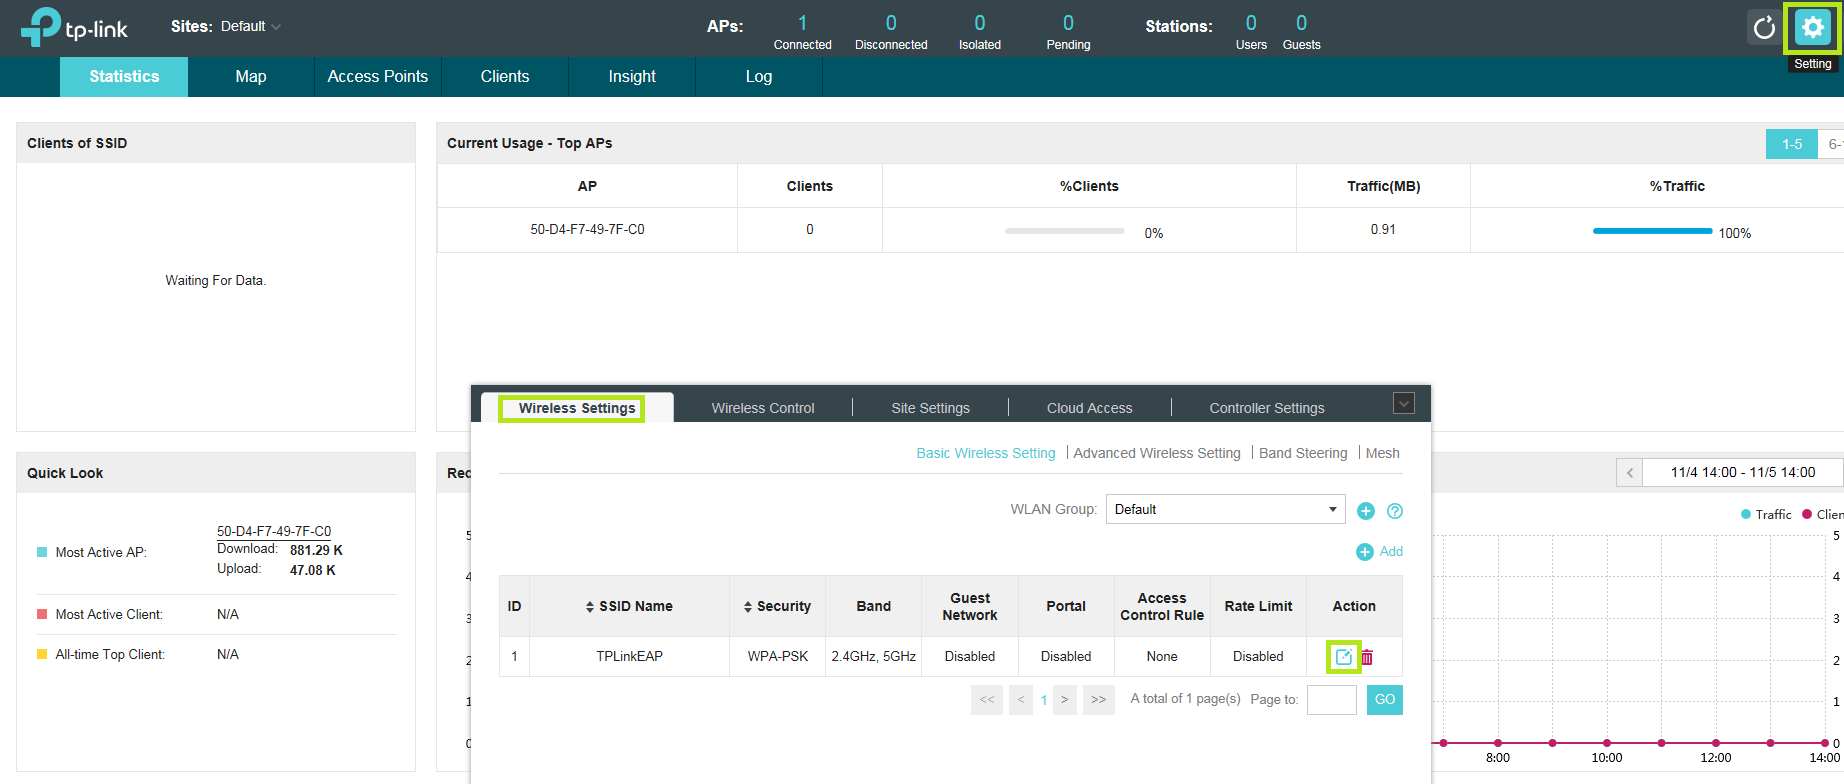
Once logged in to the controller, click the Settings button on the upper right corner of the management interface.
Go to Wireless Settings and from the menu, click the Edit button.
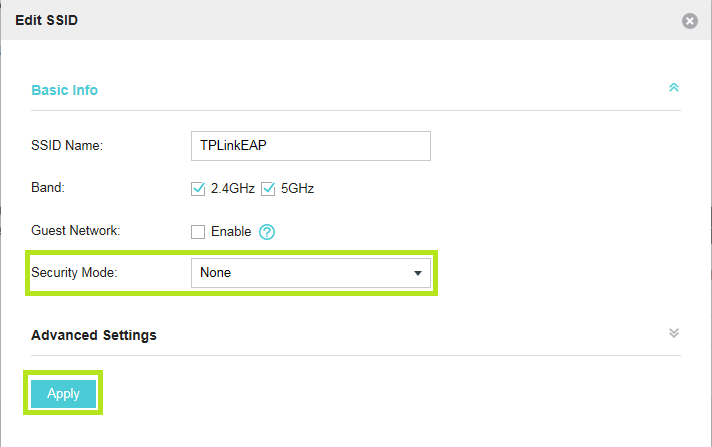
Enter the SSID created during the wizard (see Step 6 Installing the Omada Software Controller)
From the Security Mode dropdown menu, select None.
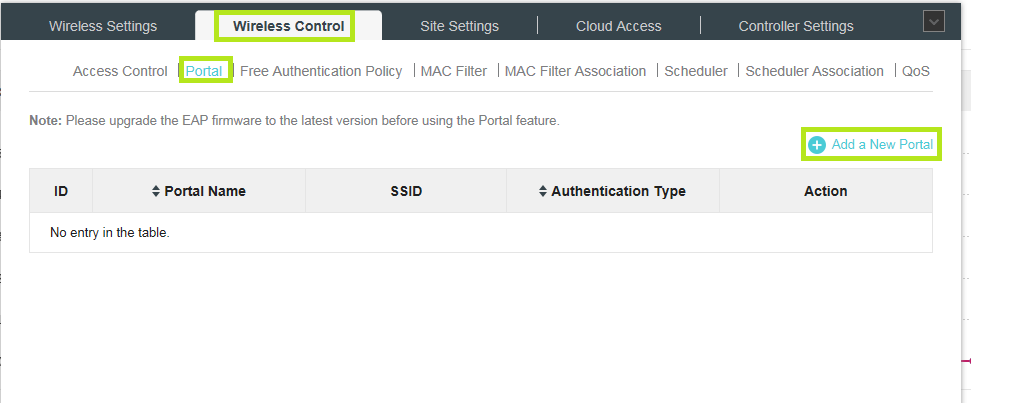
Select the Wireless Control tab and then click the Portal submenu.
Click Add New Portal on the top right corner.
Now you need to enter the parameters of your portal. Enter the details as follows:
In order to add the Secret you need to get it from your HSNM as described in the Radius Secret paragraph.
All other parameters are optional and you can leave them as they are.
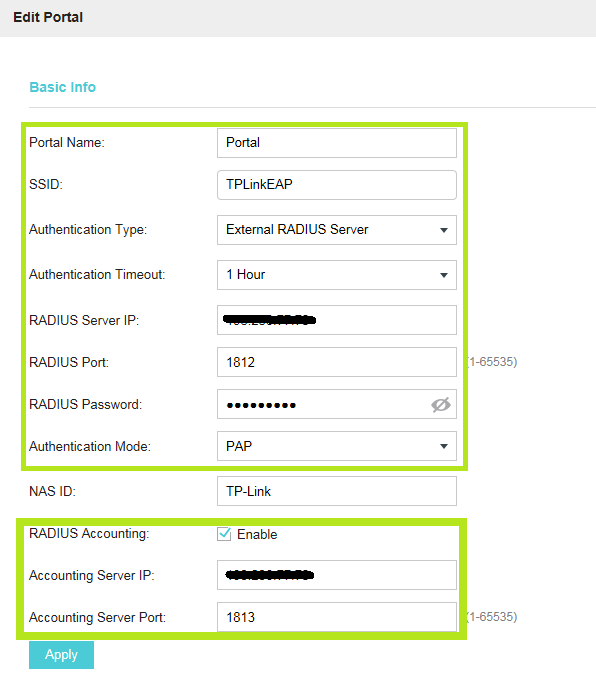

Once completed, click the Apply button to save.